How to Fork a Repository on GitHub: A Step-by-Step Guide
Are you ready to dive into the world of open-source collaboration and take your coding skills to the next level? In this blog post, we'll walk you through the process of forking a repository on GitHub, a crucial skill for any developer looking to contribute to projects or experiment with new ideas.
But before we get started, make sure to check out our video tutorial on YouTube for a visual guide on forking repositories:
By watching the video alongside reading this post, you'll gain a comprehensive understanding of the forking process and be well on your way to becoming a GitHub pro!
What is Forking?
Forking a repository creates a copy of someone else's project in your own GitHub account. This allows you to freely modify and experiment with the codebase without affecting the original project. It's a fundamental concept in open-source collaboration and a great way to learn from and build upon the work of others.
Step 1: Find the Repository
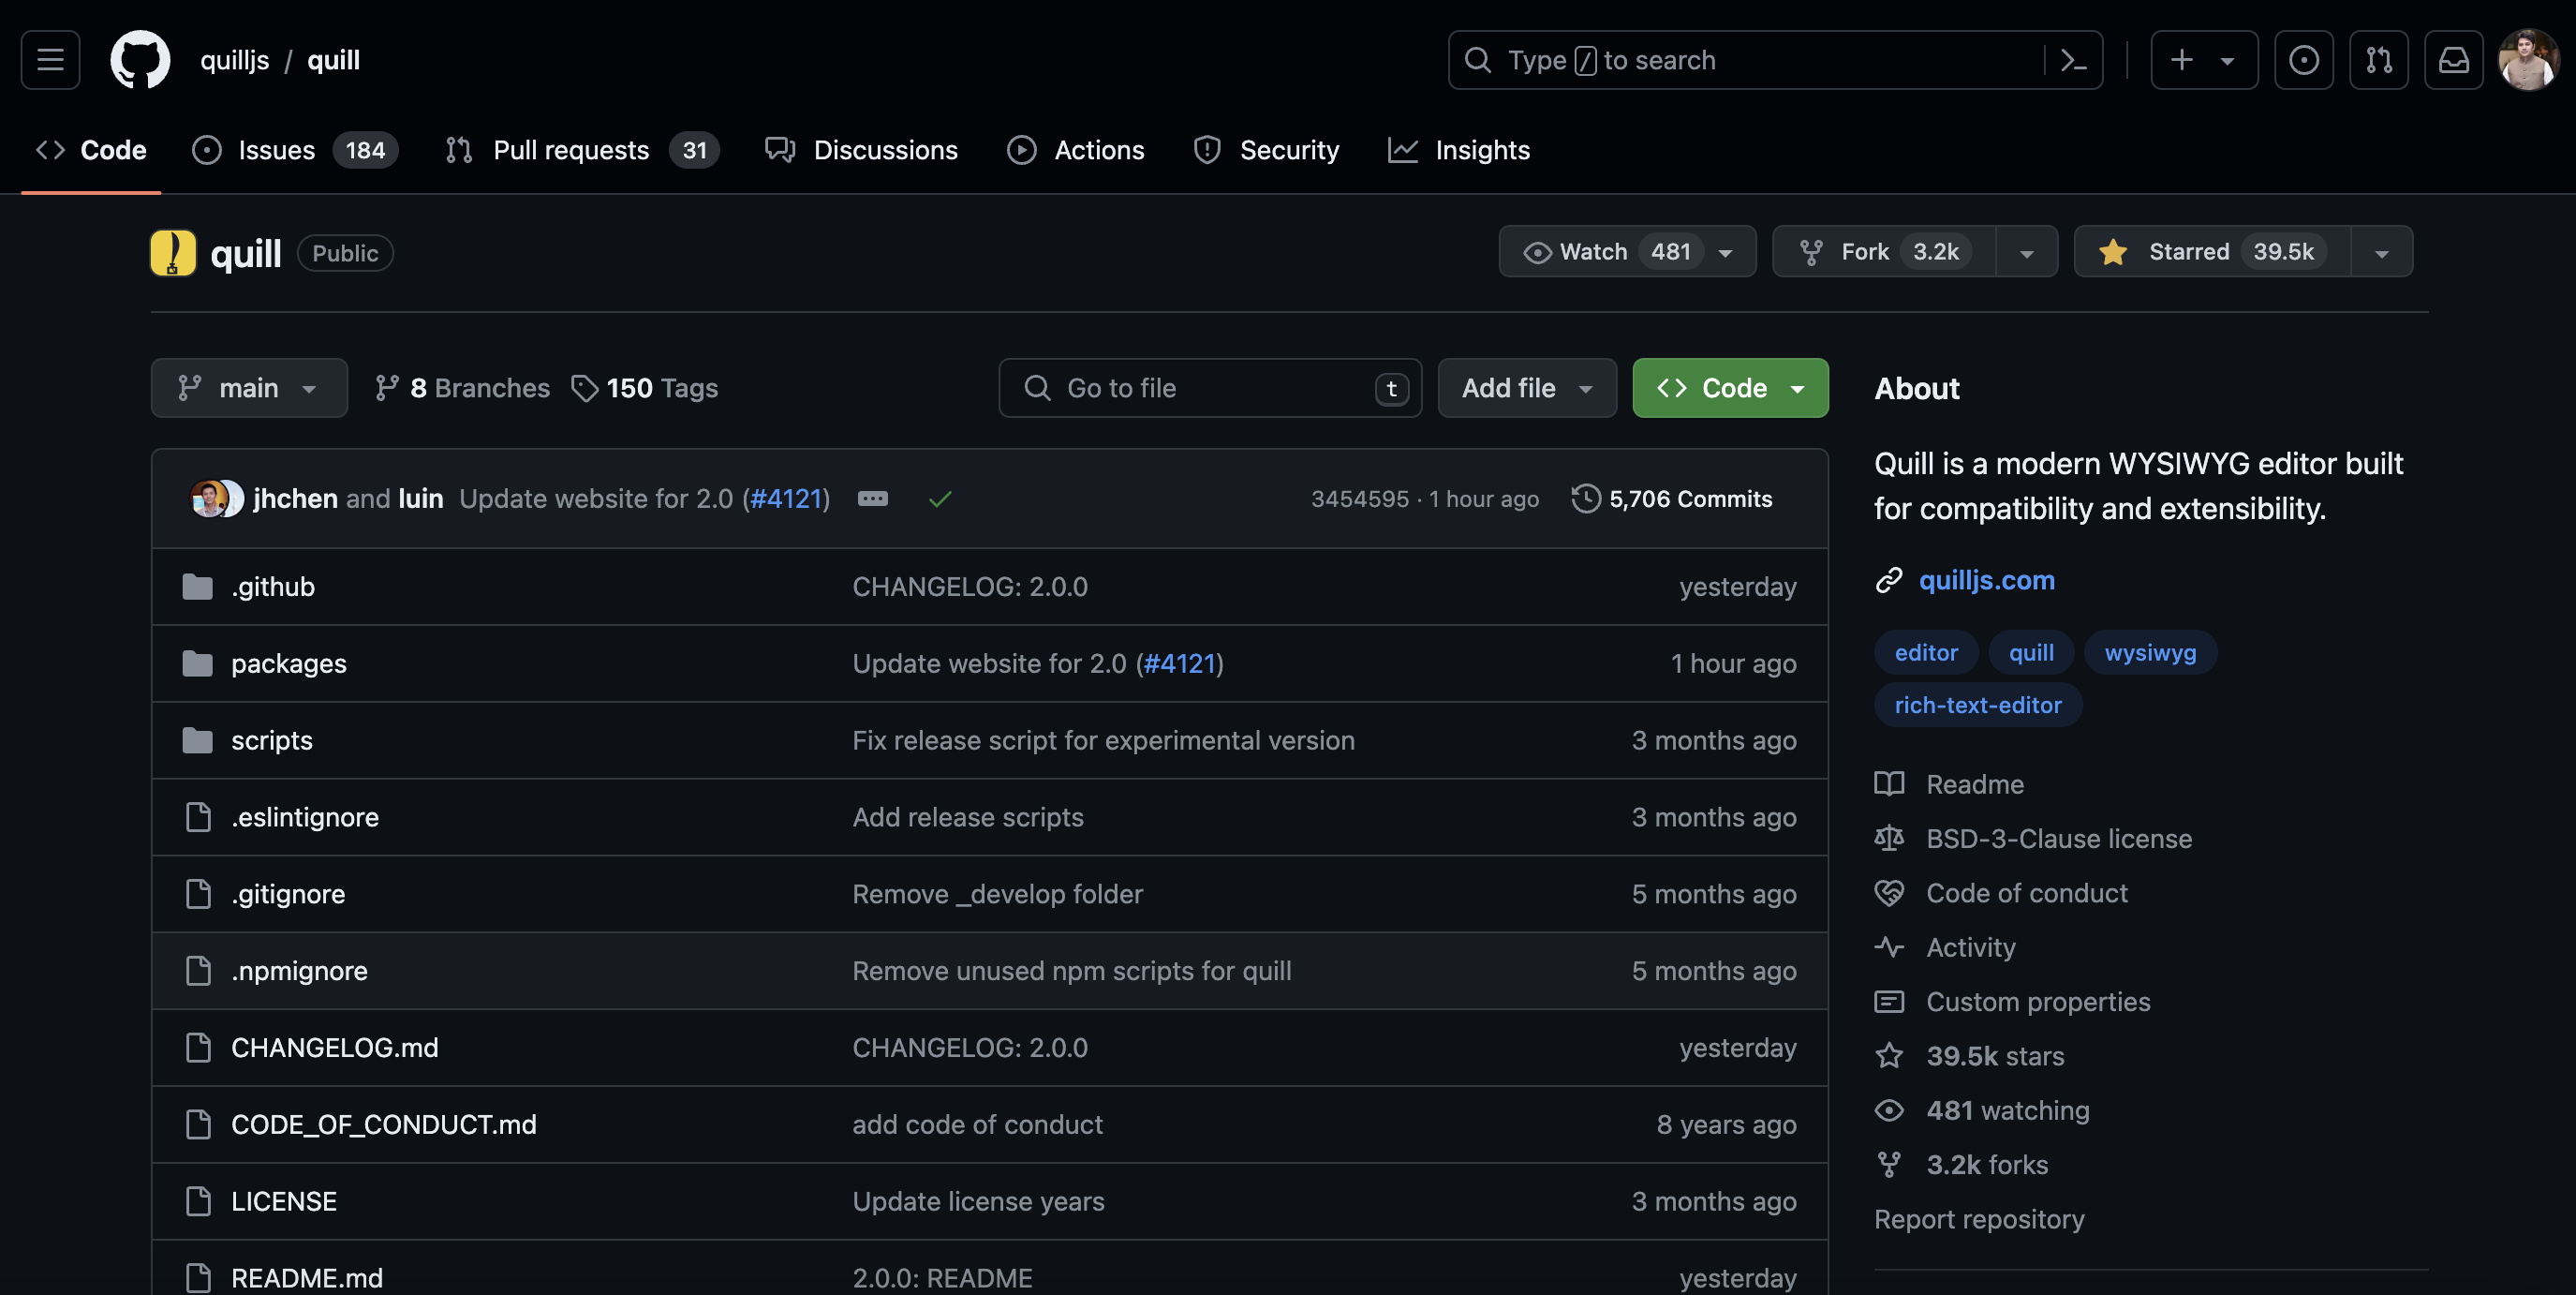
To begin, navigate to the repository you want to fork on GitHub. You can find repositories by searching for specific topics or by following direct links shared by other developers. For this example, we'll be forking the popular "quill" repository.
Step 2: Click the "Fork" Button
Once you've found the repository you want to fork, look for the "Fork" button in the upper right-hand corner of the page. Give it a click, and you're on your way to creating your own copy of the project!
Step 3: Choose Your Account
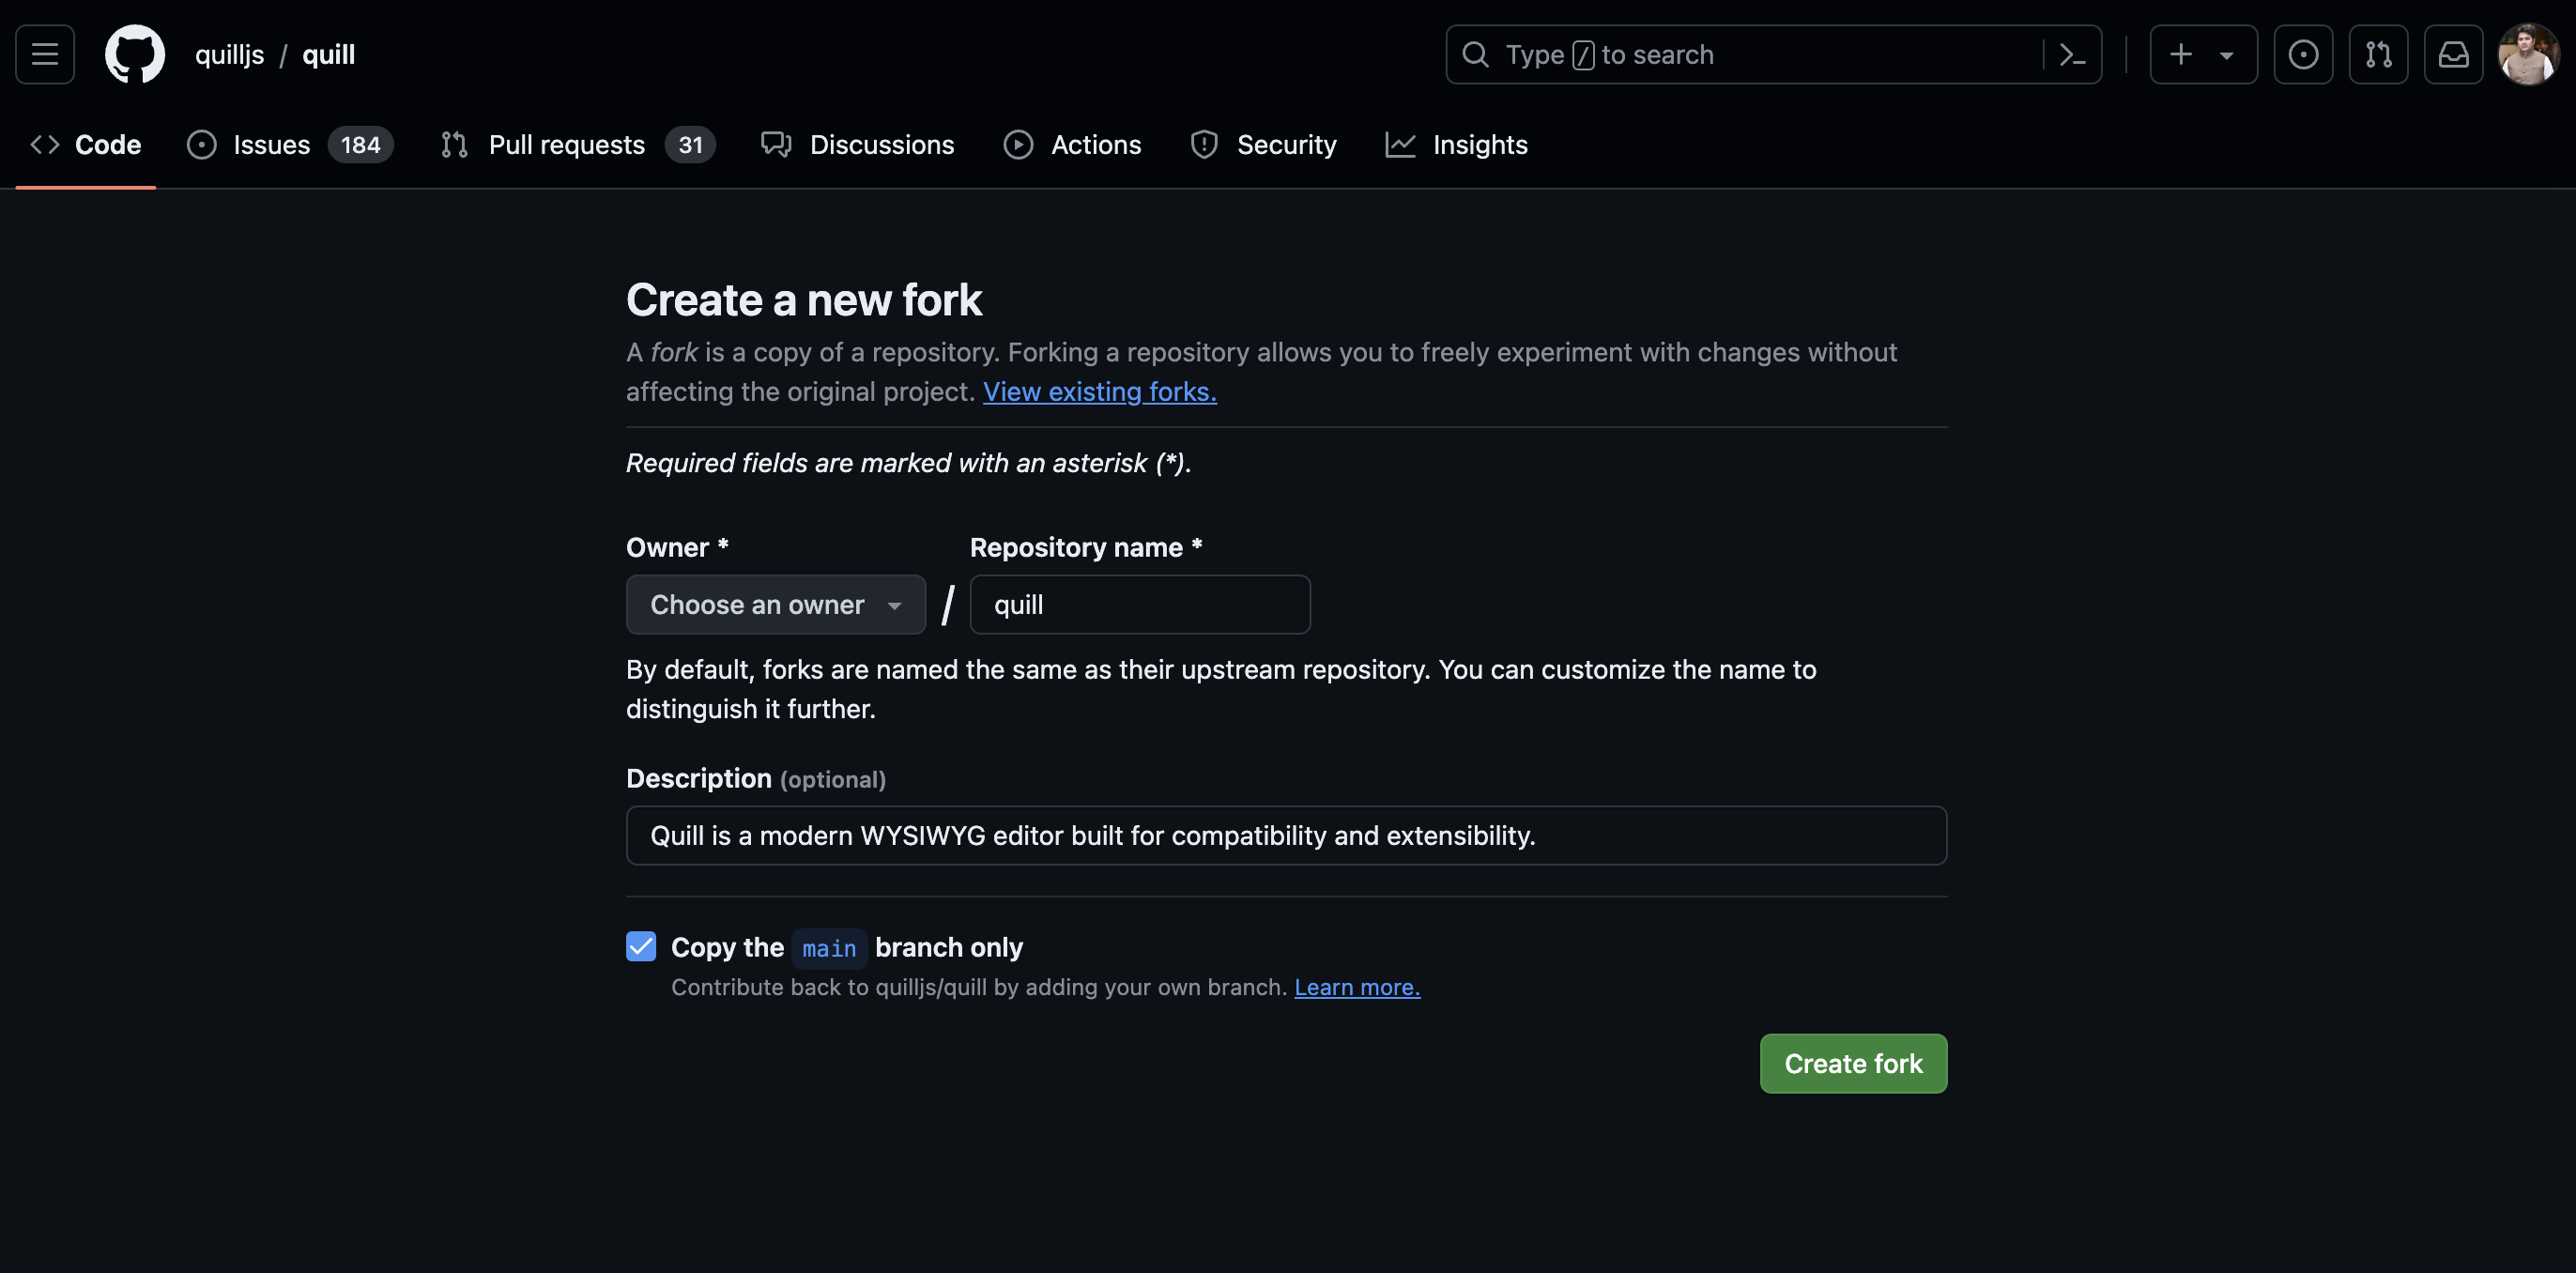
After clicking the "Fork" button, GitHub will ask you to choose the account where you want to fork the repository. If you have multiple GitHub accounts, select the one you want to use for this specific fork. If you only have one account, it will be selected by default.
Step 4: Let the Forking Magic Happen
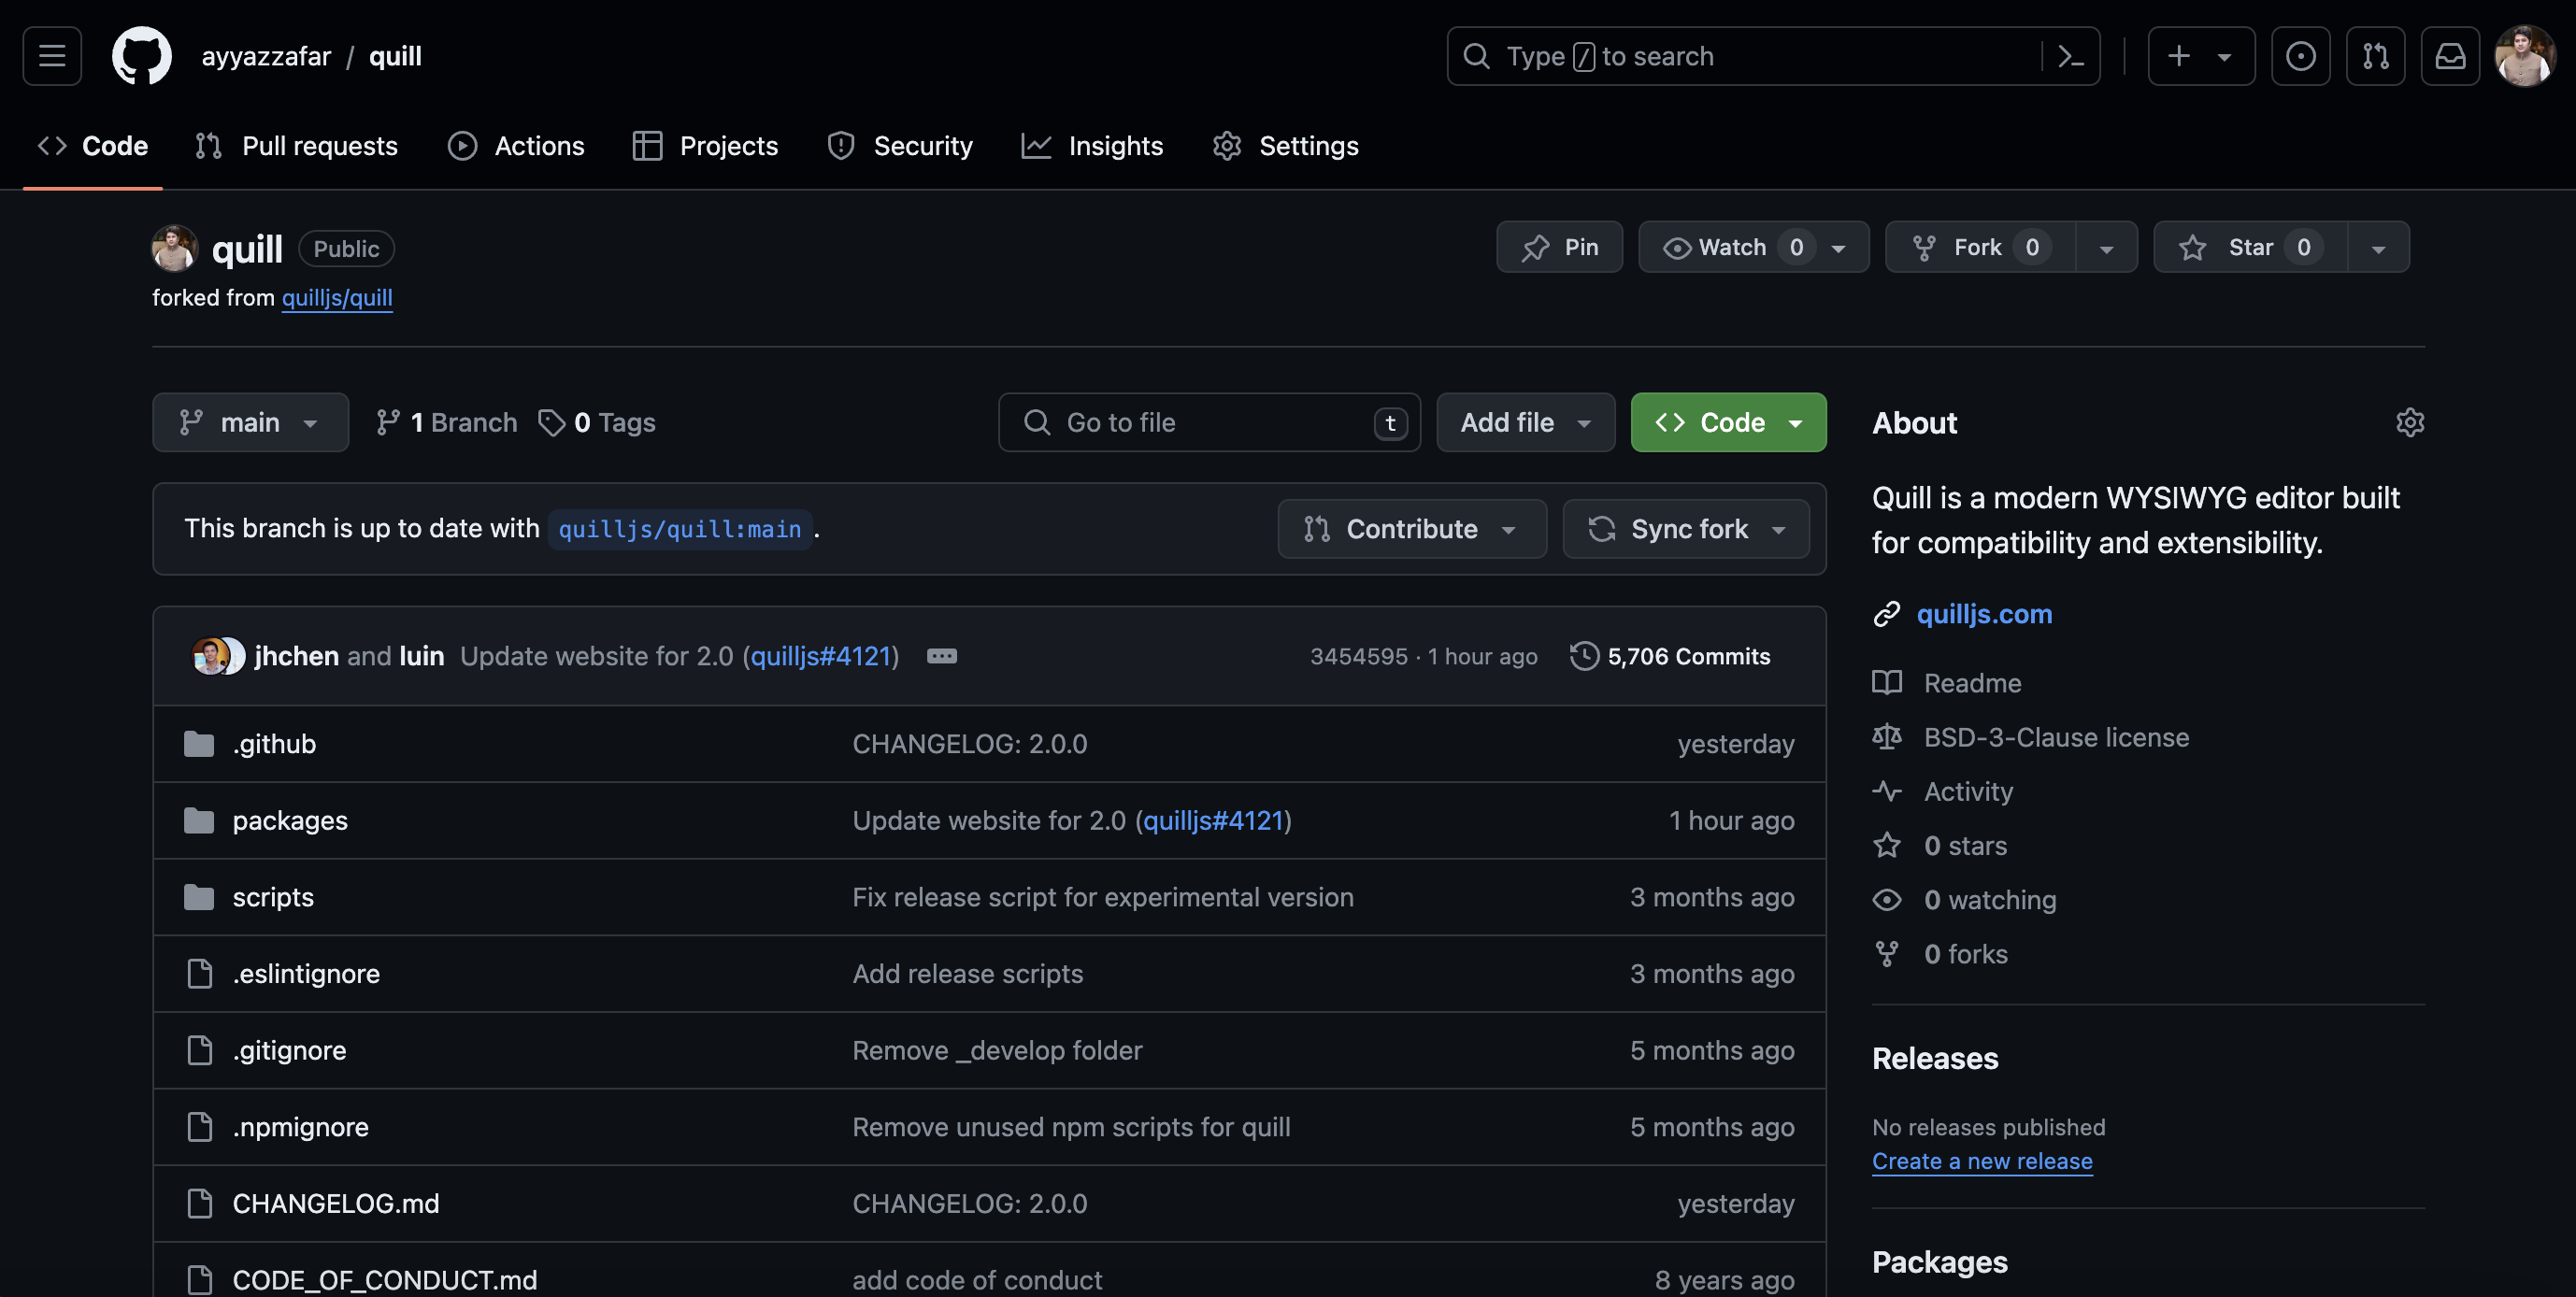
Sit back and relax while GitHub creates a copy of the repository in your chosen account. The time this takes depends on the size of the repository, but it usually only takes a few seconds. Once the process is complete, you'll be redirected to your very own forked version of the repository.
Step 5: Make It Your Own
Now that you have a forked version of the repository, it's time to make it your own! You can edit existing files, add new ones, or even create new branches to experiment with different features or bug fixes. Remember, any changes you make will only affect your forked version of the repository, so feel free to get creative!
Start Your Coding Journey Today
Forking repositories is just the beginning of your open-source journey. By collaborating with other developers and contributing to projects, you'll not only sharpen your coding skills but also build a strong portfolio that showcases your expertise.
Ready to take the next step? Subscribe to our YouTube channel for more tutorials, tips, and tricks on all things GitHub and open-source development.
And if you're looking for a reliable and affordable hosting solution to bring your projects to life, check out Hostinger. With their user-friendly interface and top-notch customer support, Hostinger makes it easy to deploy your projects and start sharing your work with the world. Plus, by using our affiliate link (https://www.hostg.xyz/SHEyO), you'll be supporting our channel and helping us create even more valuable content for the developer community.
So what are you waiting for? Start forking, coding, and collaborating today, and let's build something amazing together!