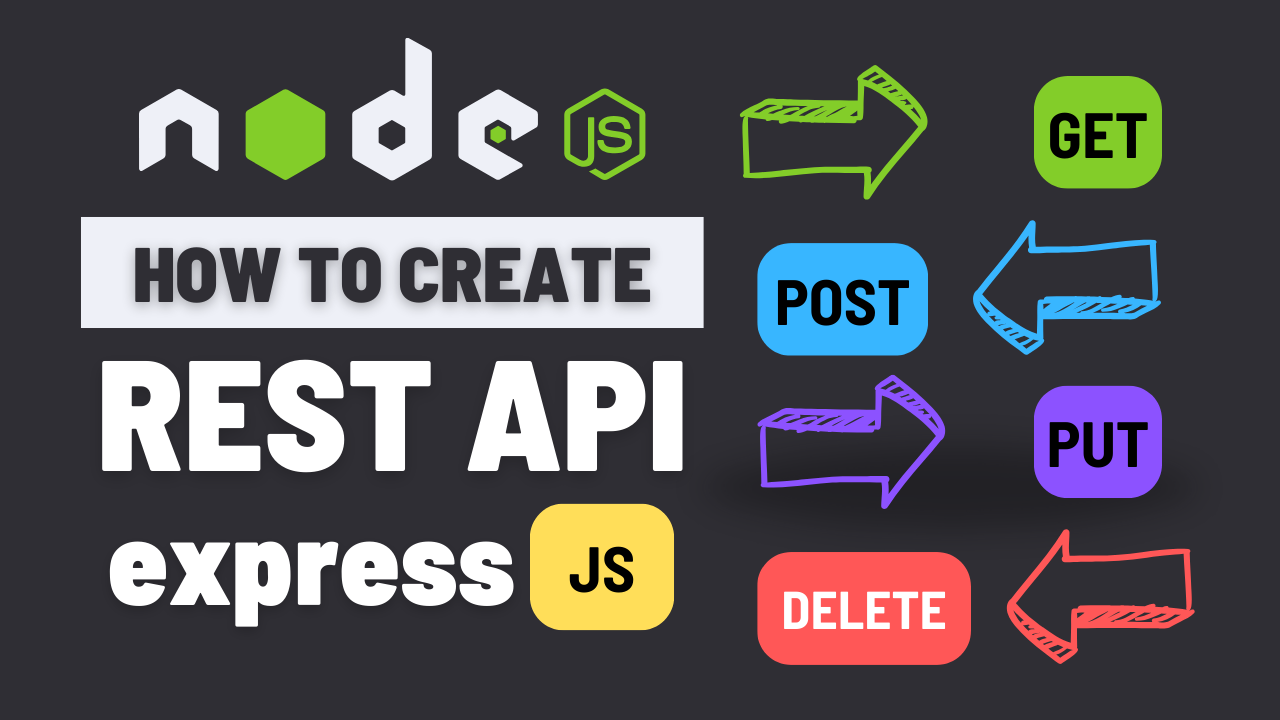
Creating an API with Node.js: A Step-by-Step Tutorial
Introduction:
In this comprehensive tutorial, we'll walk you through the process of creating an API using Node.js. By the end of this guide, you'll have a solid understanding of how to set up a Node.js project, define API endpoints, connect to a database, and implement CRUD (Create, Read, Update, Delete) functionality. If you prefer a visual learning experience, be sure to check out the accompanying YouTube tutorial: https://www.youtube.com/watch?v=X-z2WMKG0Xs
Step 1: Setting up the Development Environment
To get started, make sure you have Node.js and npm (Node Package Manager) installed on your machine. You can download them from the official Node.js website: https://nodejs.org
Once you have Node.js and npm set up, create a new directory for your project and navigate to it in your terminal. Initialize a new Node.js project by running the following command:
npm init -yThis will create a package.json file with default settings.
Step 2: Installing Dependencies
Next, install the necessary dependencies for your project. We'll be using Express.js as our web framework and Mongoose for interacting with a MongoDB database. Run the following command to install them:
npm install express mongooseStep 3: Creating the Express Server
Create a new file named server.js in your project directory and add the following code:
const express = require('express');
const app = express();
const PORT = process.env.PORT || 3000;

app.get('/', (req, res) => {
  res.send('Welcome to my API!');
});

app.listen(PORT, () => {
  console.log(`Server running on port ${PORT}`);
});
This code sets up a basic Express server that listens on port 3000 and responds with a welcome message when accessed.
Step 4: Designing API Endpoints
Create a new directory named routes and inside it, create a file named users.js. This file will contain the API endpoints for handling user-related operations. Add the following code to users.js:
const express = require('express');
const router = express.Router();

router.get('/', (req, res) => {
  res.send('Get all users');
});

router.post('/', (req, res) => {
  res.send('Create a new user');
});

router.put('/:id', (req, res) => {
  res.send(`Update user with ID ${req.params.id}`);
});

router.delete('/:id', (req, res) => {
  res.send(`Delete user with ID ${req.params.id}`);
});

module.exports = router;
This code defines the API endpoints for getting all users, creating a new user, updating a user, and deleting a user.
In the server.js file, add the following code to use the users.js routes:
const userRoutes = require('./routes/users');
app.use(express.json());
app.use('/users', userRoutes);
Step 5: Connecting to the Database
Create a new file named database.js in your project directory and add the following code:
const mongoose = require('mongoose');

mongoose.connect('mongodb://localhost/myapi', {
  useNewUrlParser: true,
  useUnifiedTopology: true,
  useCreateIndex: true,
  useFindAndModify: false
}).then(() => {
  console.log('Connected to MongoDB');
}).catch((err) => {
  console.error('Error connecting to MongoDB:', err);
  process.exit(1);
});

module.exports = mongoose;
This code establishes a connection to the MongoDB database using Mongoose. Make sure to replace 'mongodb://localhost/myapi' with your actual MongoDB connection URL.
In the server.js file, add the following code to import the database connection:
require('./database');Step 6: Creating Mongoose Models
Create a new directory named models and inside it, create a file named user.js. This file will define the Mongoose schema for the user model. Add the following code to user.js:
const mongoose = require('mongoose');

const userSchema = new mongoose.Schema({
  name: String,
  email: String,
  password: String
});

module.exports = mongoose.model('User', userSchema);
Step 7: Implementing CRUD Functionality
Create a new directory named controllers and inside it, create a file named userController.js. This file will contain the functions for handling CRUD operations on the user resource. Add the following code to userController.js:
const User = require('../models/user');

exports.getAllUsers = async (req, res) => {
  try {
    const users = await User.find();
    res.json(users);
  } catch (err) {
    res.status(500).json({ message: err.message });
  }
};

exports.createUser = async (req, res) => {
  const user = new User({
    name: req.body.name,
    email: req.body.email,
    password: req.body.password
  });

  try {
    const newUser = await user.save();
    res.status(201).json(newUser);
  } catch (err) {
    res.status(400).json({ message: err.message });
  }
};

// Implement update and delete functions similarly
In the routes/users.js file, import the controller functions and use them in the respective routes:
const userController = require('../controllers/userController');

router.get('/', userController.getAllUsers);
router.post('/', userController.createUser);
// Add update and delete routes similarly
Step 8: Validating User Input
To validate user input, you can use libraries like Joi or Zod. Let's use Zod for this example. Install Zod by running:
npm install zodIn the controllers/userController.js file, add the following code to validate user input in the createUser function:
const { z } = require('zod');

const userSchema = z.object({
  name: z.string().min(3).max(50),
  email: z.string().email(),
  password: z.string().min(6)
});

exports.createUser = async (req, res) => {
  try {
    const validatedData = userSchema.parse(req.body);
    const user = new User(validatedData);
    const newUser = await user.save();
    res.status(201).json(newUser);
  } catch (err) {
    res.status(400).json({ message: err.message });
  }
};
Step 9: Testing the API
You can test your API using tools like Postman or by writing automated tests. Create a new directory named tests and inside it, create a file named user.test.js. Add the following code to user.test.js:
const request = require('supertest');
const app = require('../server');

describe('User API', () => {
  it('should get all users', async () => {
    const res = await request(app).get('/users');
    expect(res.statusCode).toBe(200);
    expect(res.body).toBeInstanceOf(Array);
  });

  // Write more test cases for other API endpoints
});
To run the tests, install Jest as a development dependency:
npm install --save-dev jestAdd a test script in the package.json file:
"scripts": {
  "test": "jest"
}
Run the tests using the command:
npm testStep 10: Implementing Authentication
To secure your API routes, you can implement authentication using JSON Web Tokens (JWT). Install the jsonwebtoken package:
npm install jsonwebtokenCreate a new directory named middleware and inside it, create a file named authMiddleware.js. Add the following code to authMiddleware.js:
const jwt = require('jsonwebtoken');

module.exports = (req, res, next) => {
  try {
    const token = req.headers.authorization.split(' ')[1];
    const decodedToken = jwt.verify(token, process.env.SECRET_KEY);
    req.userData = decodedToken;
    next();
  } catch (err) {
    return res.status(401).json({ message: 'Authentication failed' });
  }
};
In the server.js file, add the following code to use the authentication middleware:
const authMiddleware = require('./middleware/authMiddleware');
app.use('/users', authMiddleware, userRoutes);
Make sure to generate and provide a JWT token in the Authorization header when making requests to protected routes.
Step 11: Deployment
To deploy your Node.js API, you can use platforms like Heroku, AWS, or Vercel. Let's use Vercel for this example.
- Create a new GitHub repository and push your code to it.
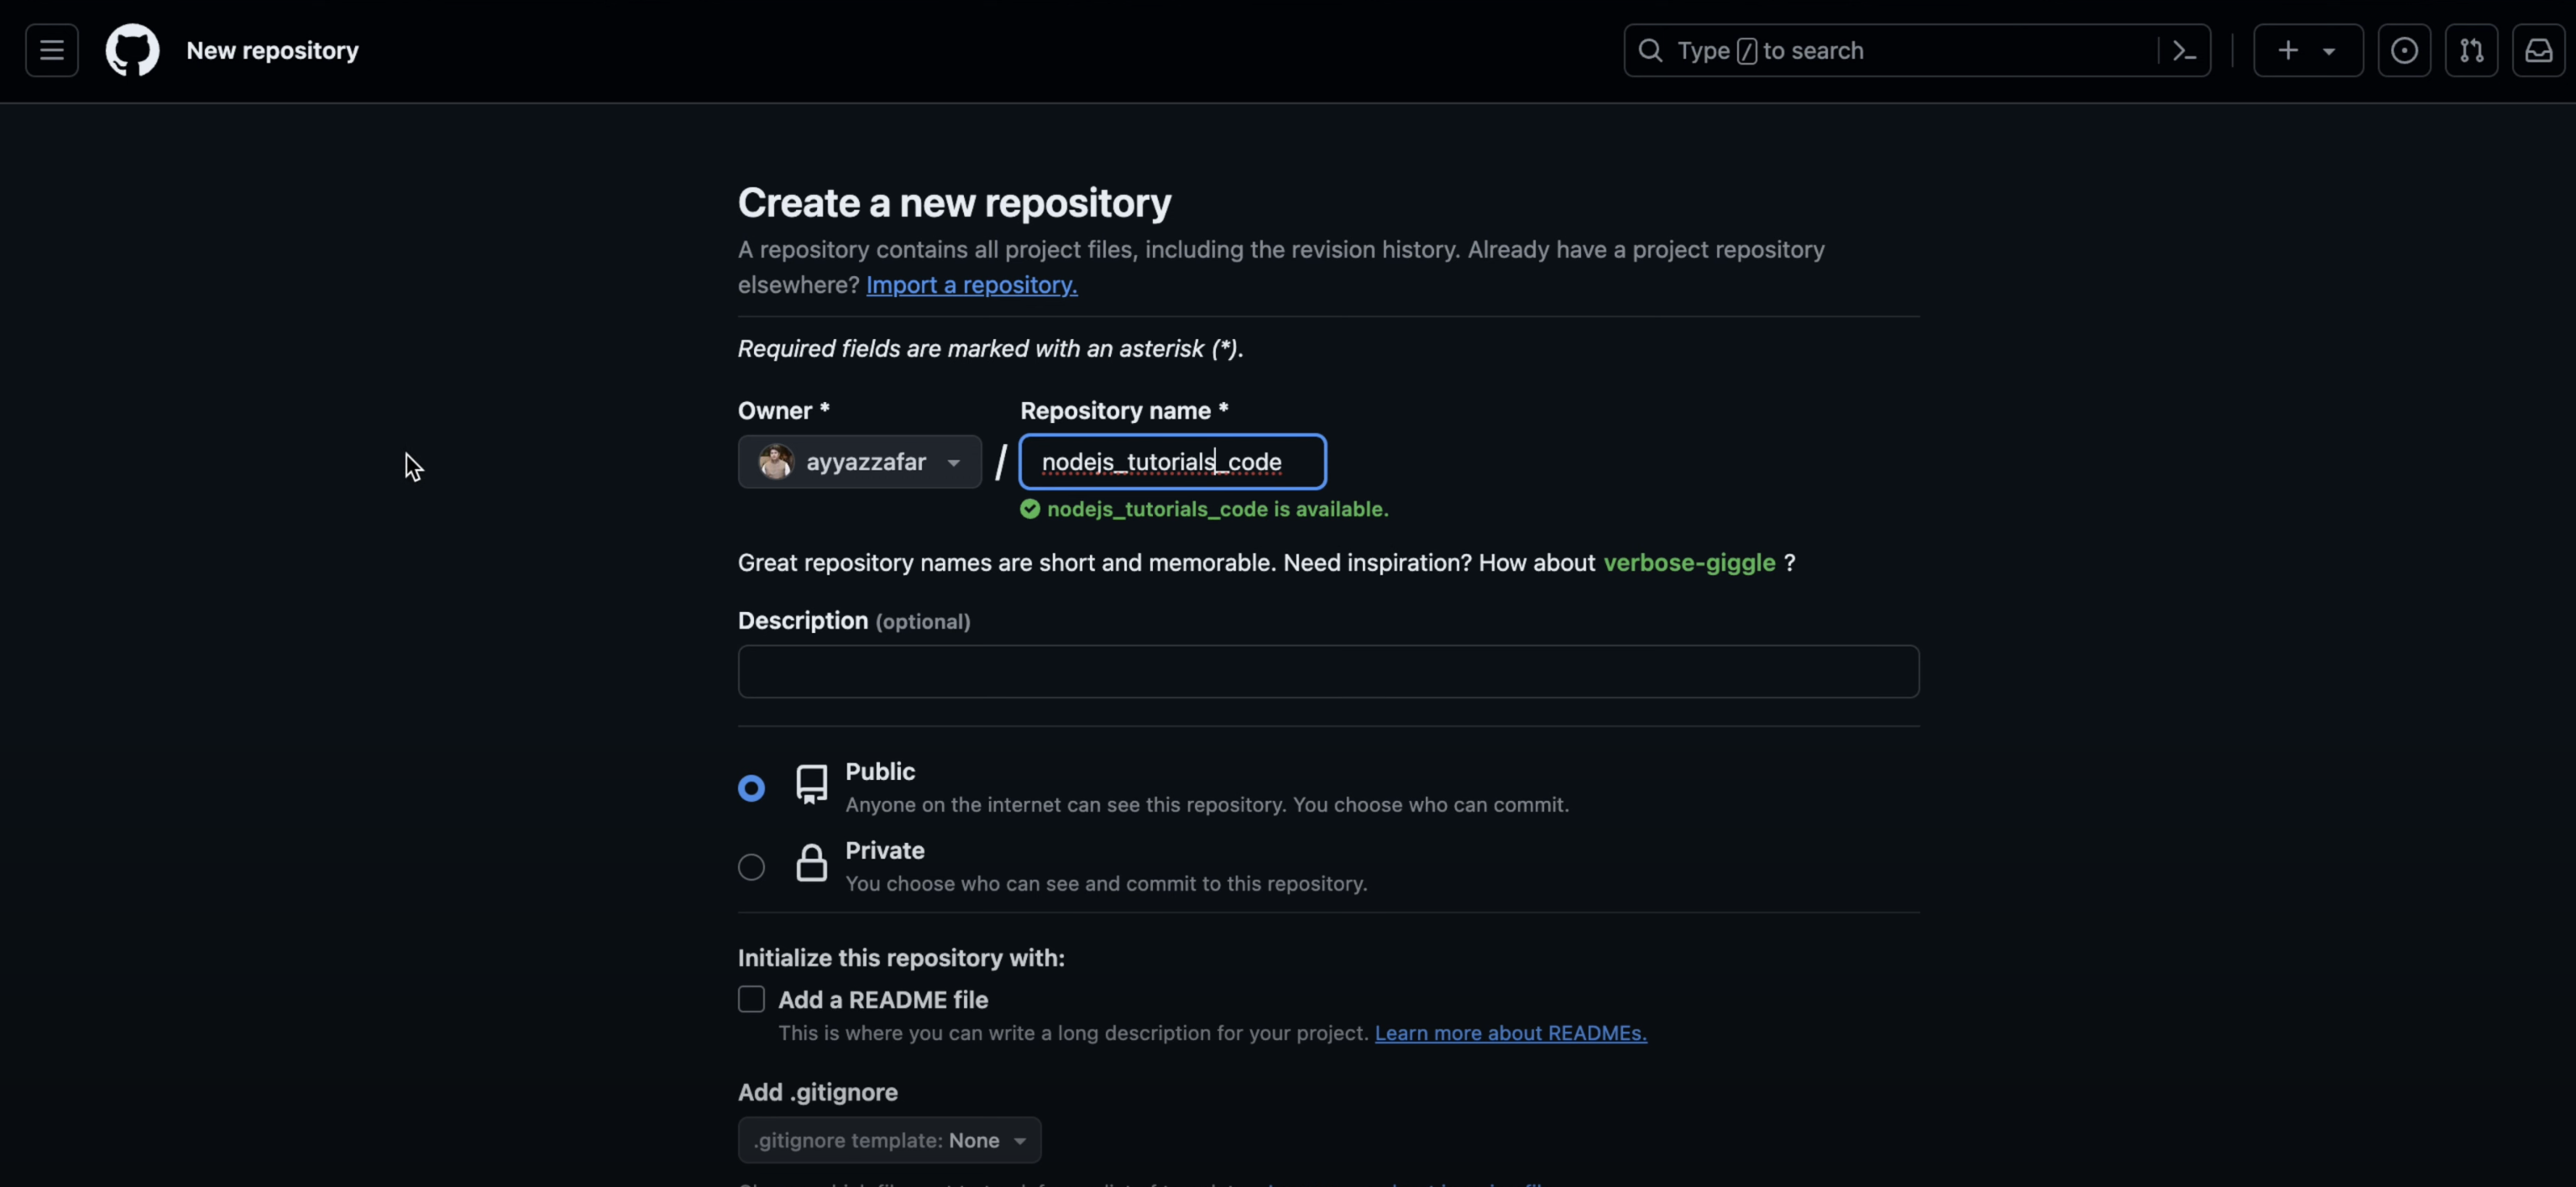
- Sign up for a Vercel account and connect your GitHub repository.
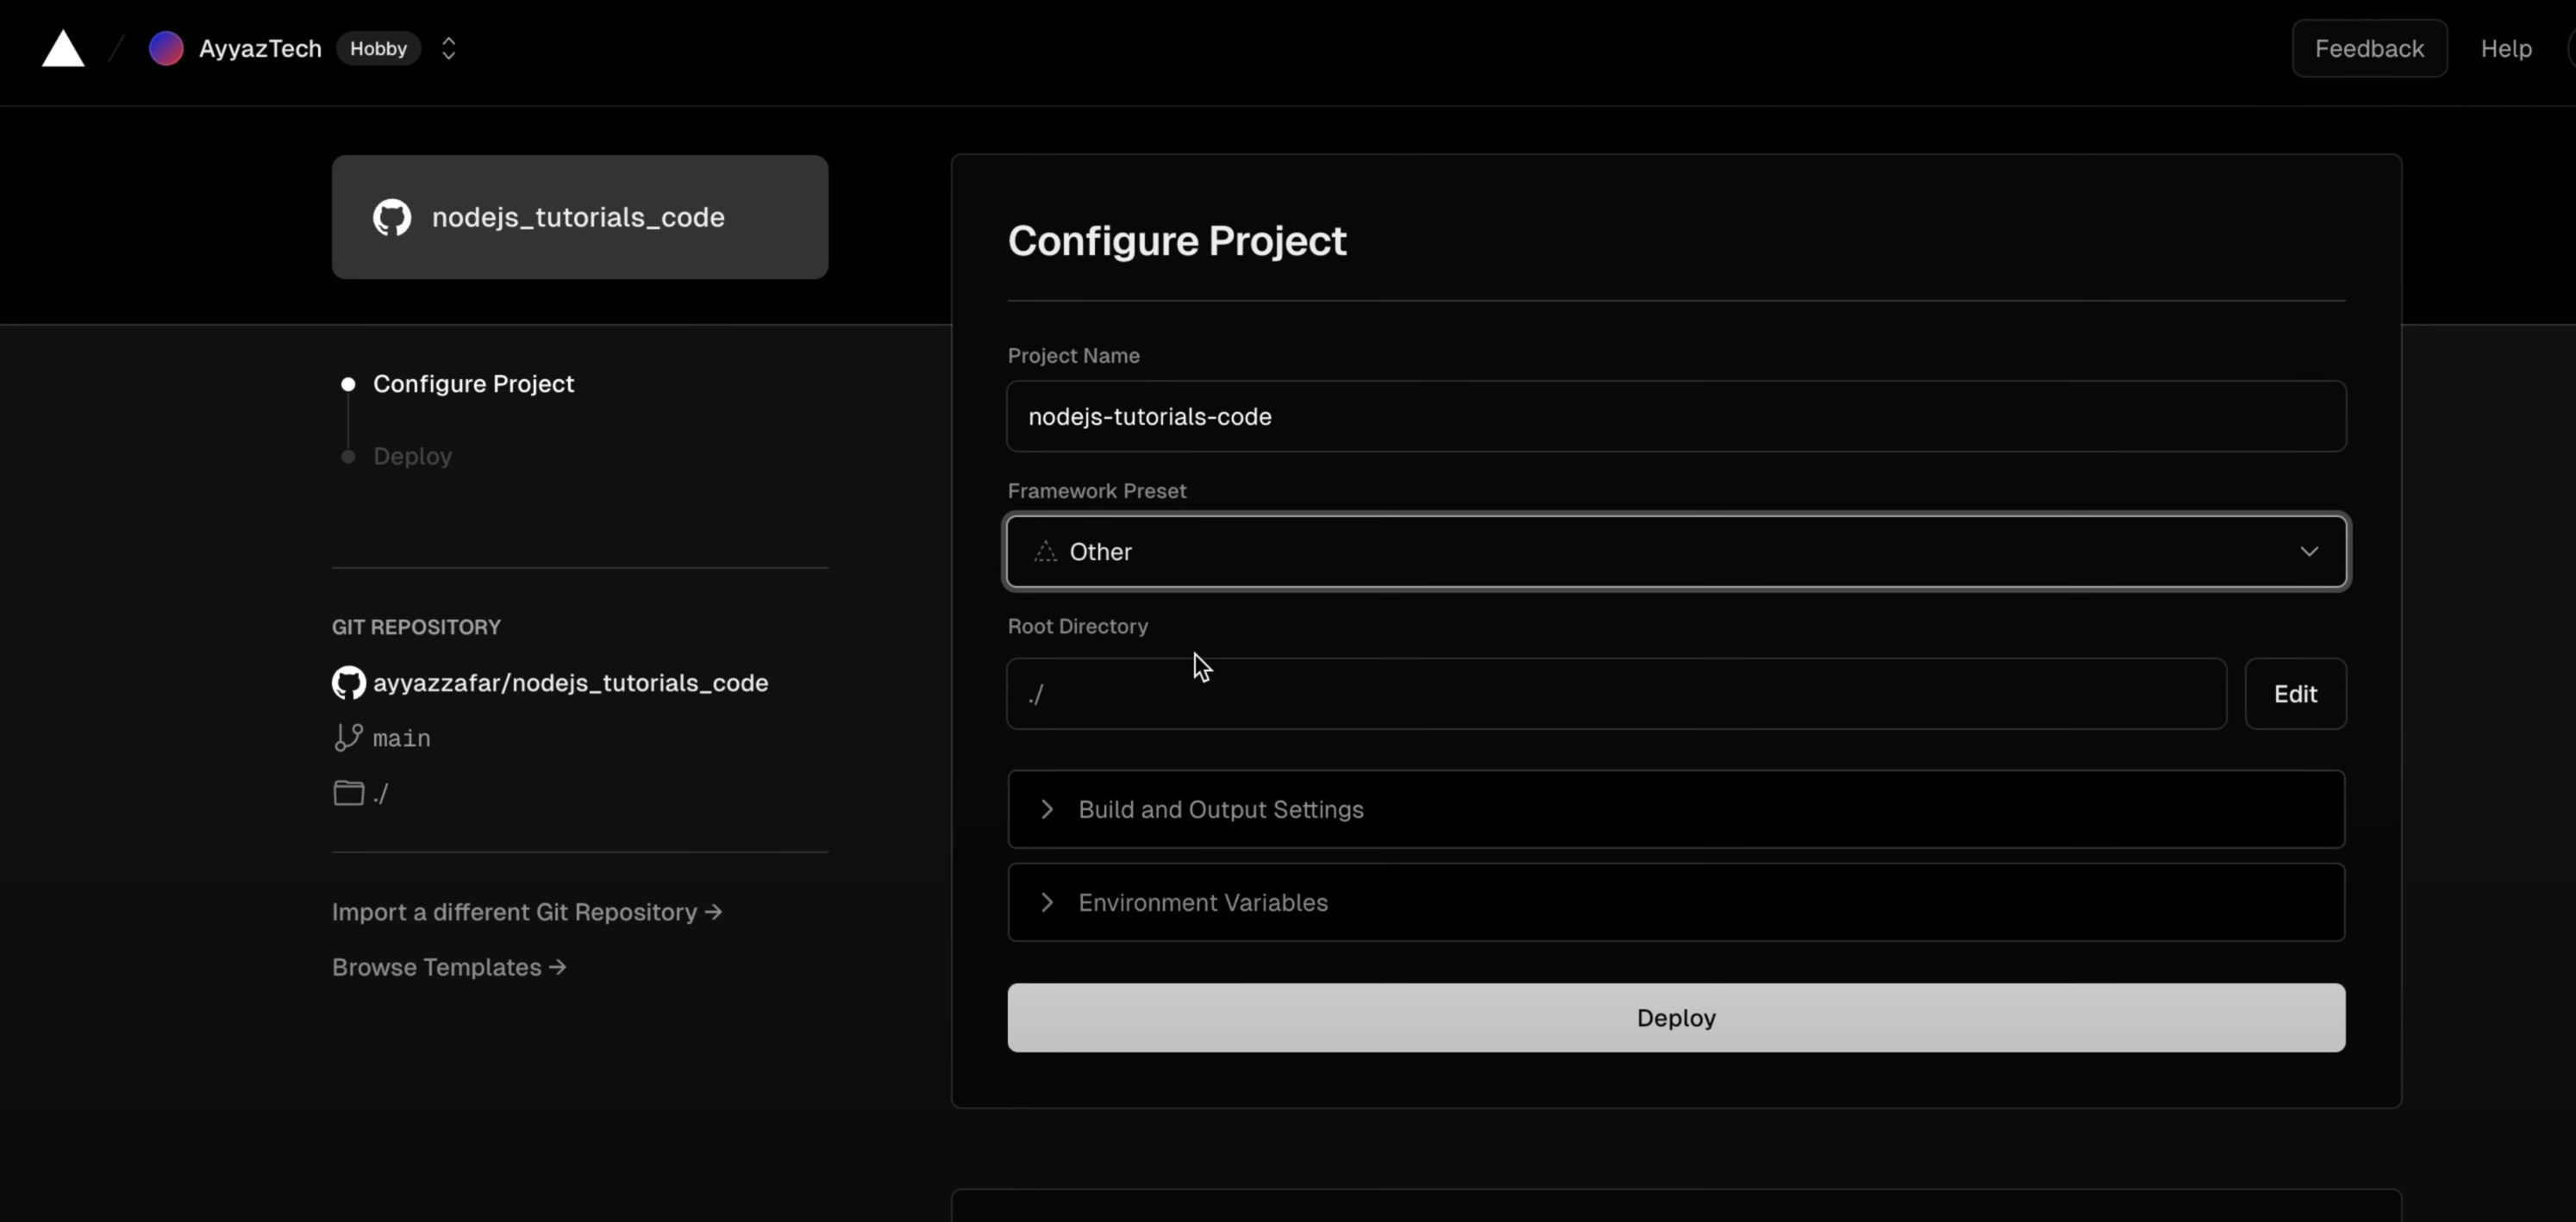
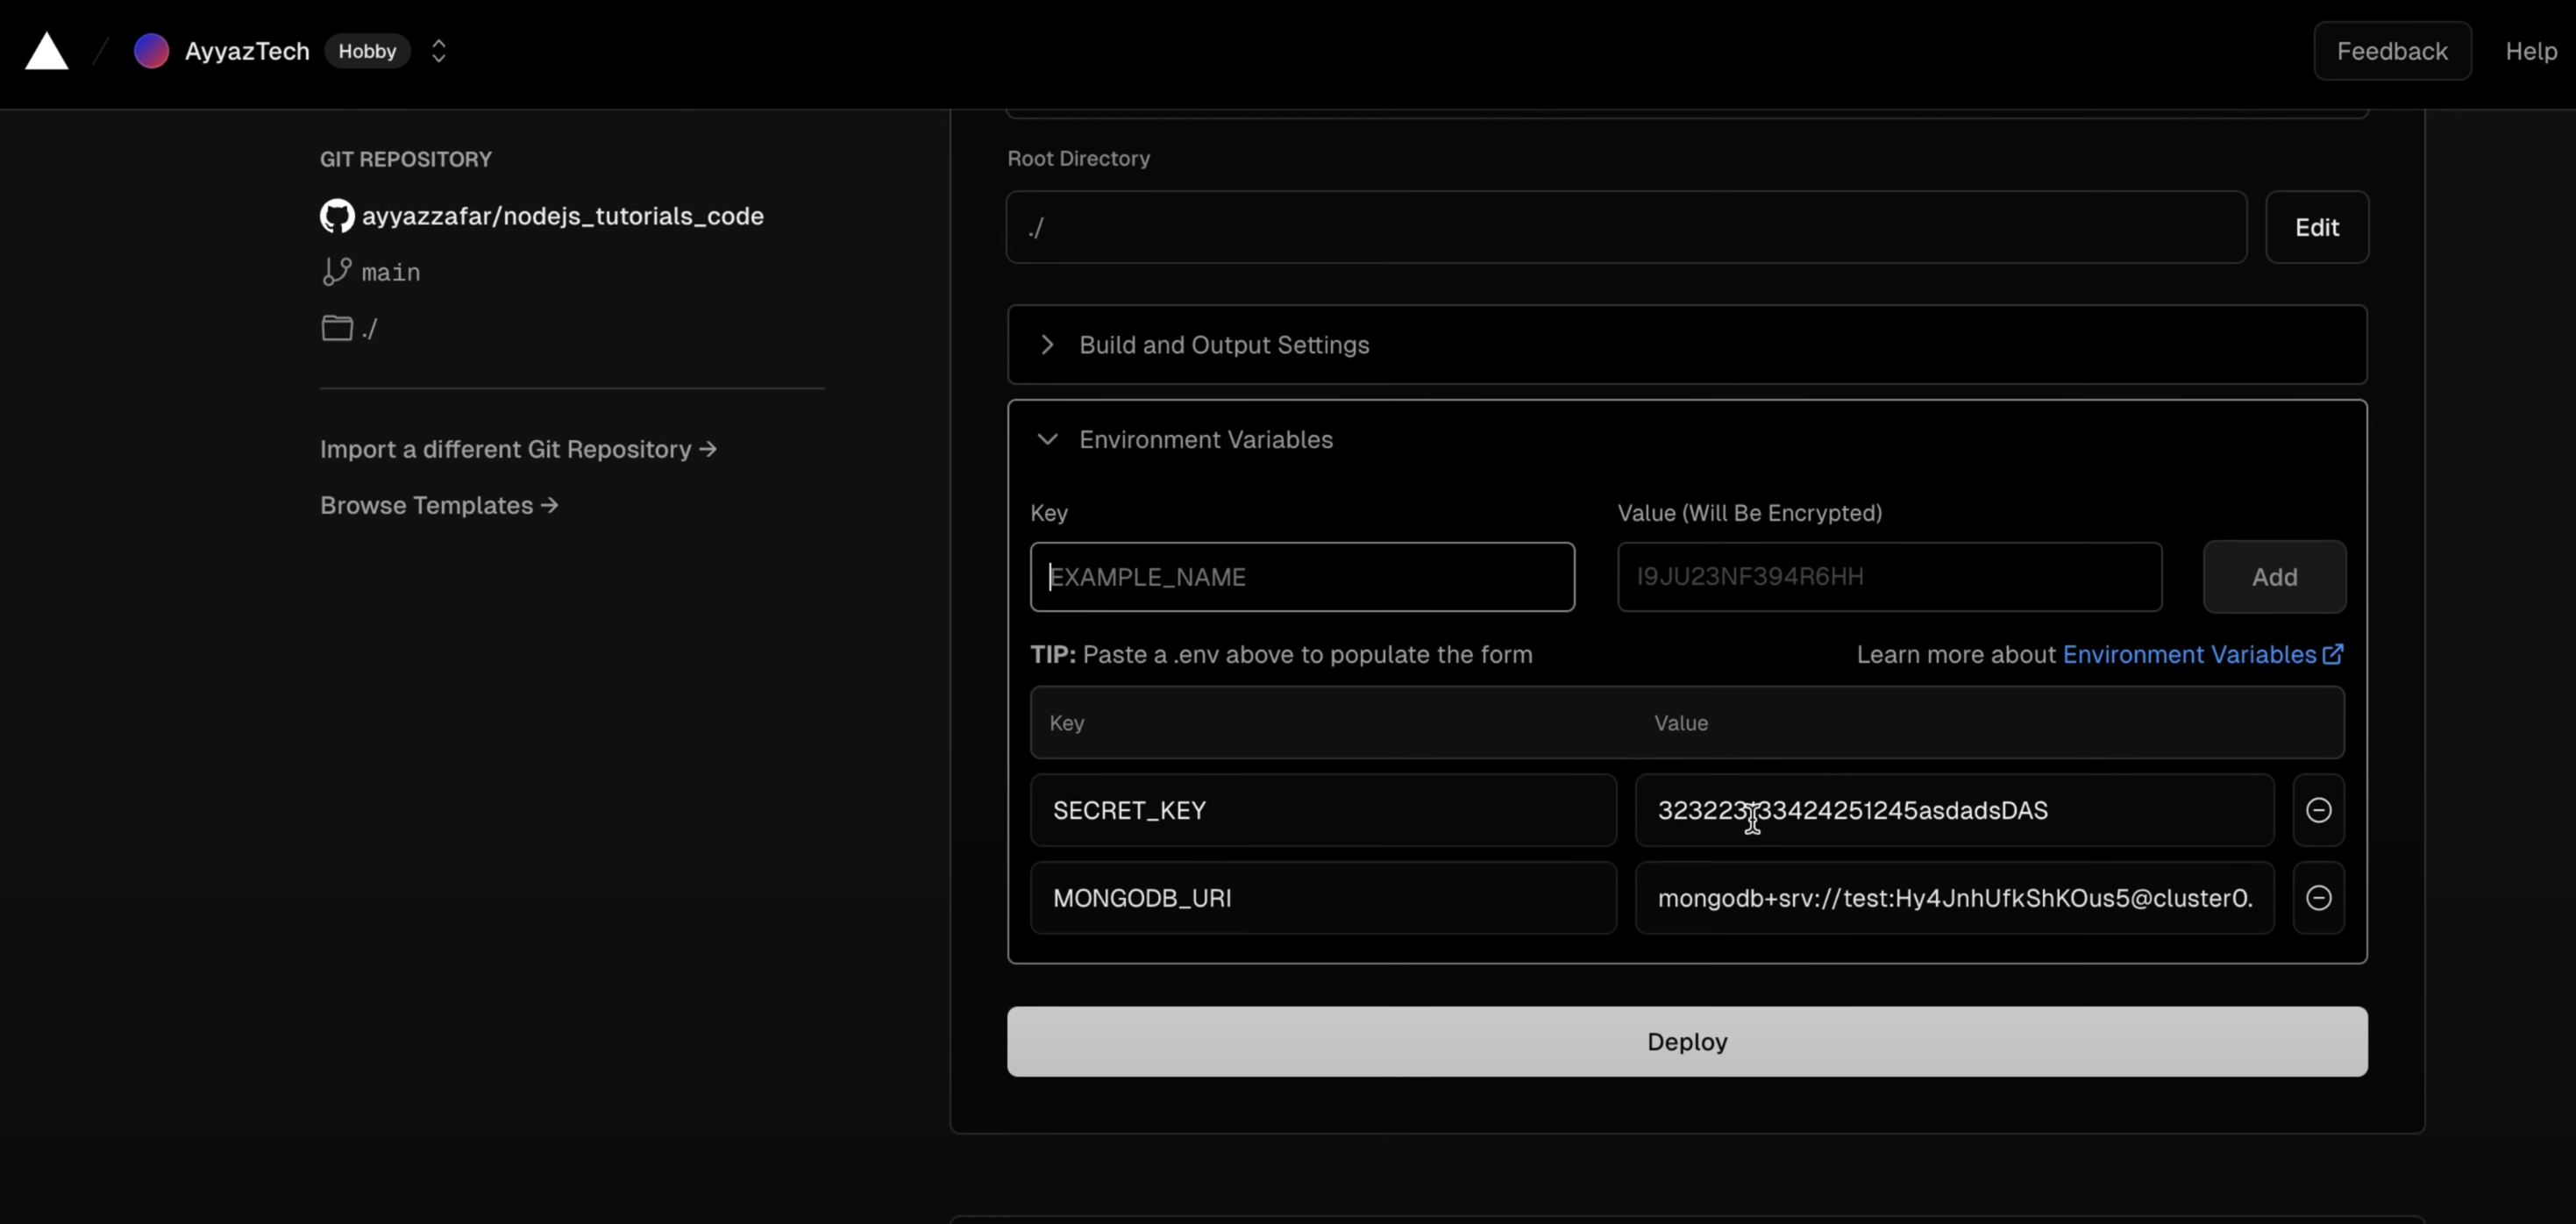
- Configure your project settings in Vercel, including environment variables.
- Deploy your API to Vercel by pushing changes to github and vercel will automatically detect change and will use the
vercel.jsonfile and set it up accordingly. - Make sure to add this
vercel.jsonfile in the root of your project:
{
    "version": 2,
    "builds": [
      {
        "src": "./index.js",
        "use": "@vercel/node"
      }
    ],
    "routes": [
      {
        "src": "/(.*)",
        "dest": "/"
      }
    ]
  }
Vercel will automatically detect your Node.js application and deploy it, providing you with a unique URL to access your API.
Conclusion:
Congratulations! You have successfully created an API using Node.js. You learned how to set up a Node.js project, define API endpoints, connect to a MongoDB database, implement CRUD functionality, validate user input, test your API, implement authentication, and deploy your API to Vercel.
Remember to handle errors gracefully, implement proper authentication and authorization mechanisms, and follow best practices for API development.
If you enjoyed this written tutorial, I highly recommend checking out the accompanying YouTube video: https://www.youtube.com/watch?v=X-z2WMKG0Xs.
The video provides a more visual and interactive learning experience, walking you through each step of the process.
Source Code: https://github.com/ayyazzafar/nodejs_tutorials_code
Happy coding!