How to Get an OpenAI API Key: A Step-by-Step Guide
OpenAI has revolutionized the world of artificial intelligence with its powerful models and APIs. If you're looking to harness the power of OpenAI in your own projects, you'll need to obtain an API key. In this article, we'll walk you through the process of creating an OpenAI API key and provide examples of how to use it.
Prerequisites
Before you can create an OpenAI API key, you'll need to have an account on the OpenAI platform. If you don't have an account yet, head over to the OpenAI website and sign up.
Purchasing Credits
To start using the OpenAI API, you need to have credits in your account. Even if you create an API key, it won't work without sufficient credits. OpenAI may provide some trial credits for new users, but if you don't have any free credits, you'll need to add billing details and purchase prepaid credits.
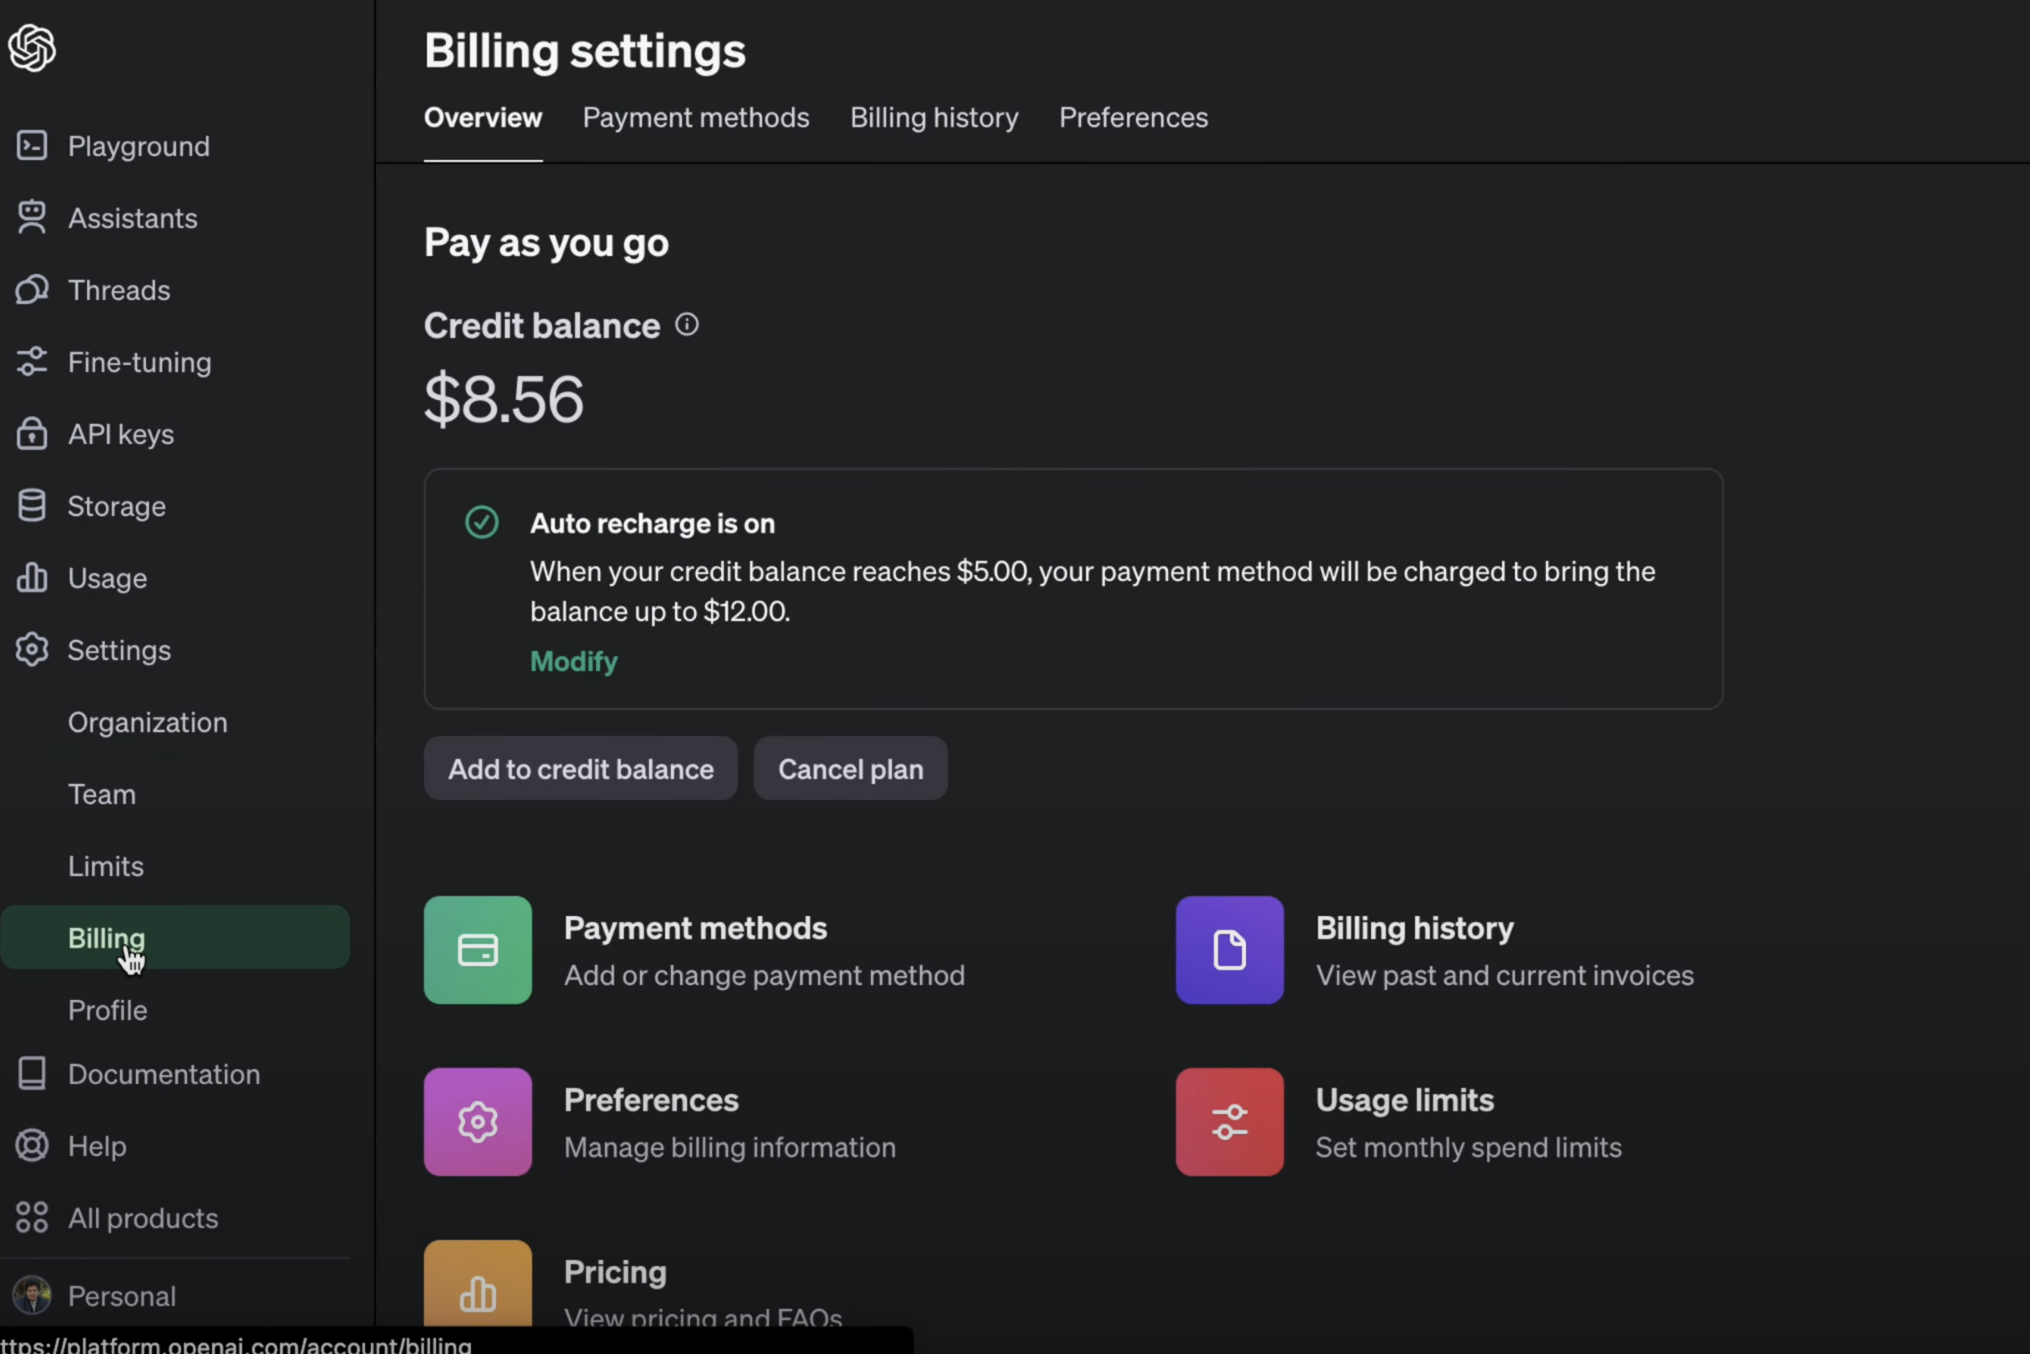
To add credits to your account, follow these steps:
- Log in to your OpenAI account.
- Click on the settings icon in the left side panel.
- Select the billing section.
- Click on "Add to credit balance" to purchase additional credits.
- Set up your payment method (debit card, credit card, etc.) and set it as the default.
Creating an API Key
Once you have credits in your account, you're ready to create an API key. Here's how:
- In the OpenAI dashboard, navigate to the API Keys section.
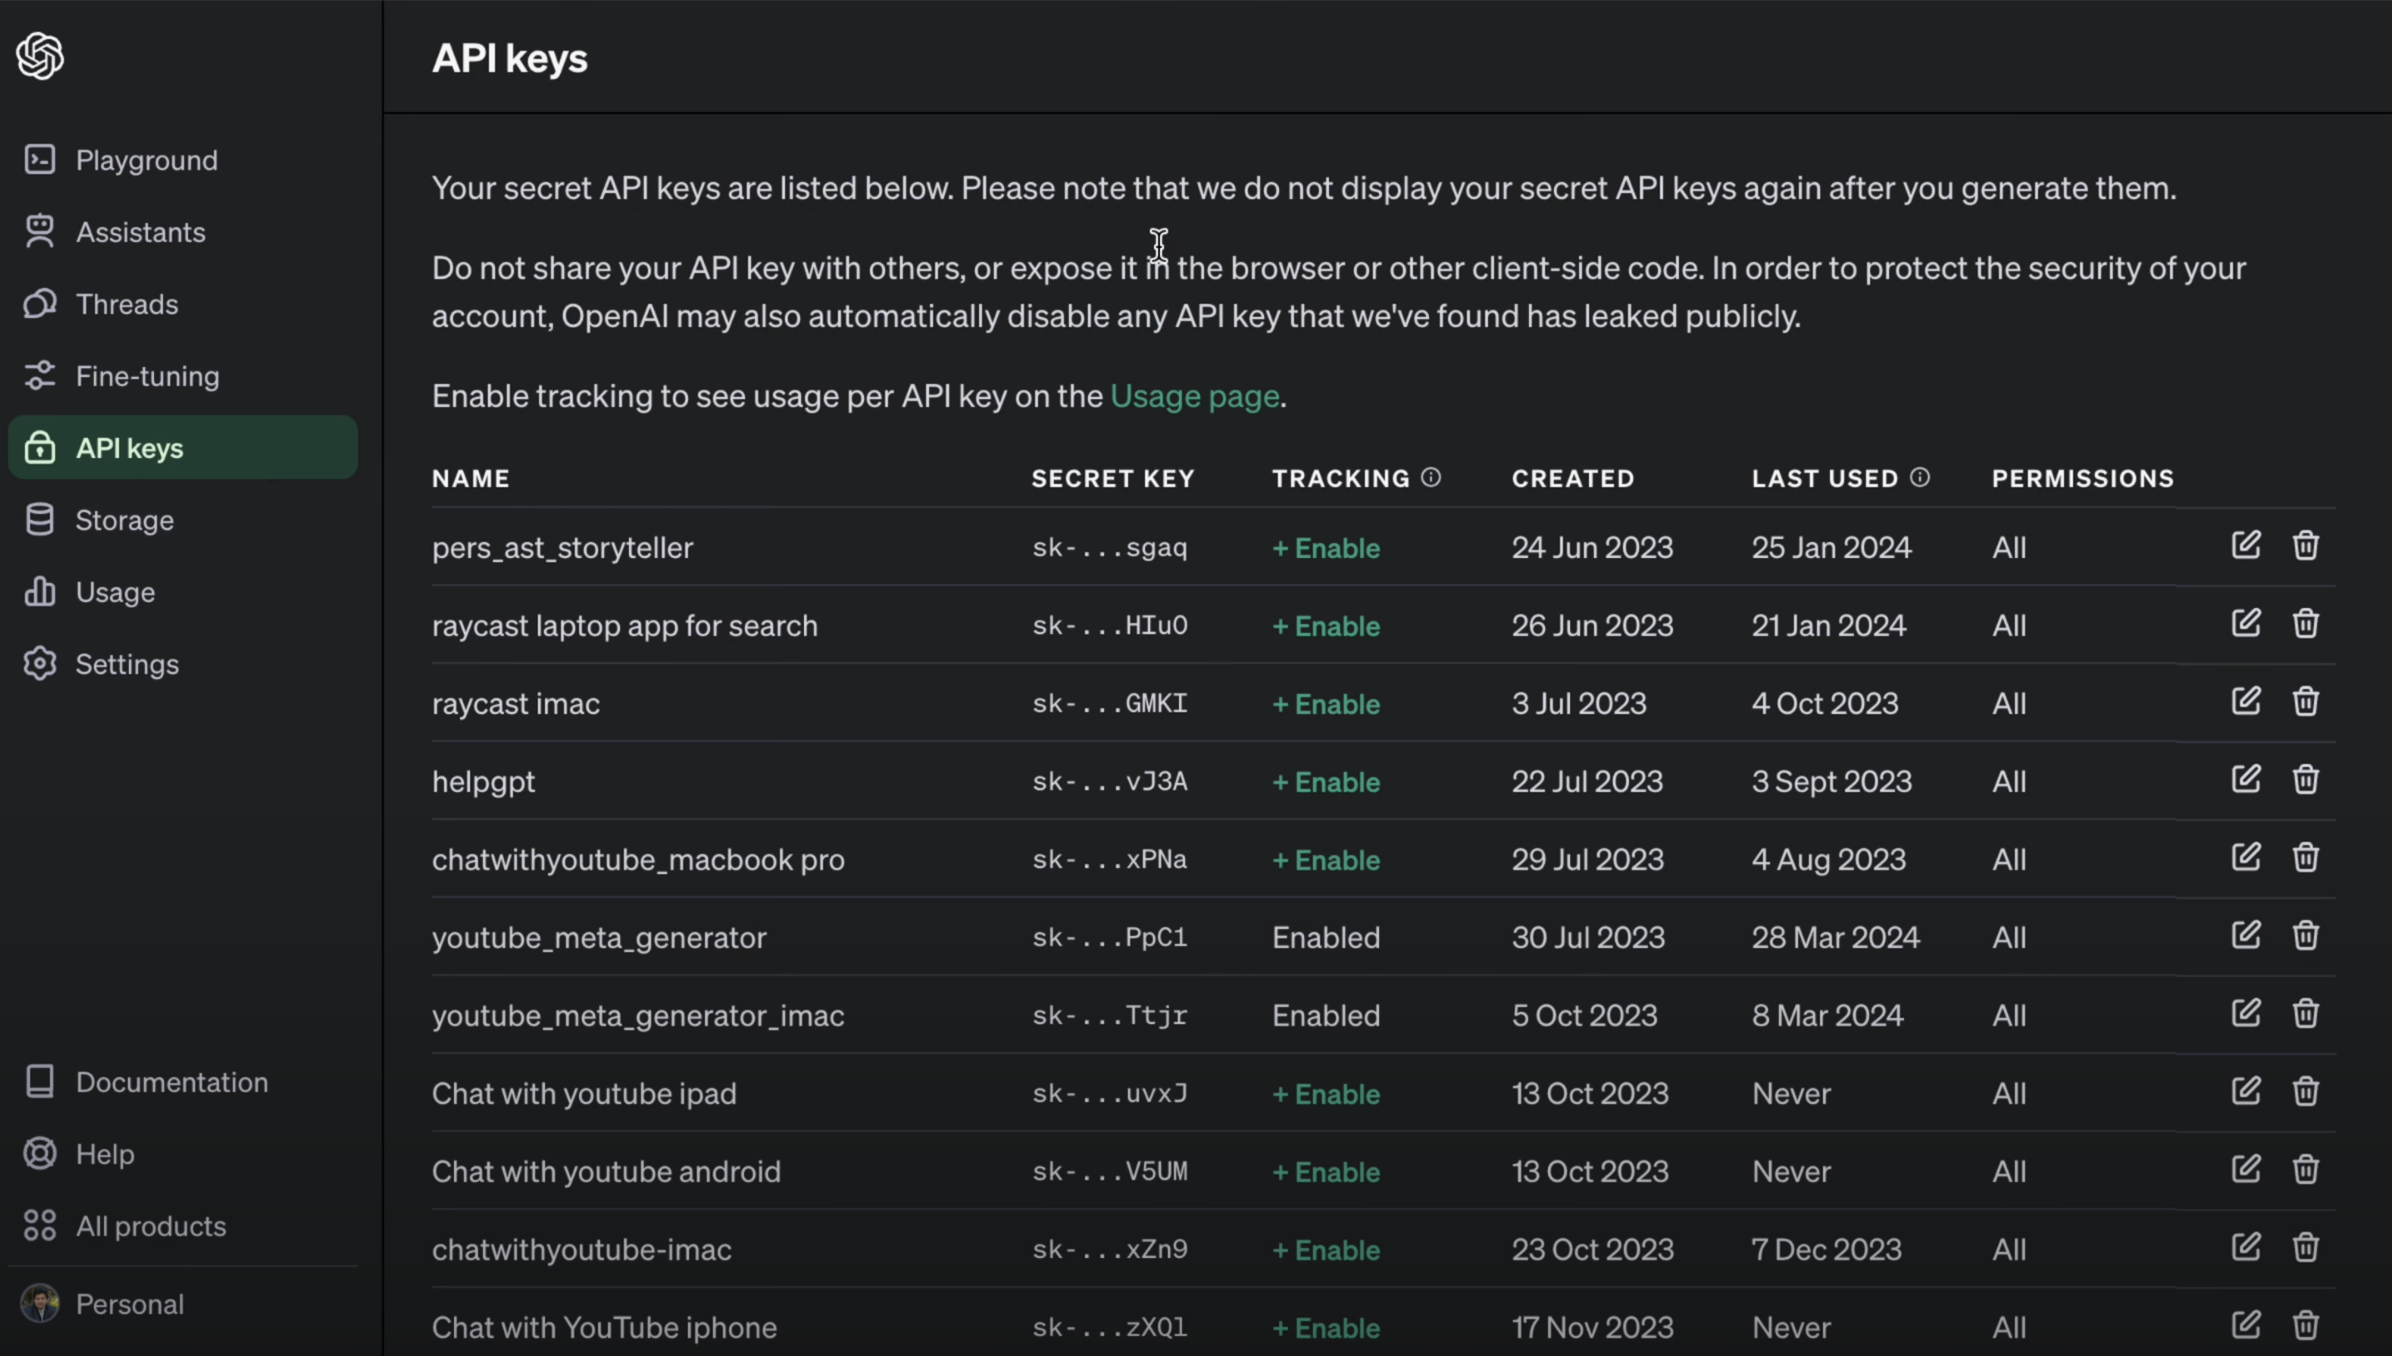
- Click on the "Create new secret" button.
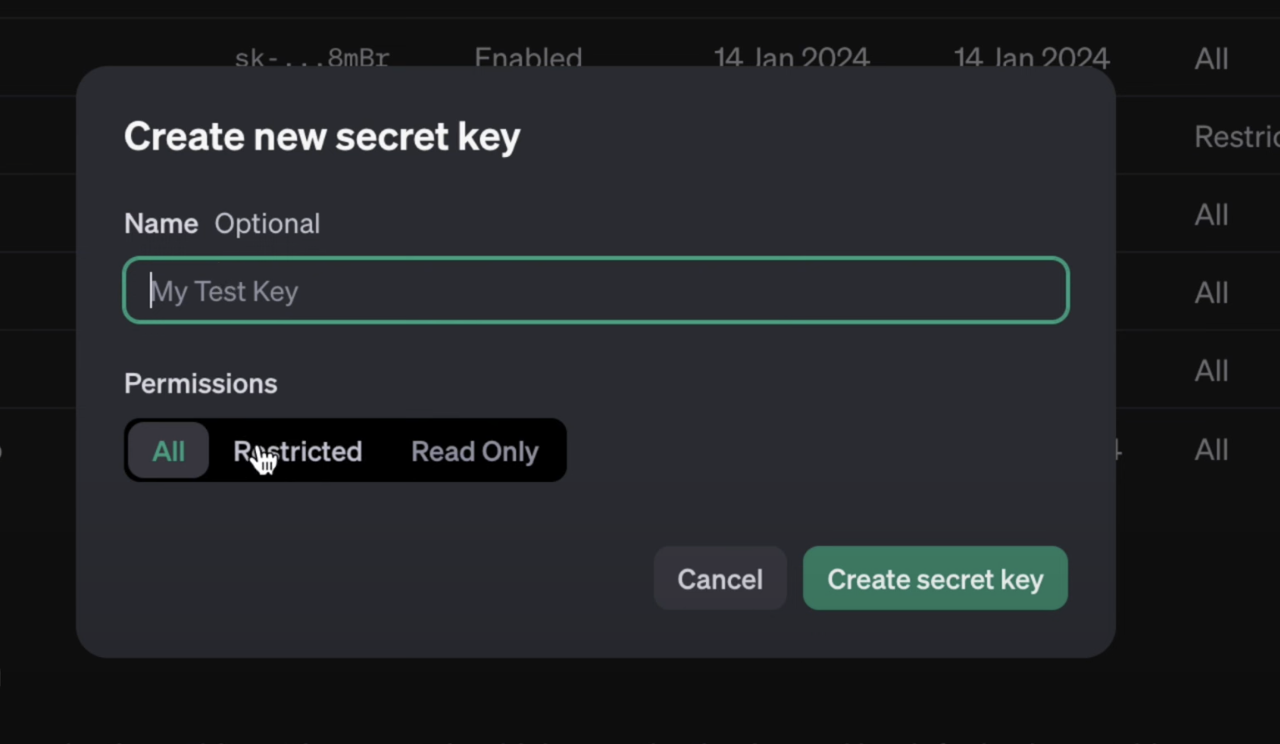
- Specify a name for your API key.
- Choose the desired permissions (restricted or read-only).
- Read-only: Allows reading data with the API key.
- Restricted: Provides more fine-grained control over resource and model capabilities.
- Click on "Create secret key" to generate the API key.
After creating the API key, make sure to copy it and store it securely, as you won't be able to view it again.
Testing Your API Key
Now that you have your API key, let's test it out! OpenAI provides various ways to interact with their API, including Python, Node.js, and even using curl commands.
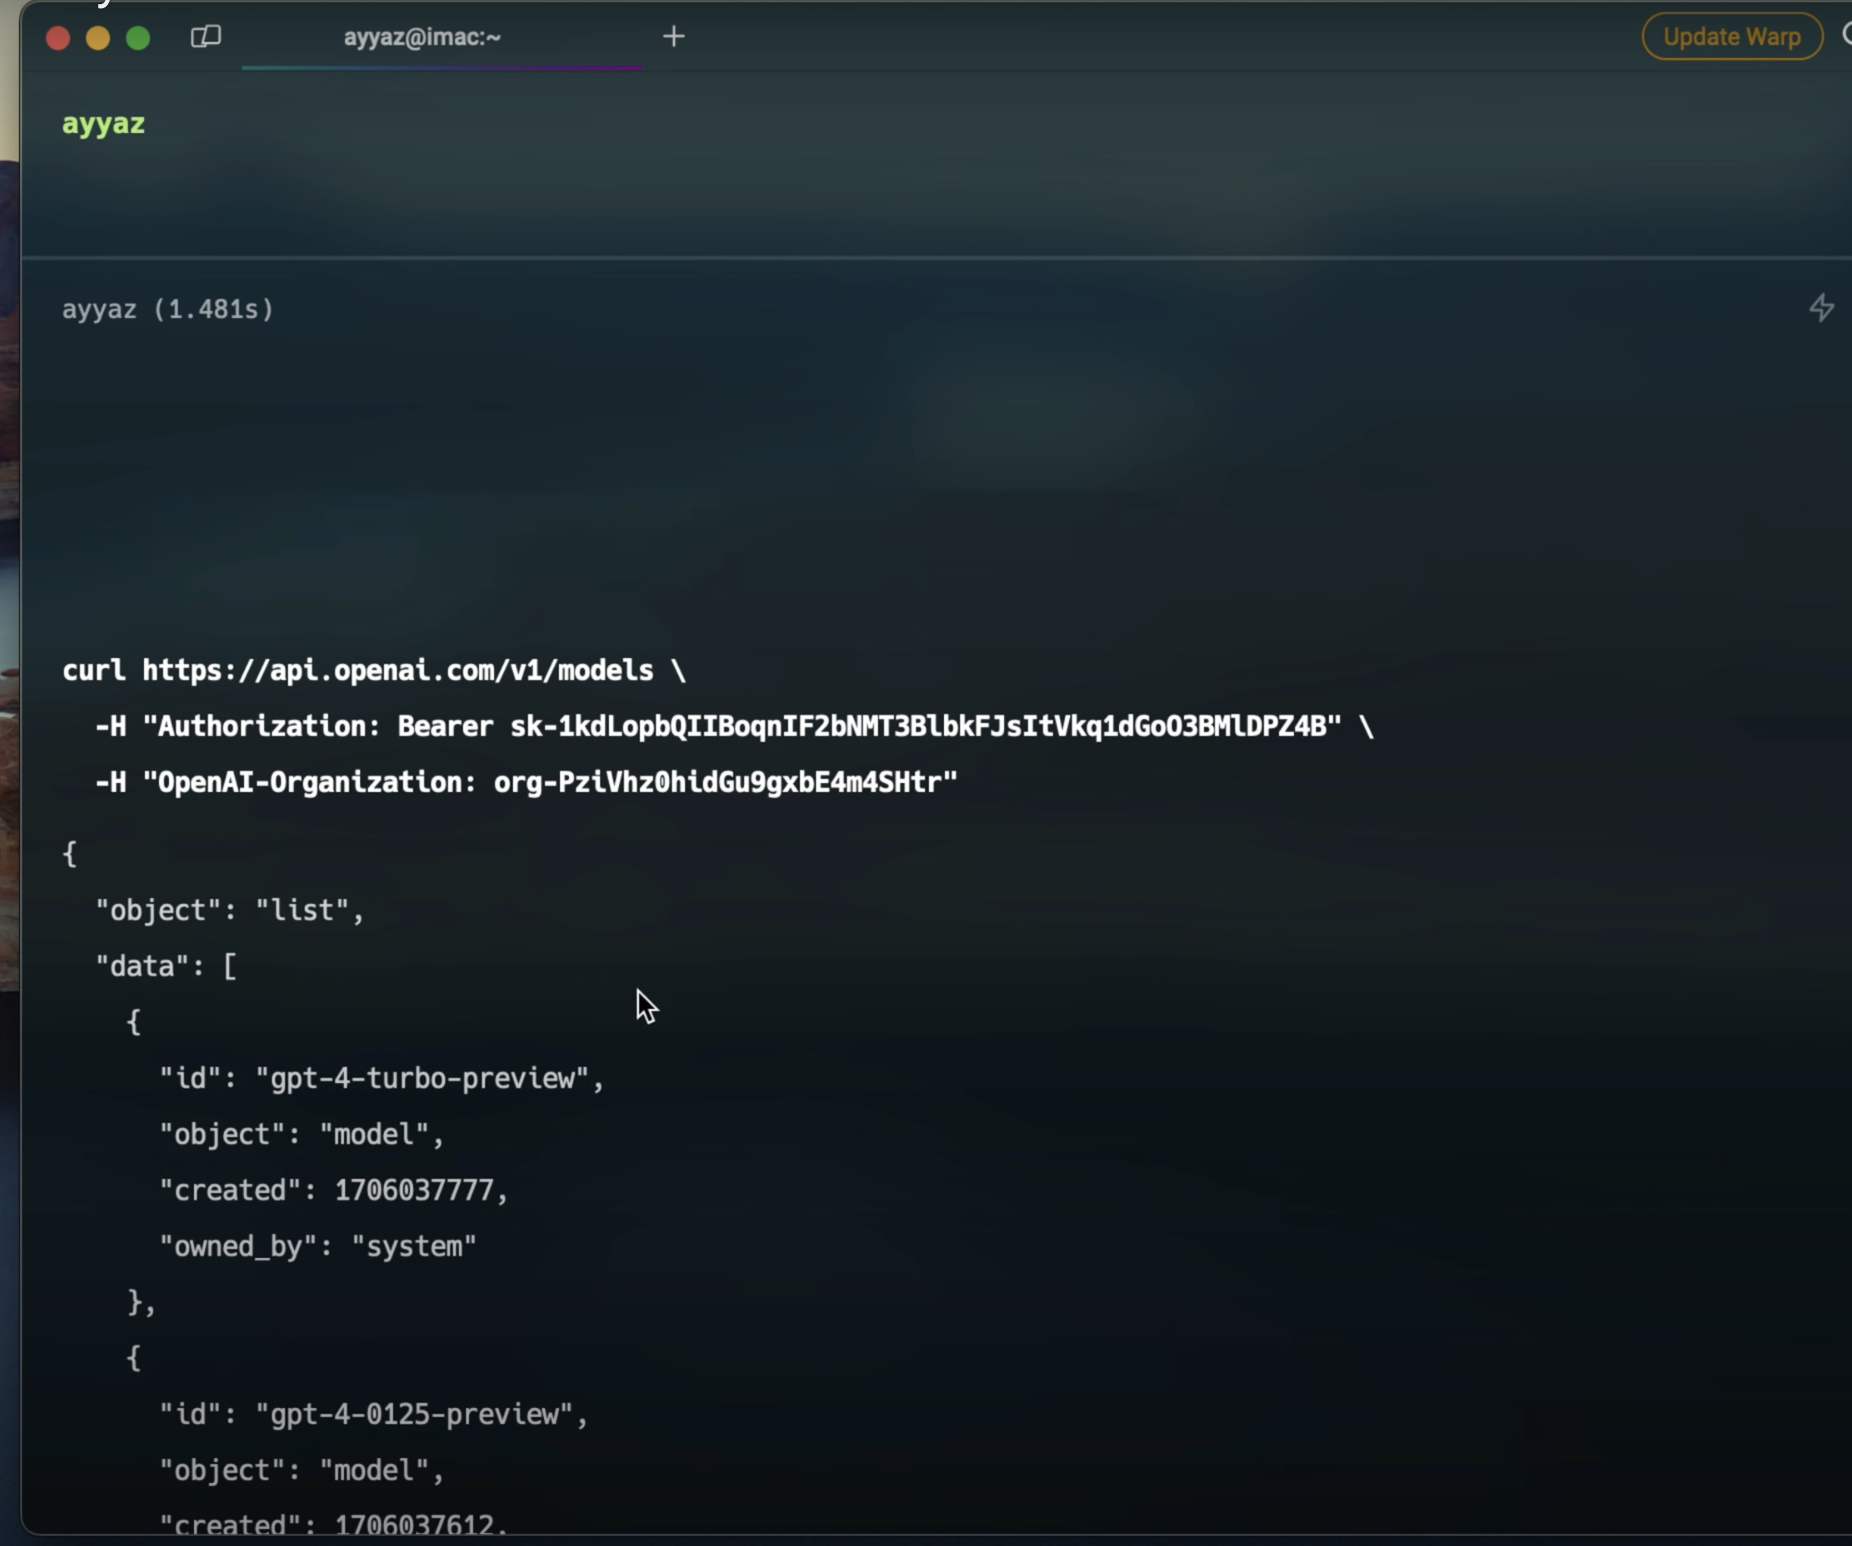
Using curl
To test your API key using curl, open a terminal and run the following command, replacing YOUR_API_KEY with your actual API key:
curl https://api.openai.com/v1/models
  -H "Authorization: Bearer YOUR_API_KEY"
If your API key is valid, the command will return a list of available models.
Using Python
OpenAI provides a convenient Python library for interacting with their API. Here's an example of how to use it:
import openai

openai.api_key = "YOUR_API_KEY"

response = openai.ChatCompletion.create(
    model="gpt-3.5-turbo",
    messages=[
        {"role": "user", "content": "Give me a list of the best AI models to learn."}
    ]
)

print(response.choices[0].message.content)
This code snippet sends a message to the ChatCompletion API and prints the generated response.
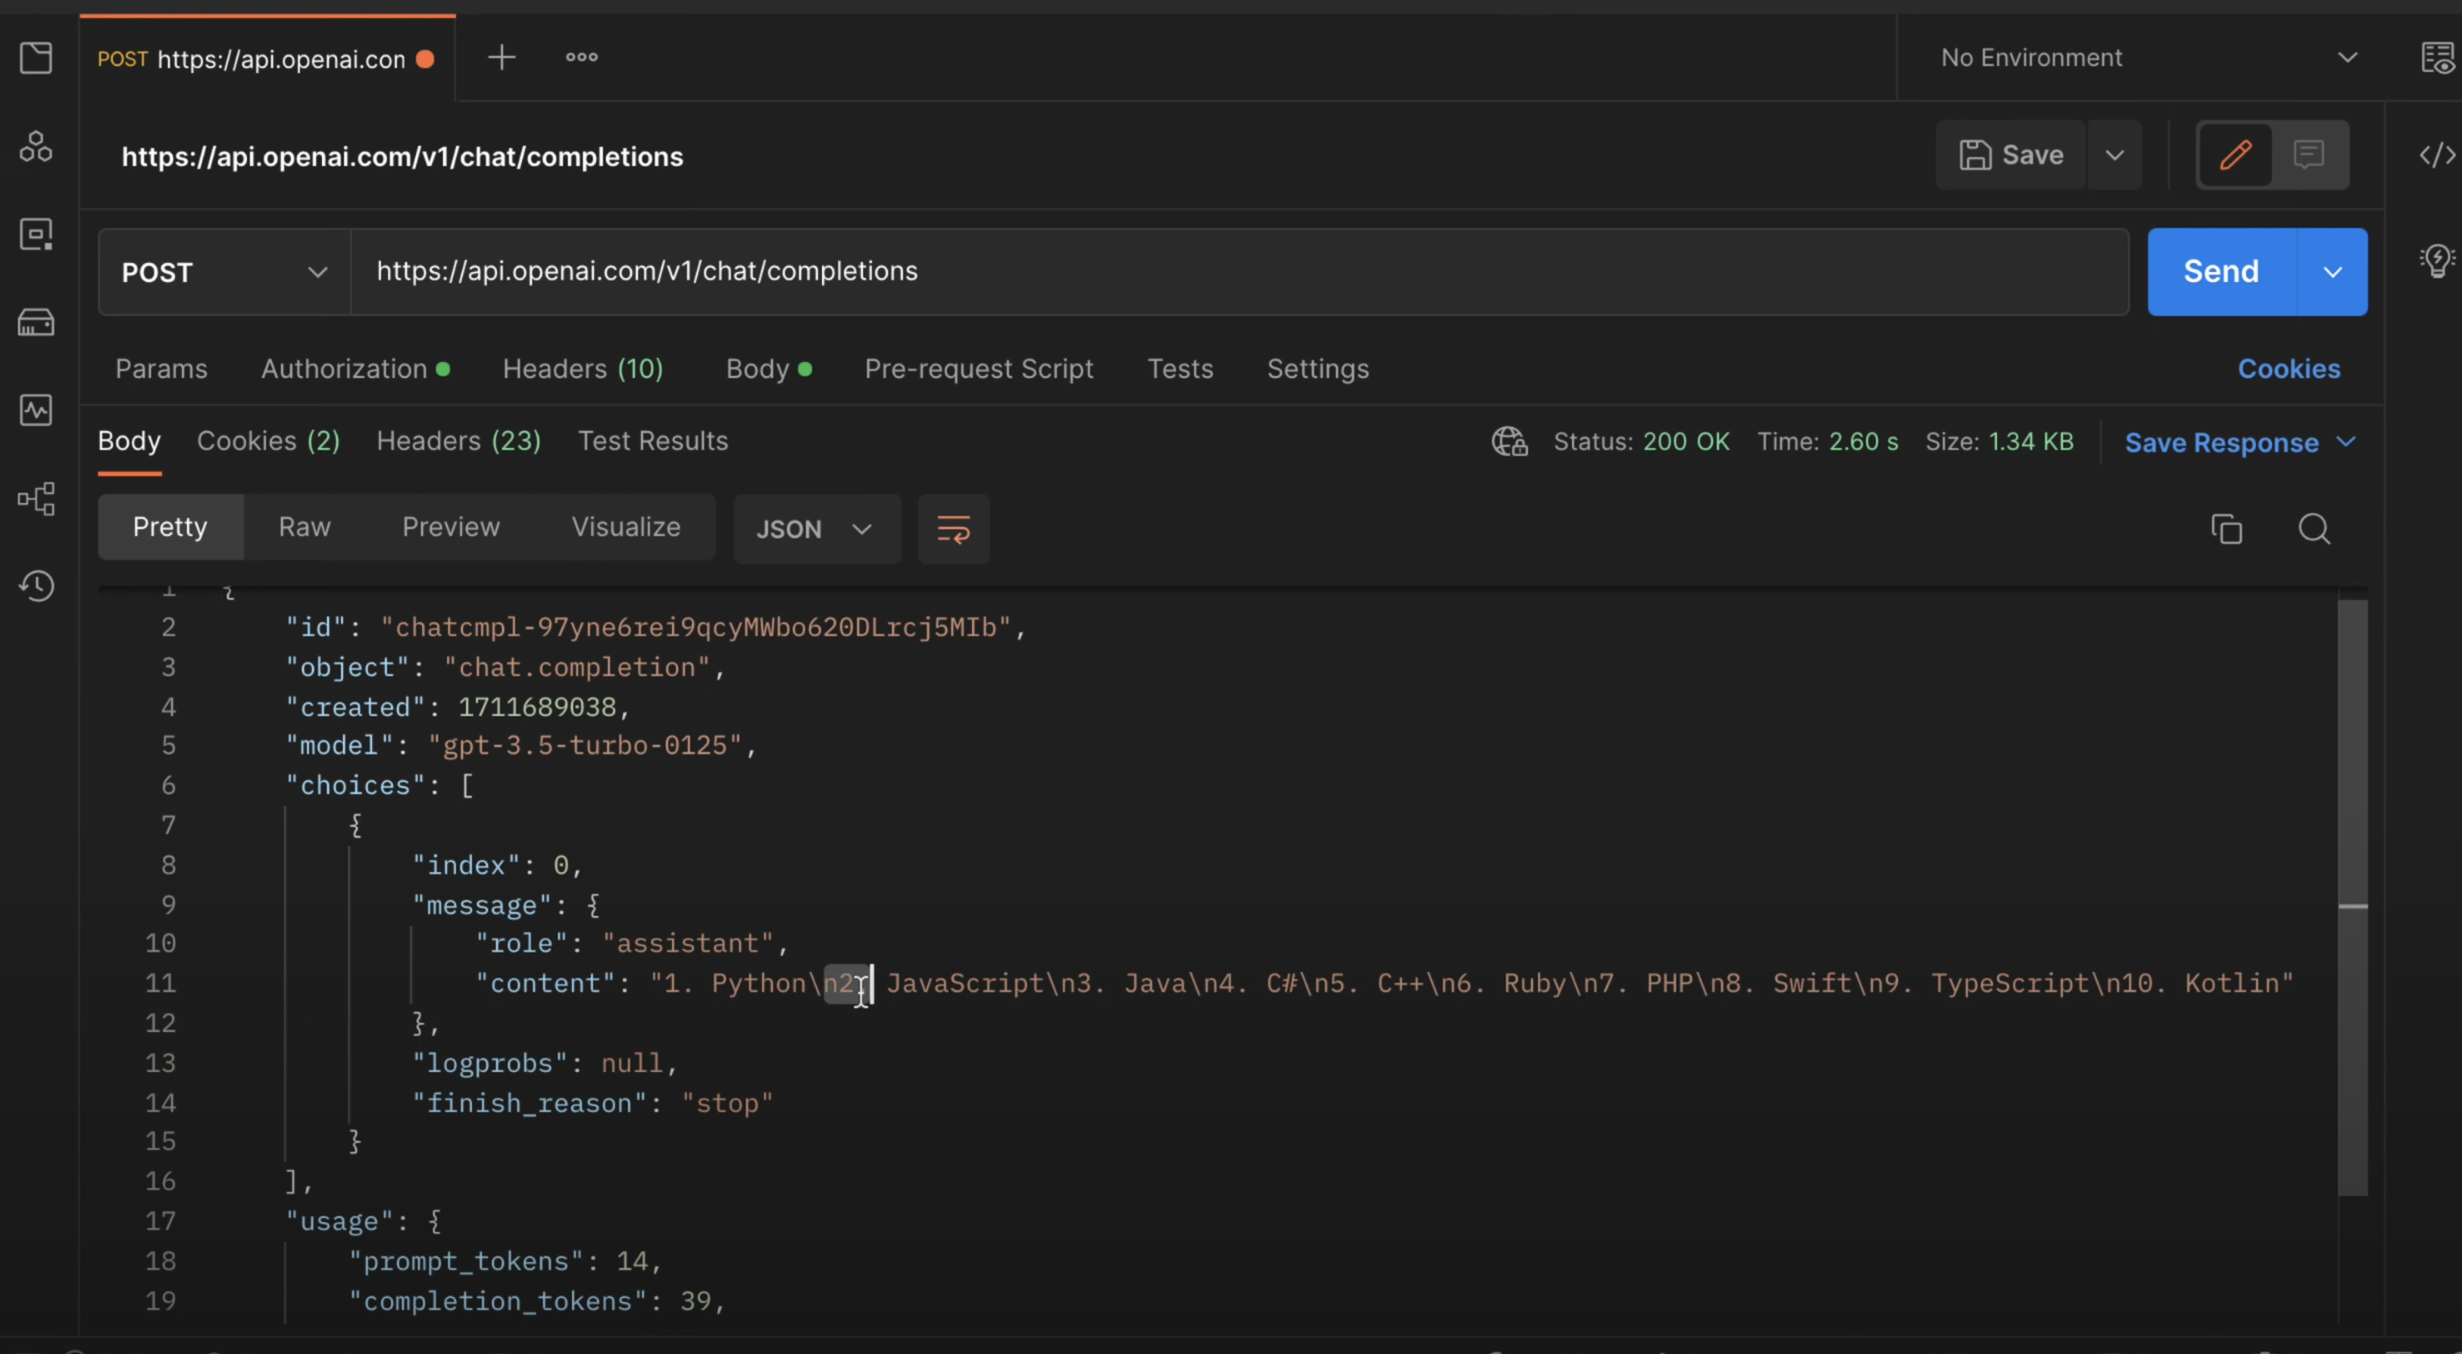
Using Postman
Postman is a popular tool for testing APIs. To use your API key with Postman, follow these steps:
- Open Postman and create a new request.
- Set the request method to POST and enter the API endpoint URL.
- In the Headers tab, add a new header with the key "Authorization" and the value "Bearer YOUR_API_KEY".
- In the Body tab, select "raw" and choose "JSON" as the format.
- Enter your request payload in JSON format.
- Click the "Send" button to send the request and view the response.
Conclusion
Obtaining an OpenAI API key is a straightforward process that opens up a world of possibilities for integrating powerful AI models into your projects. By following the steps outlined in this article, you'll be ready to start experimenting with OpenAI's APIs and unleash your creativity.
To gain a deeper understanding of the process and see the steps in action, we highly recommend watching the accompanying YouTube video tutorial. The video provides a visual walkthrough of each step, making it easier to follow along and replicate the process yourself.
YouTube video: https://www.youtube.com/watch?v=bPG5d0o4BhU
Don't forget to subscribe to the AyyazTech YouTube channel for more valuable content like this. By subscribing, you'll stay up to date with the latest tutorials, tips, and tricks related to OpenAI and other cutting-edge technologies.
Happy coding, and may your AI projects be successful!