How to install and set up Facebook pixel in WordPress?
If you want to track who has been on your websites to run Facebook and Instagram ads to those users the Facebook pixel is the tool that you need. In this article, you will learn how the Facebook pixel works, how to install it in the right way and how to use it correctly.
Facebook pixel connects your landing page or website to your facebook ad account that allows them to communicate. So it does two things: It collects the data of the people that visited the specific pages of your website on your website or your landing page or who performed specific actions. Then it runs your ads to them.
The second important thing that it helps to do is that it lets you optimise your advertisements for conversions. That means that you can instruct facebook that the purpose of your ad is to get users to go to your landing page or website and perform specific actions like buying a specific product, fill out the contact form, become a lead.
And facebook then learns from users’ such actions and what type of people are taking those actions so that facebook could improve your ads. So that’s what you are going to understand in this article and how to use pixel in right way.
As I explained how Facebook pixel works but let me provide a little bit more details on this. Facebook pixel helps your landing page or website to communicate with your ads management and also it helps you to optimise your ads to increase conversion rate. So you are giving Facebook instruction that what does conversion for your case.
If you are trying to increase sales on your website and you install facebook pixel then there is normally a default event that is called “Purchases” and you give facebook instruction that you want that behaviour ( purchases ).
For example, if 500 users click on your ad and go to your website and among those 100 people actually purchase your product then facebook will keep record of that information that those 100 users are the type of users that they should target with their ad. Facebook ad system will slowly keeps learning over time to get smarter and better about who they show your ad to.
For example you are doing e-commerce and you want to target nationwide or you want to target a city, there is huge number of users there.
So facebook would learn that what people are taking the desired actions and actually starts showing your ad to more relevant people. So this is how you optimise your ad automatically while running your ads.
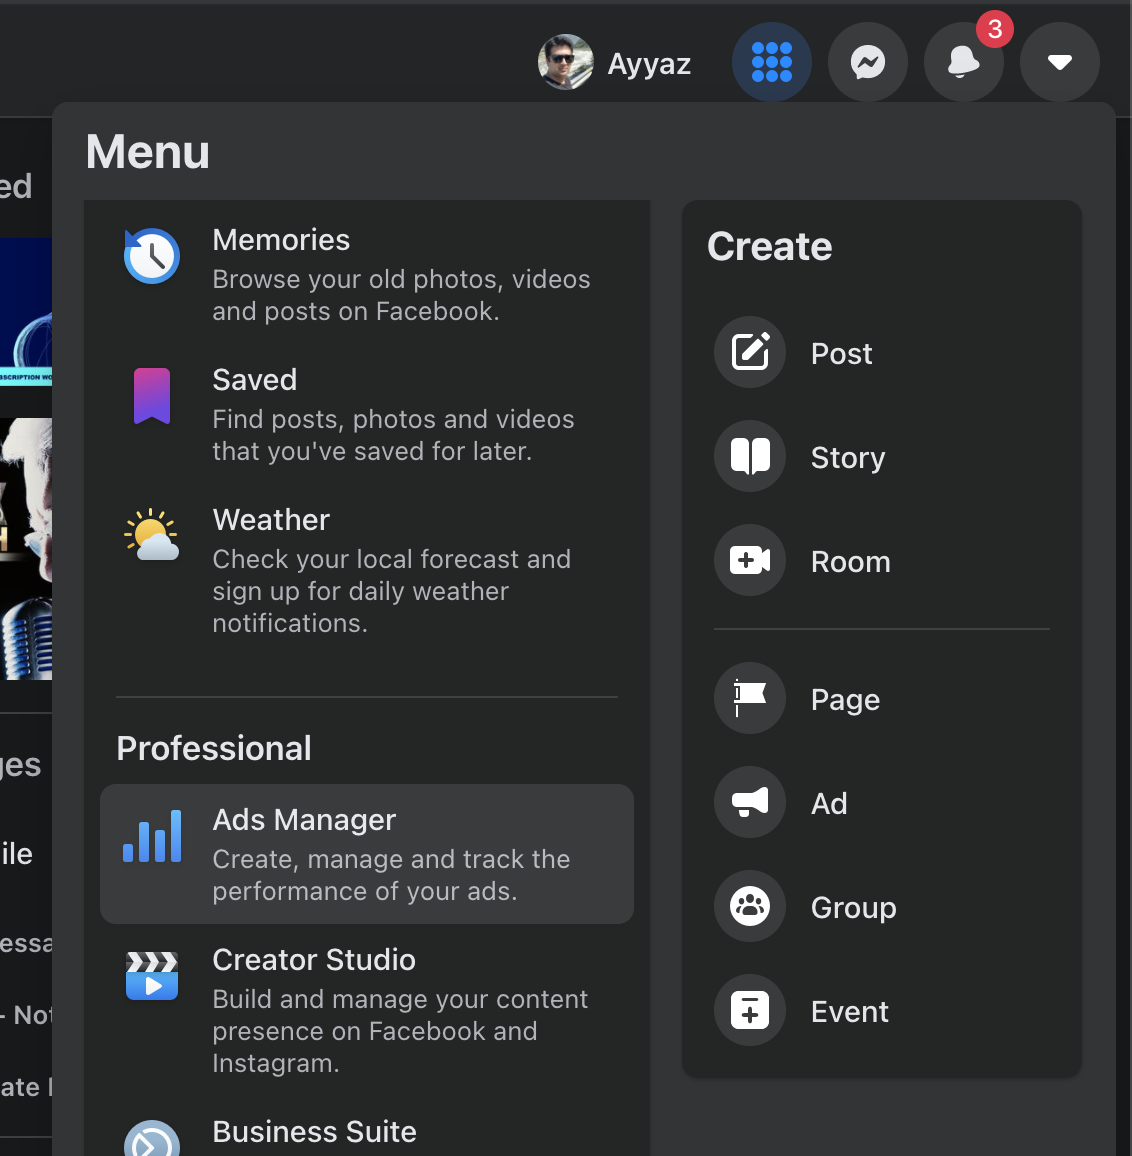
In order to install the Facebook pixel, go to your Facebook page and click on the 9-dots-menu icon button on the top right and then click on the “Ads Manager” as shown in following screenshot:
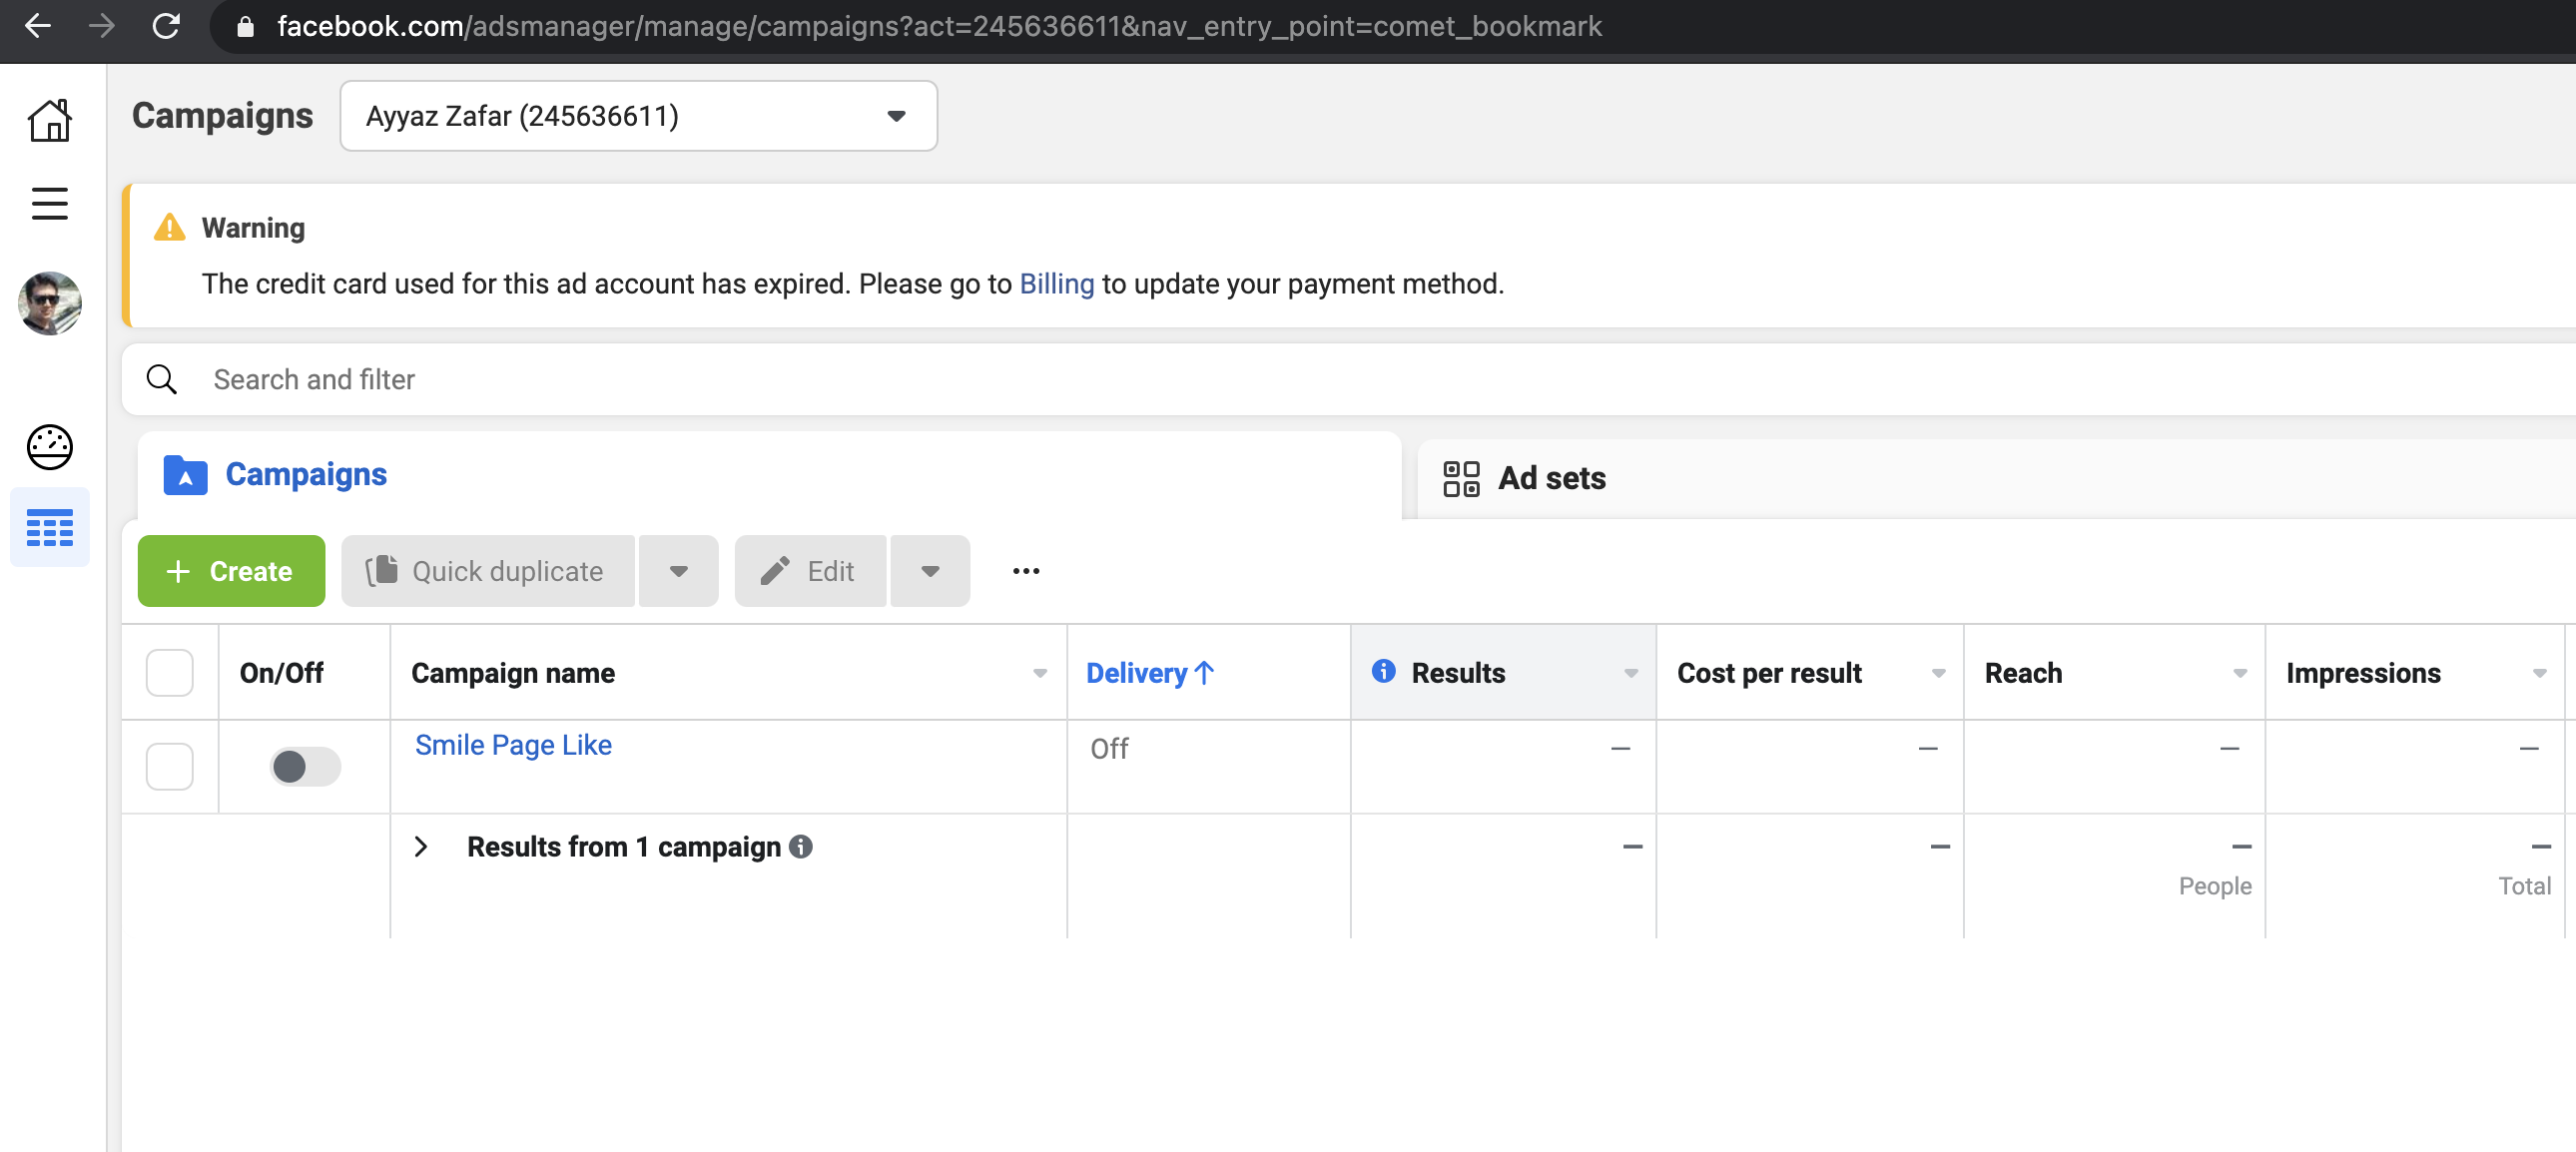
Then you will see following ads manager dashboard:
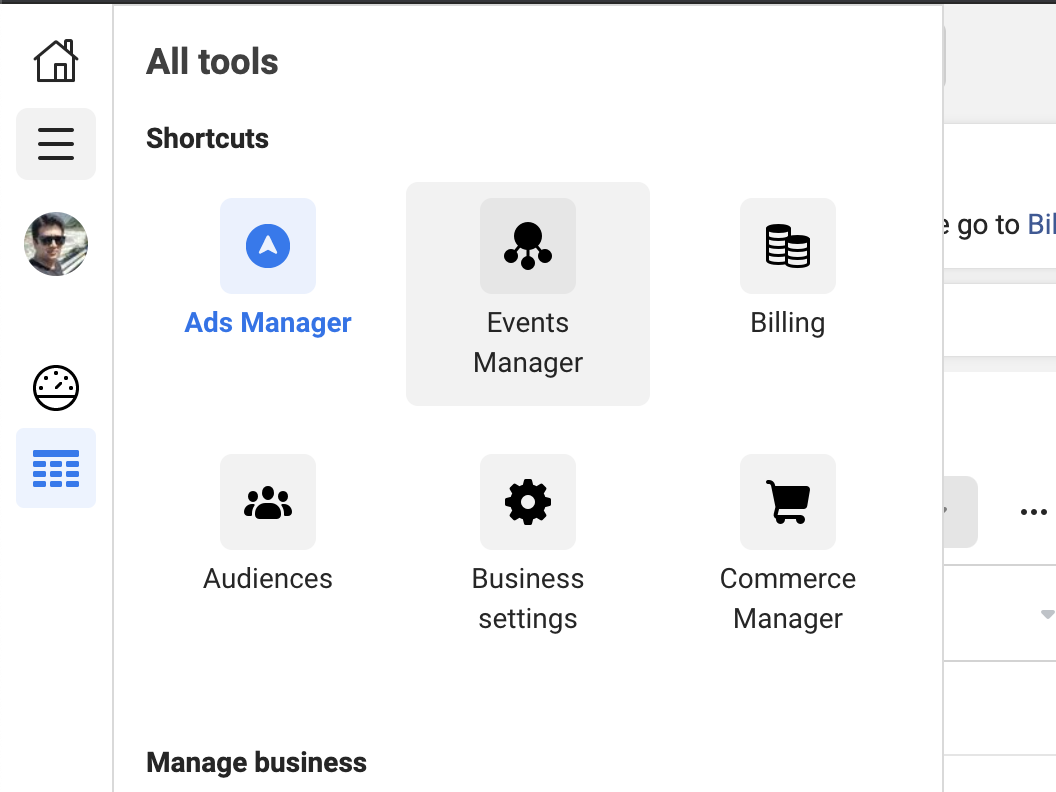
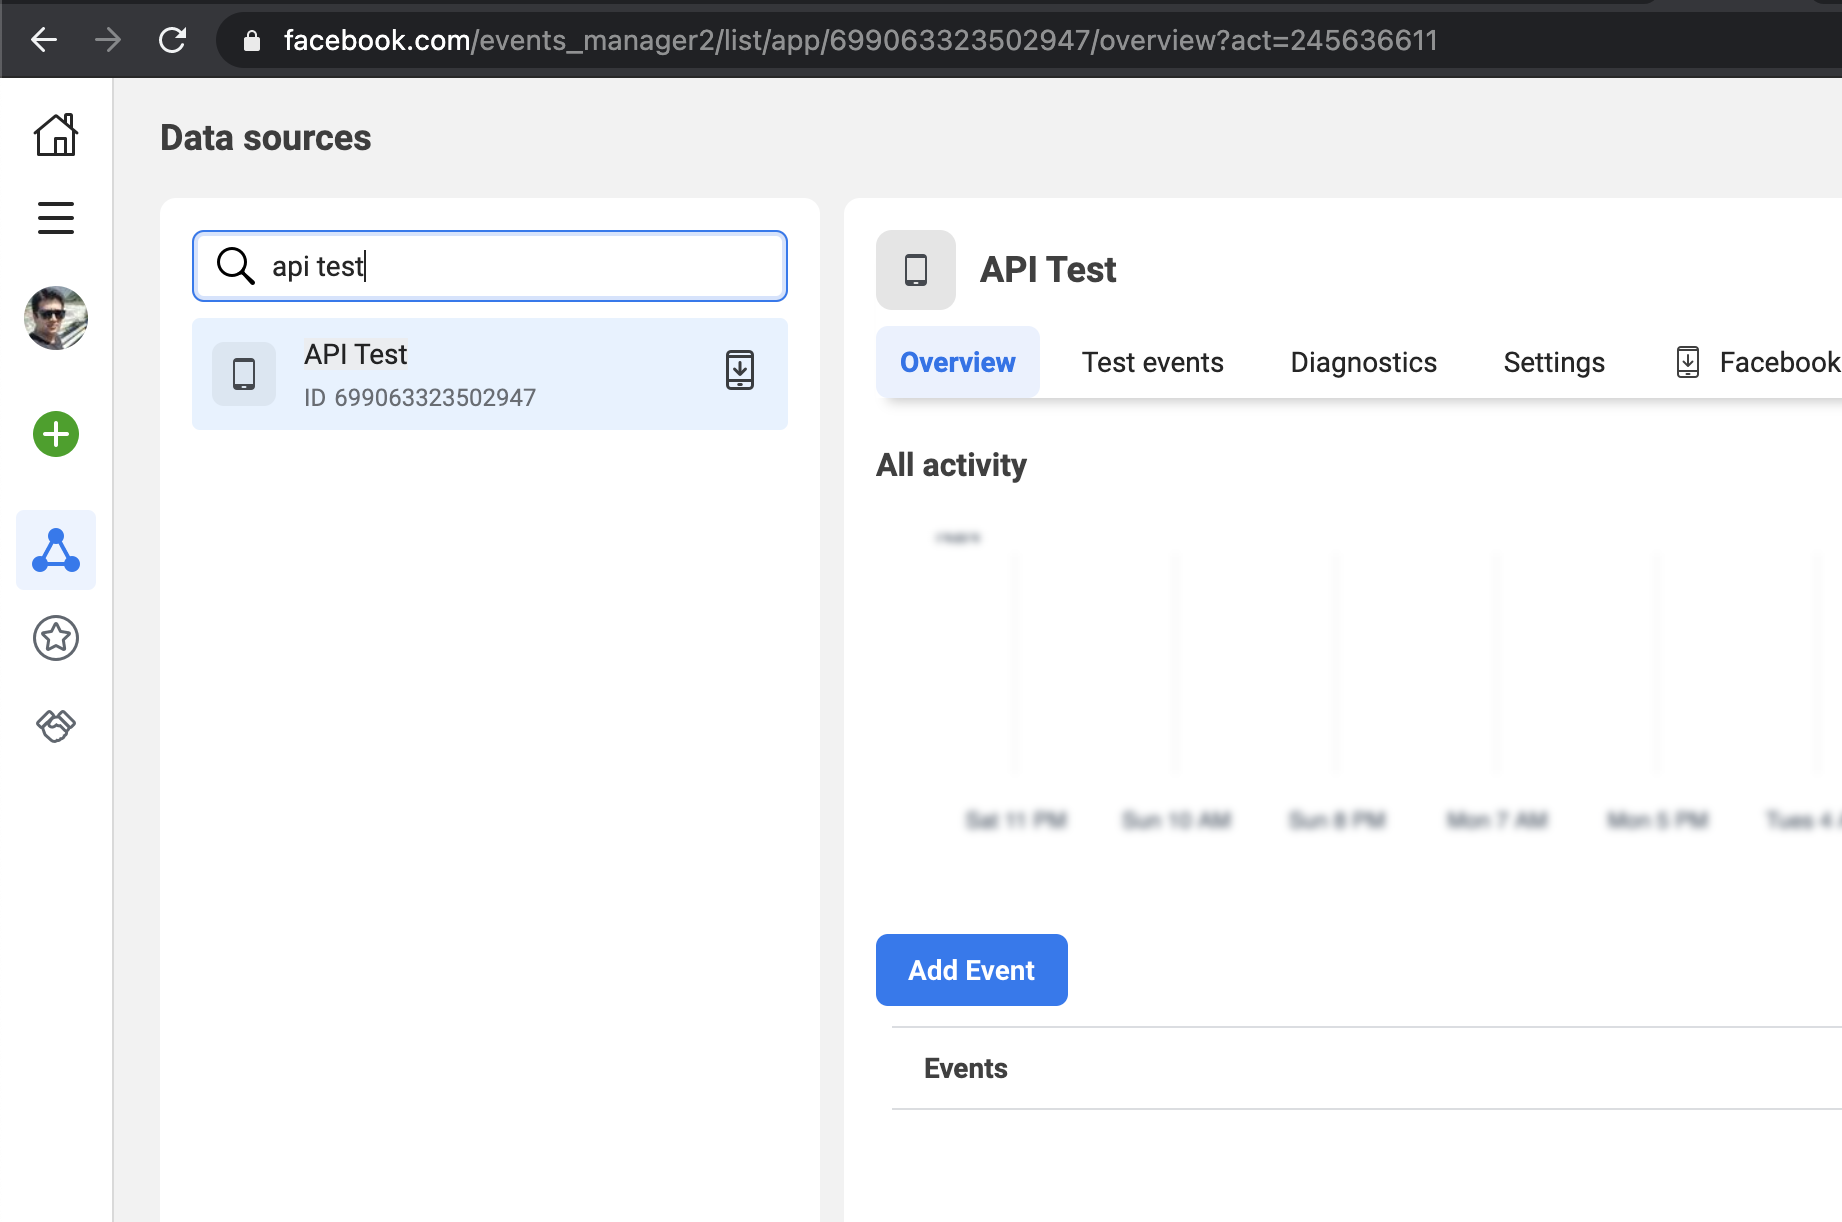
Now click on “All Tools” icon from left side menu bar and then click on “Events Manager”:
That will open Events Manager page:
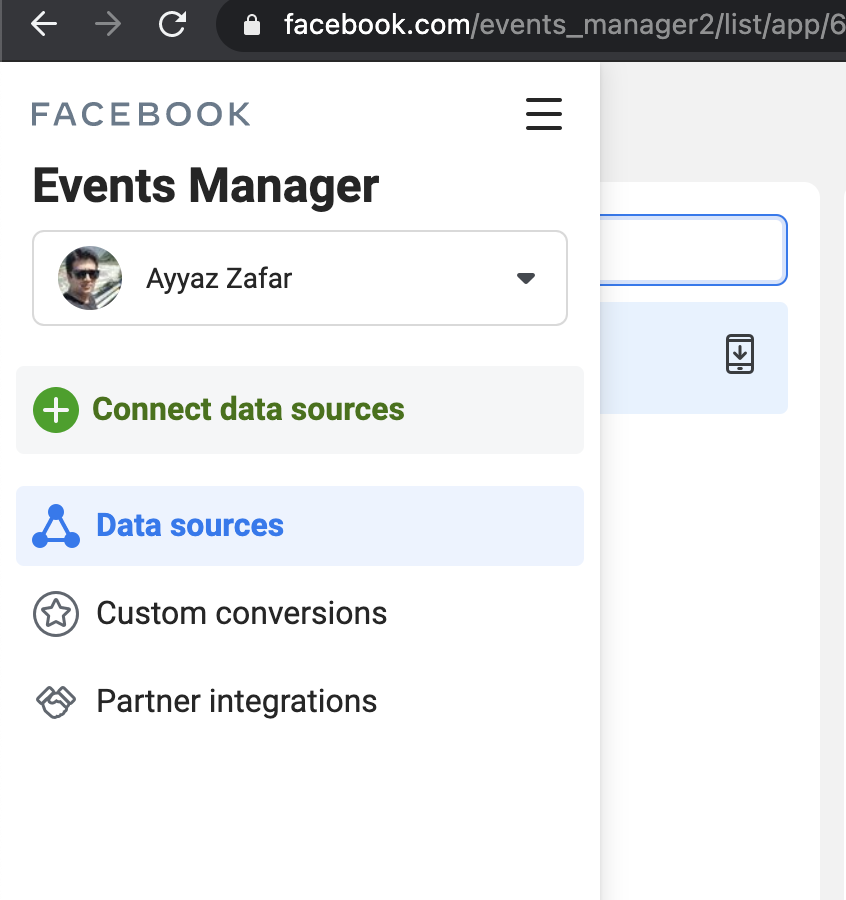
Now click on the green button “Connect Data sources” on the left menu bar:
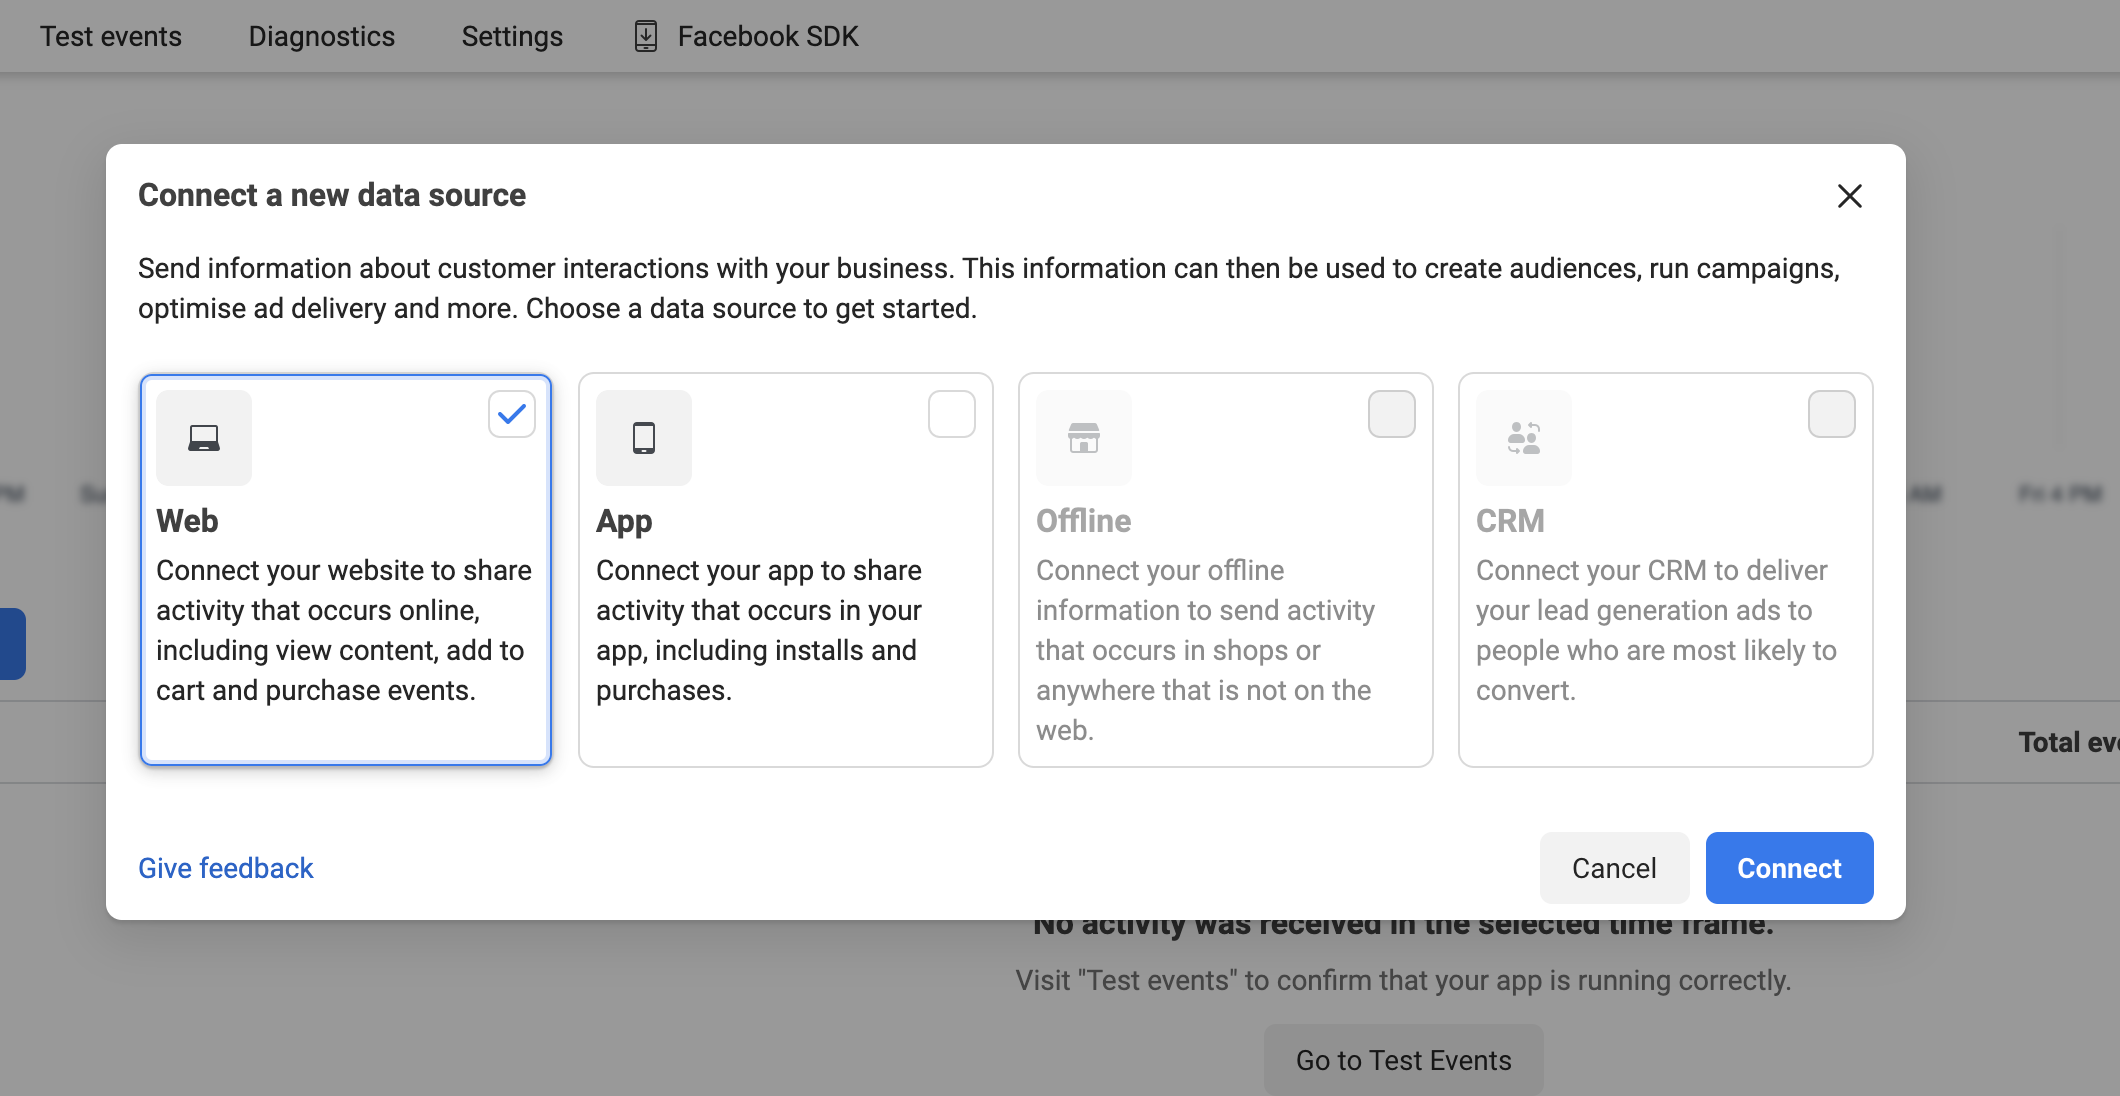
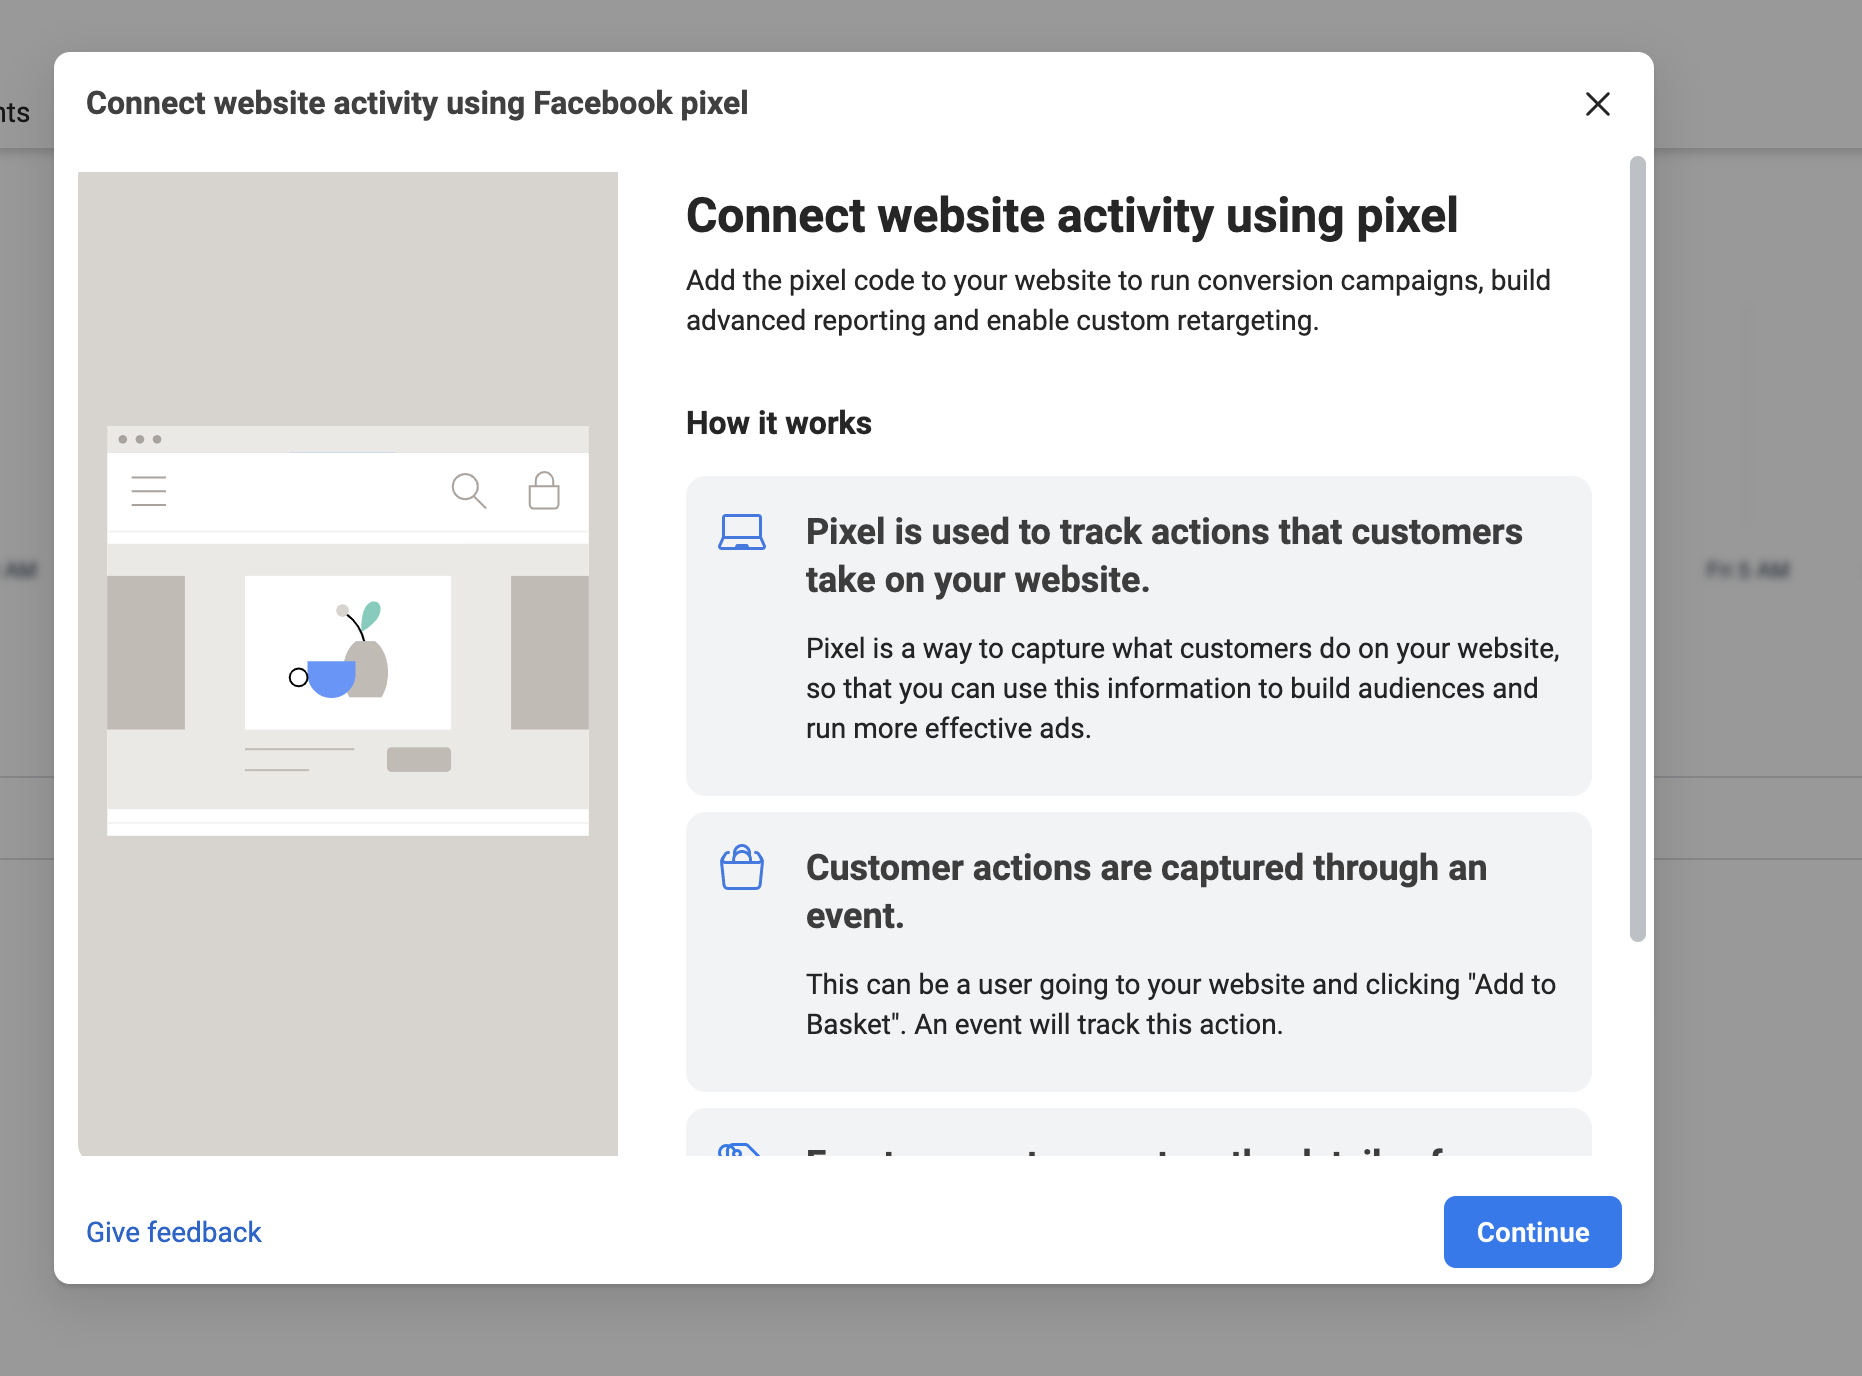
Then you will see dialogue as shown in the screenshot below. In that dialogue, you need to select the option “Web”
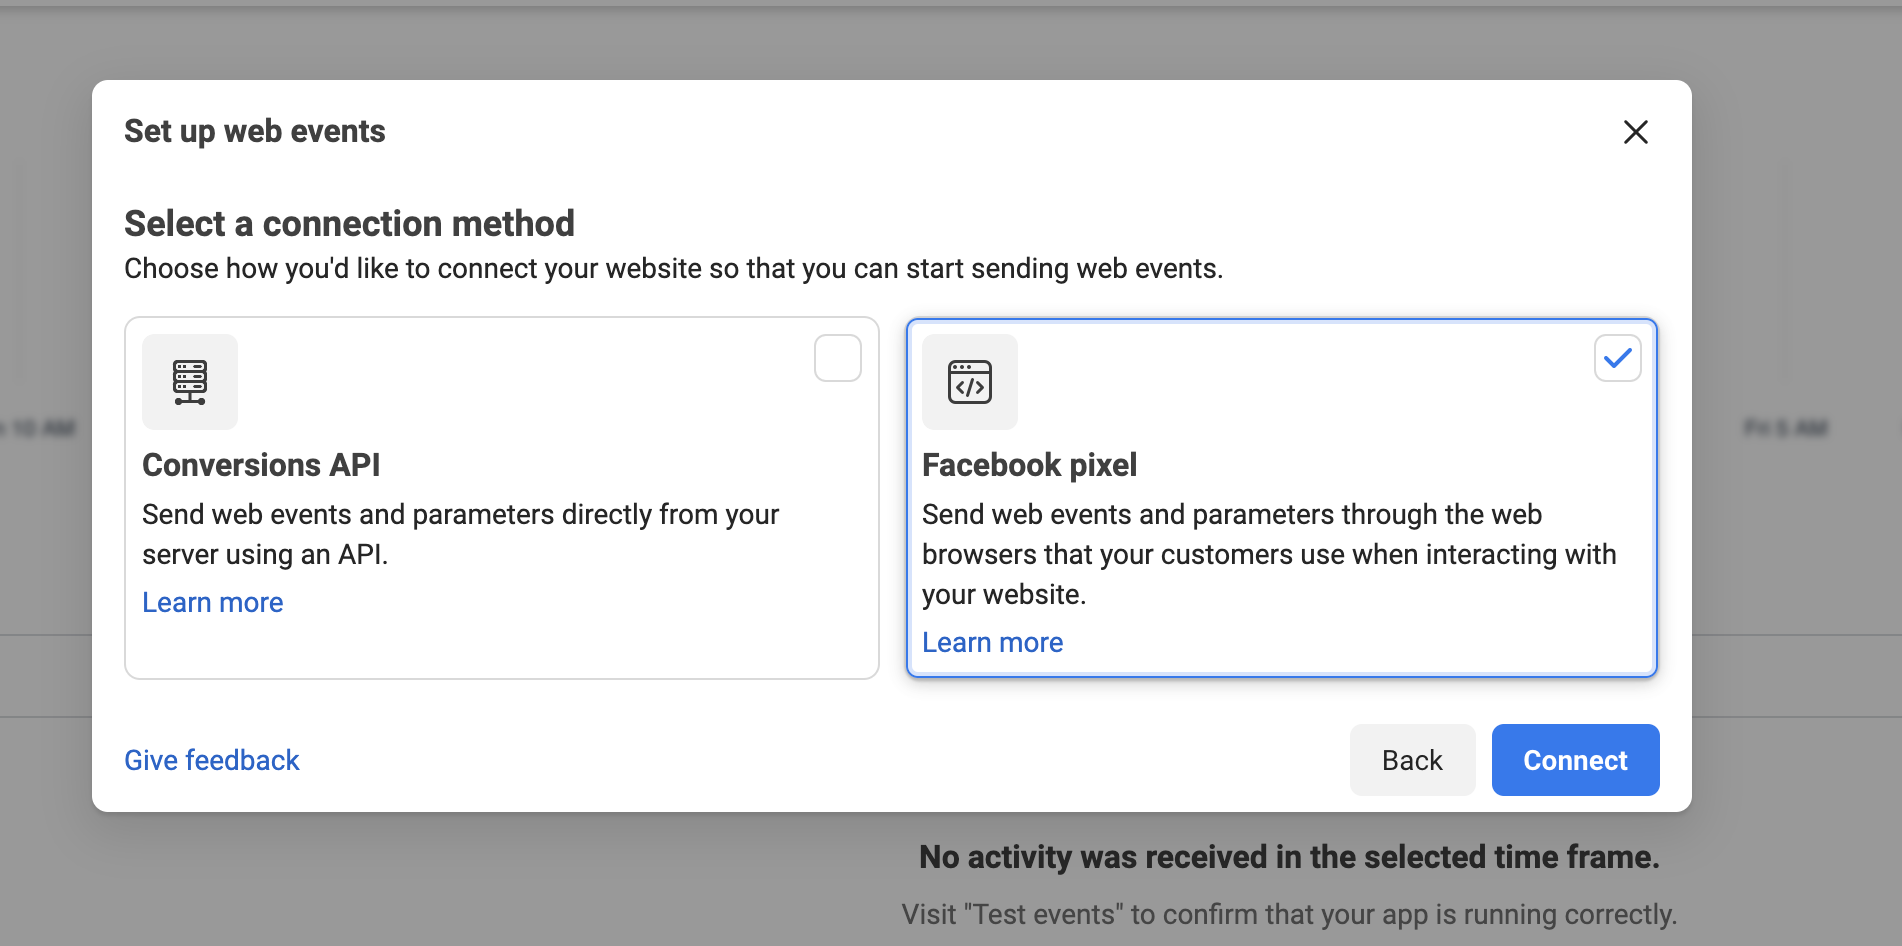
Click on “Connect” button that will then show you the Connection methods to select. You need to select Facebook Pixel and click on Connect button:
Now click on the “Continue” button:
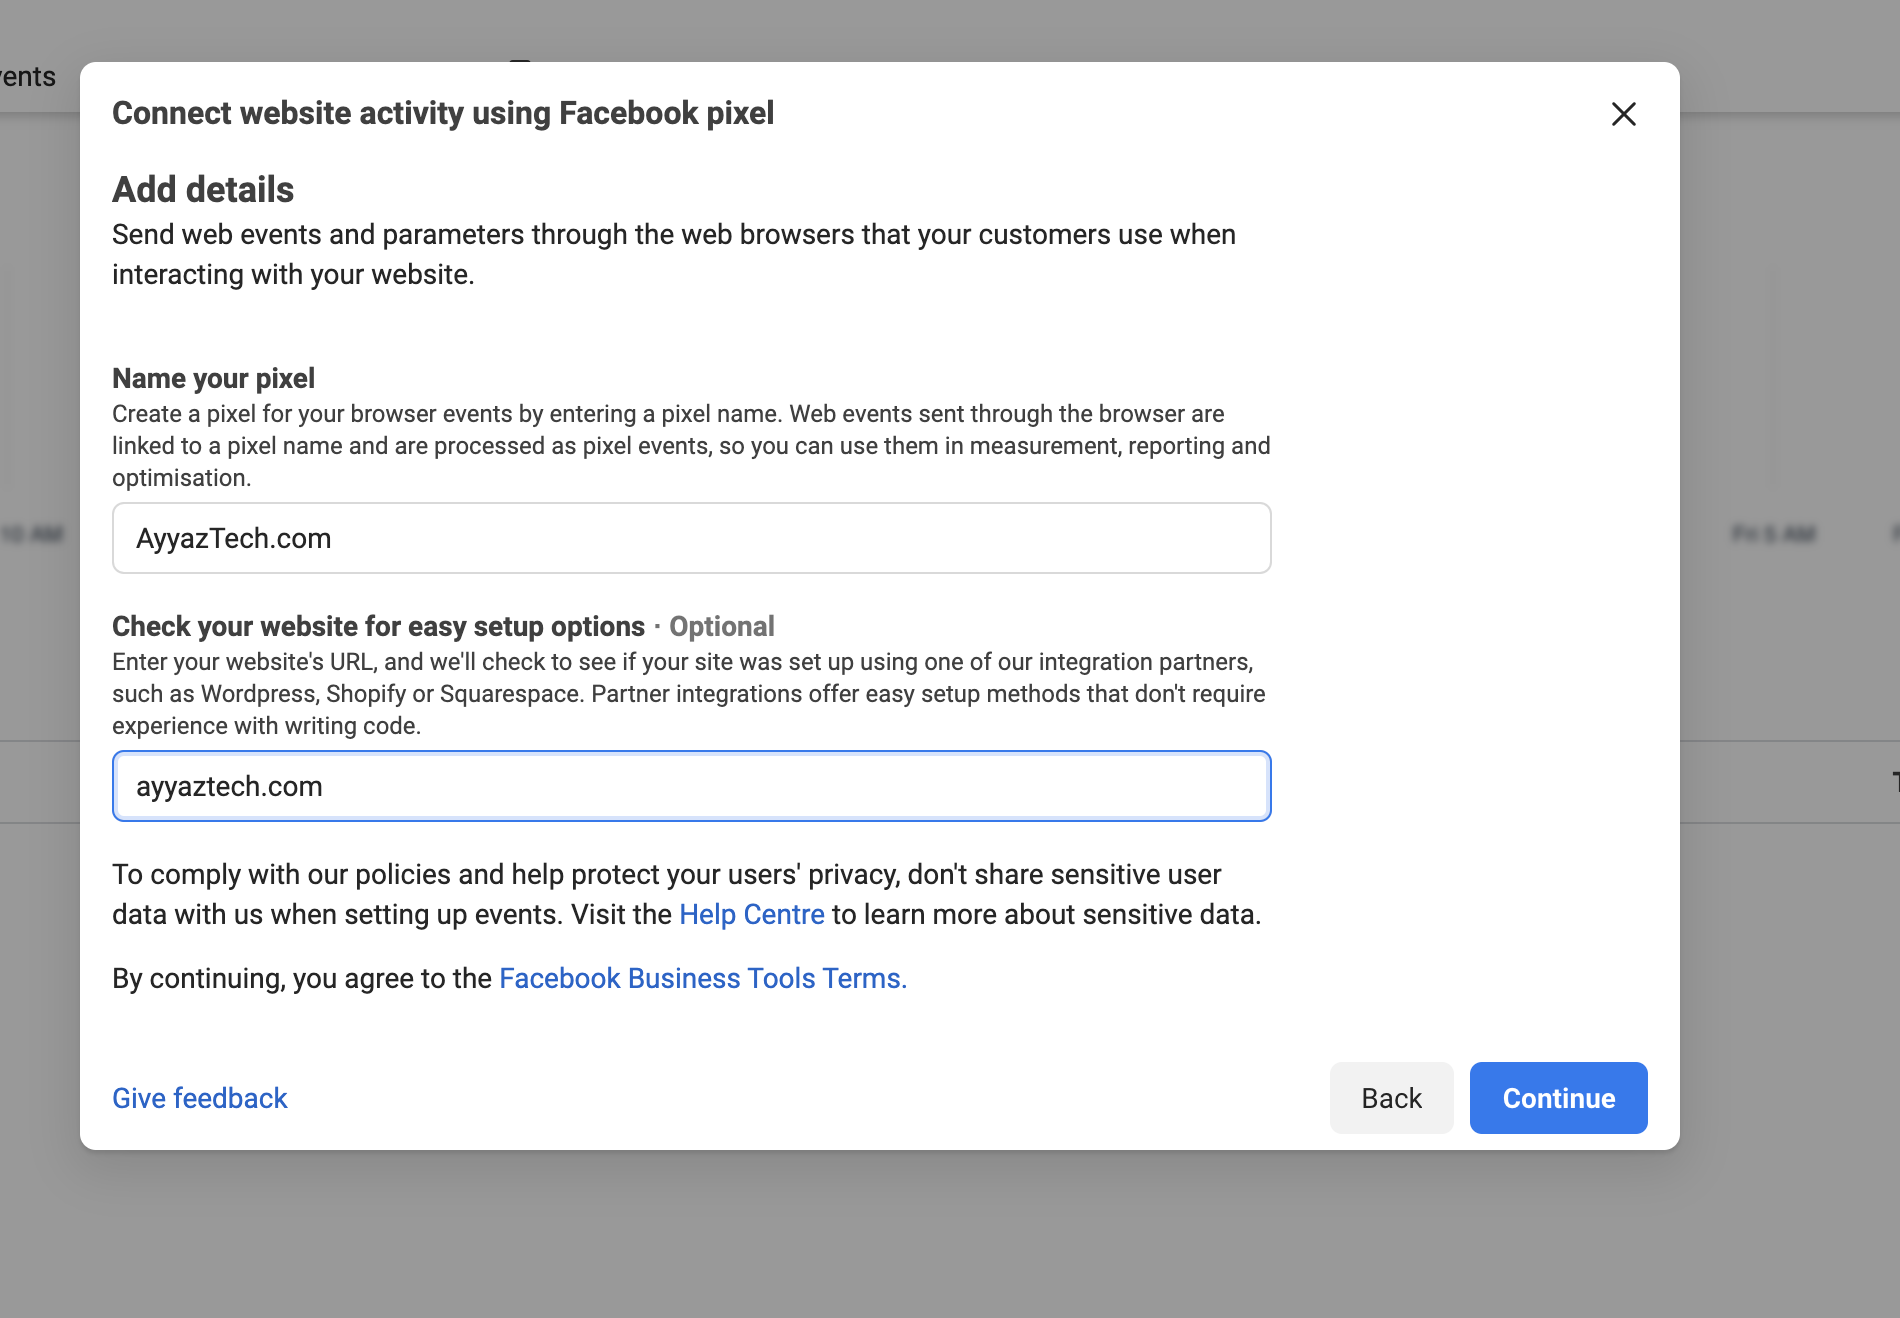
In the next step, you need to enter any name for your pixel and provide the website url then click on “Continue” button:
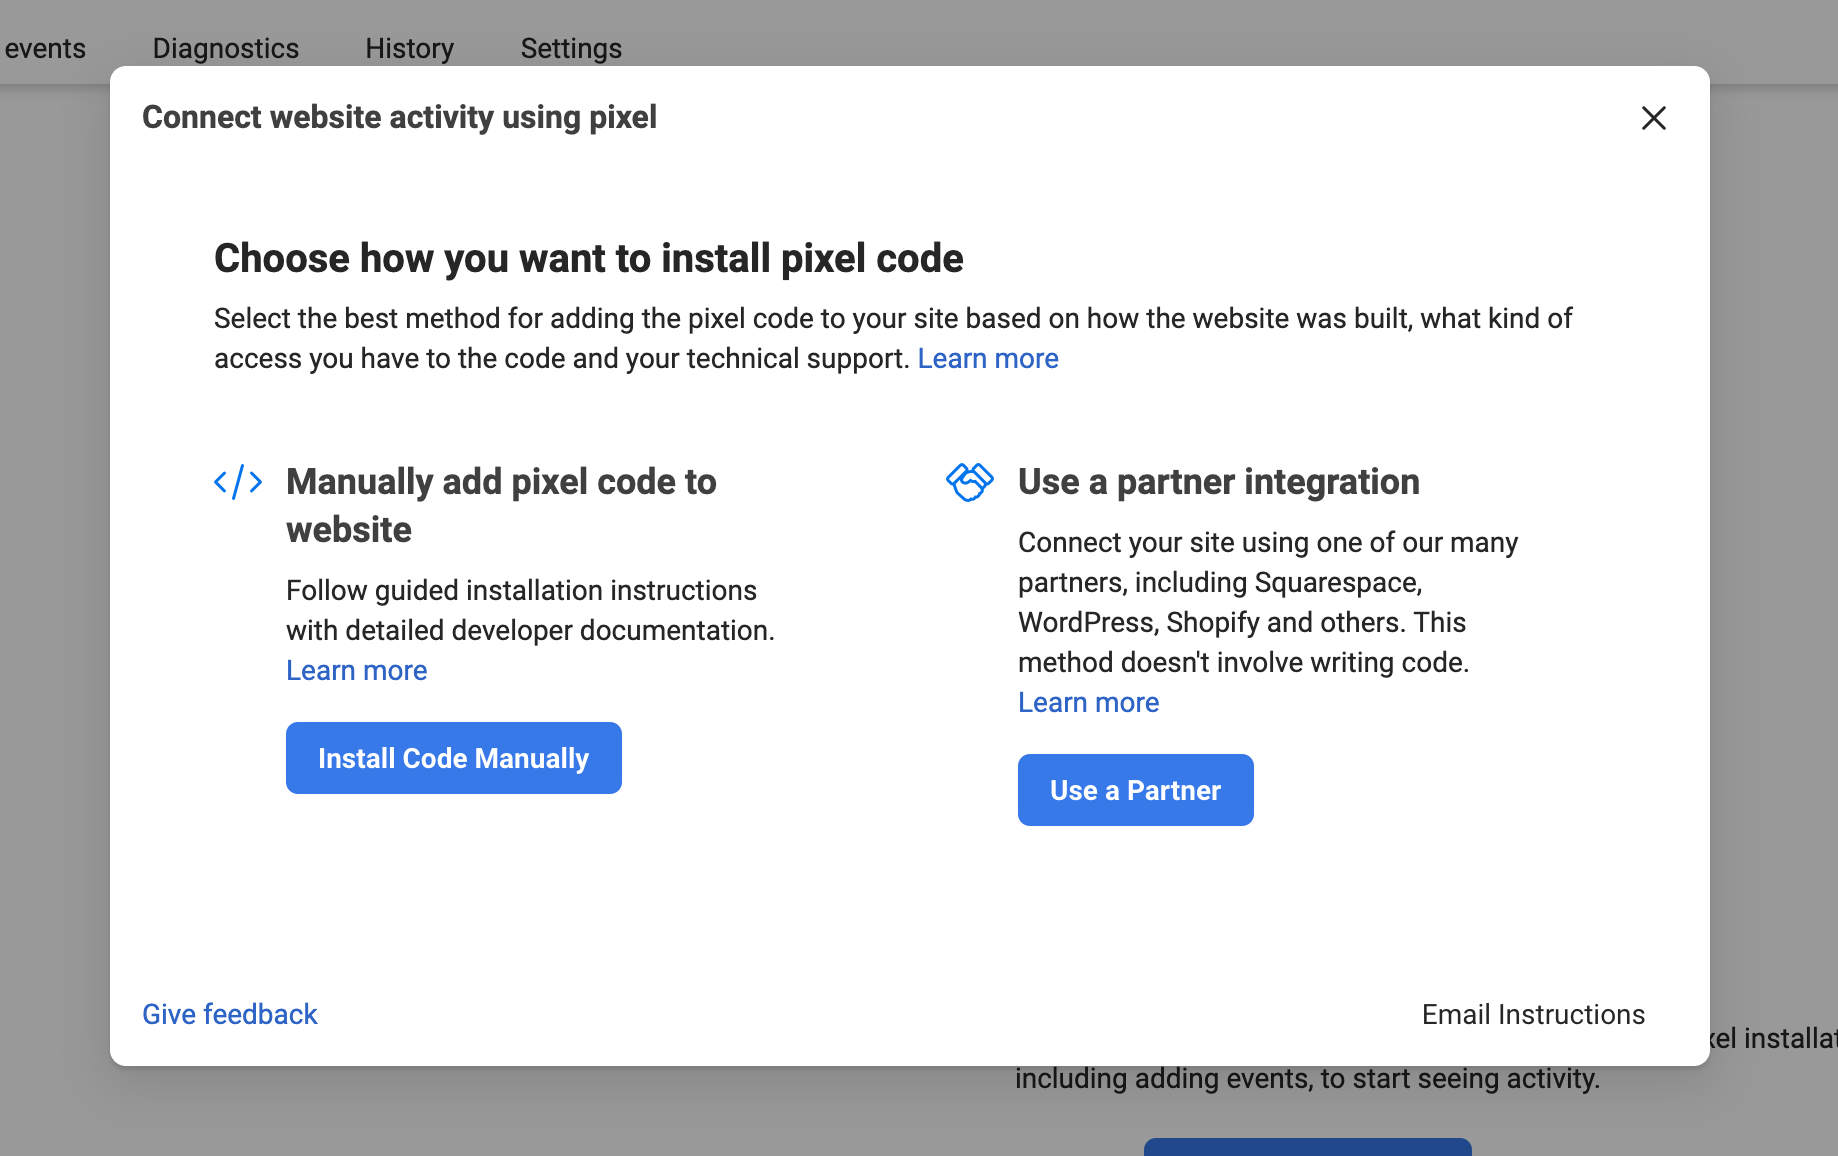
In next step you need to select that how you want to install the pixel code. Just select “Use a Partner integration” by clicking on “Use a Partner button:
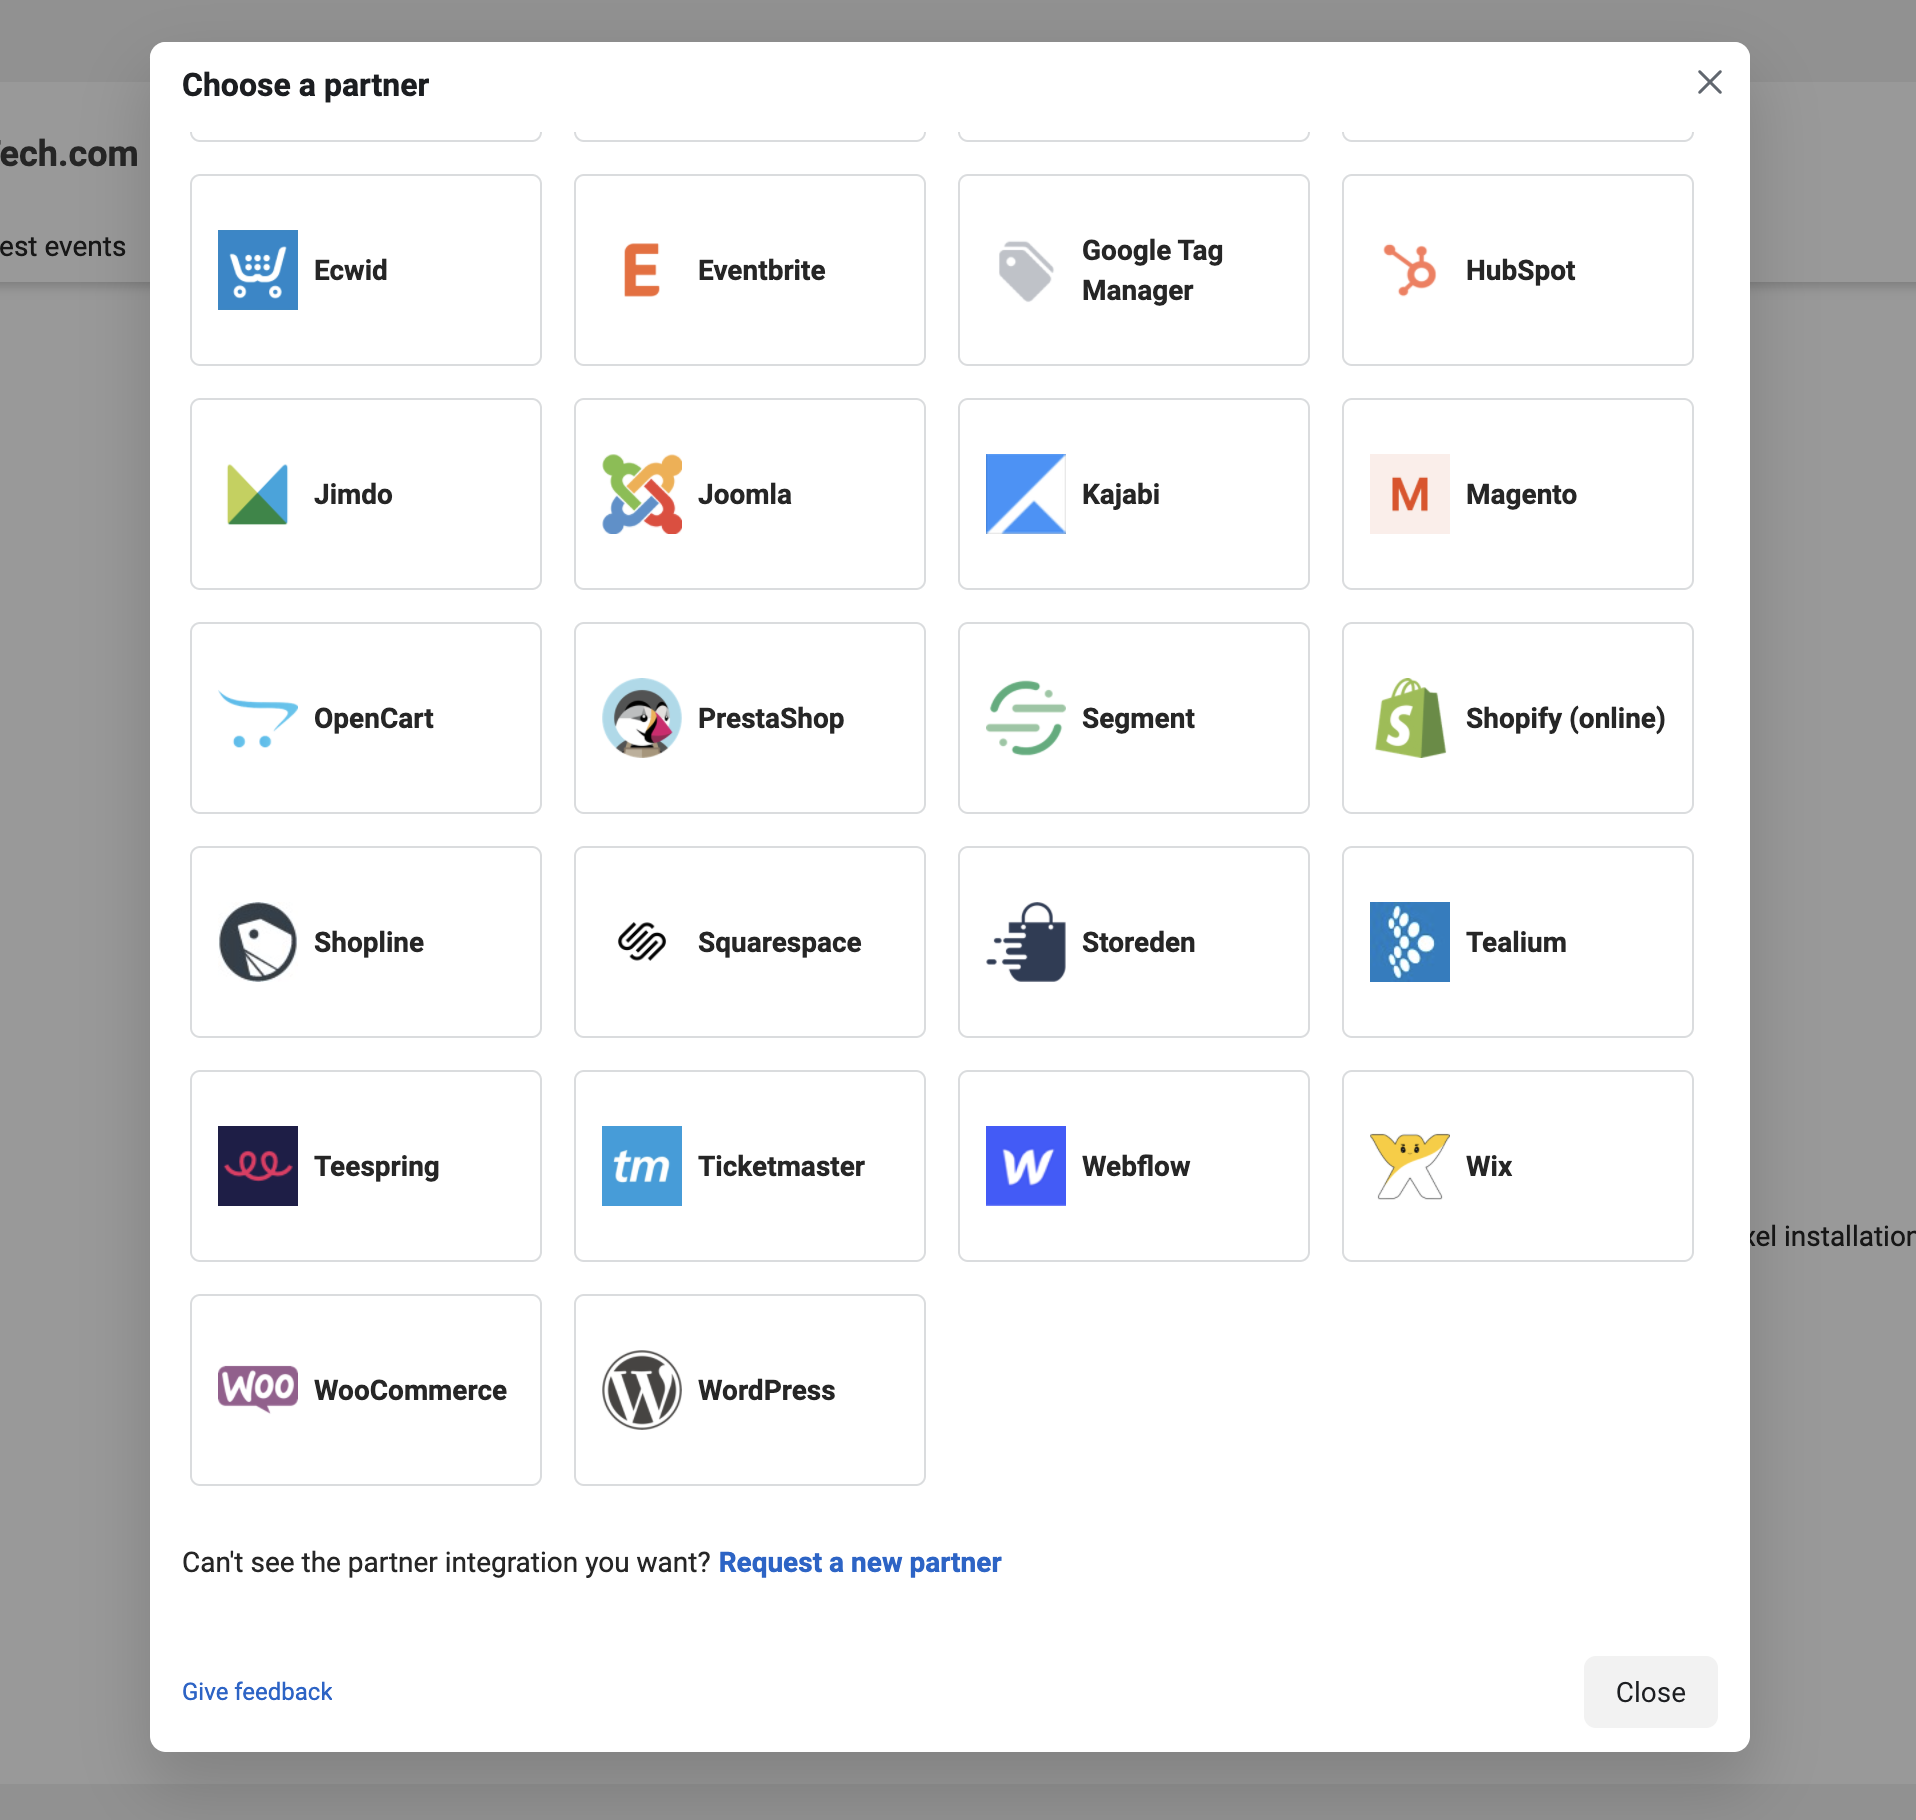
Then from the list of partners, find WordPress, select it and
After clicking on “WordPress” it will show next steps to perform:
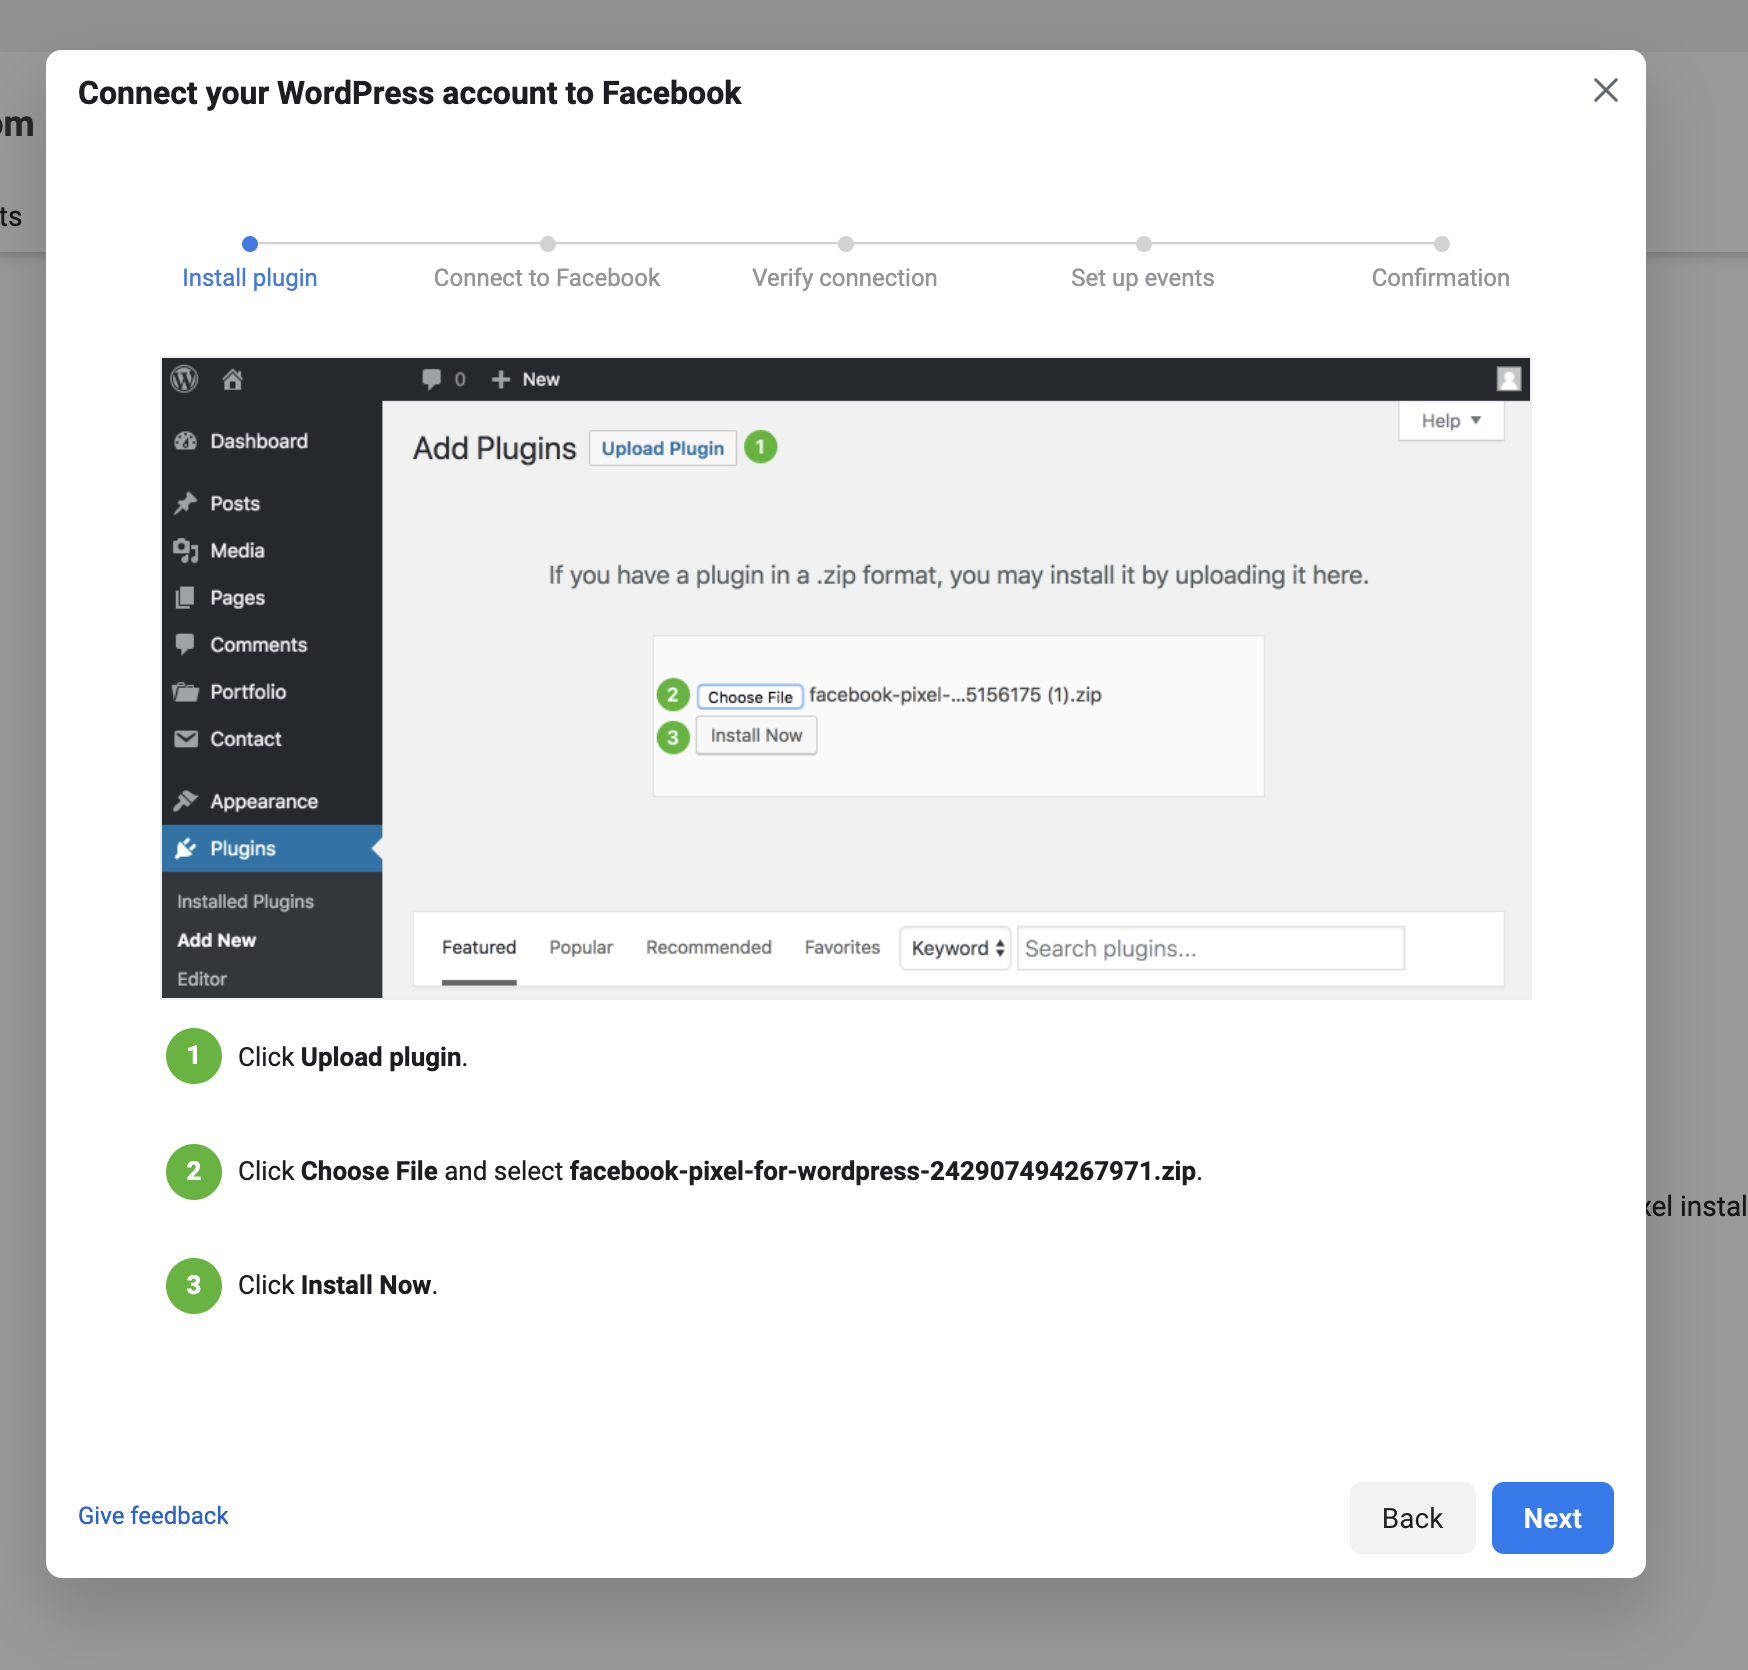
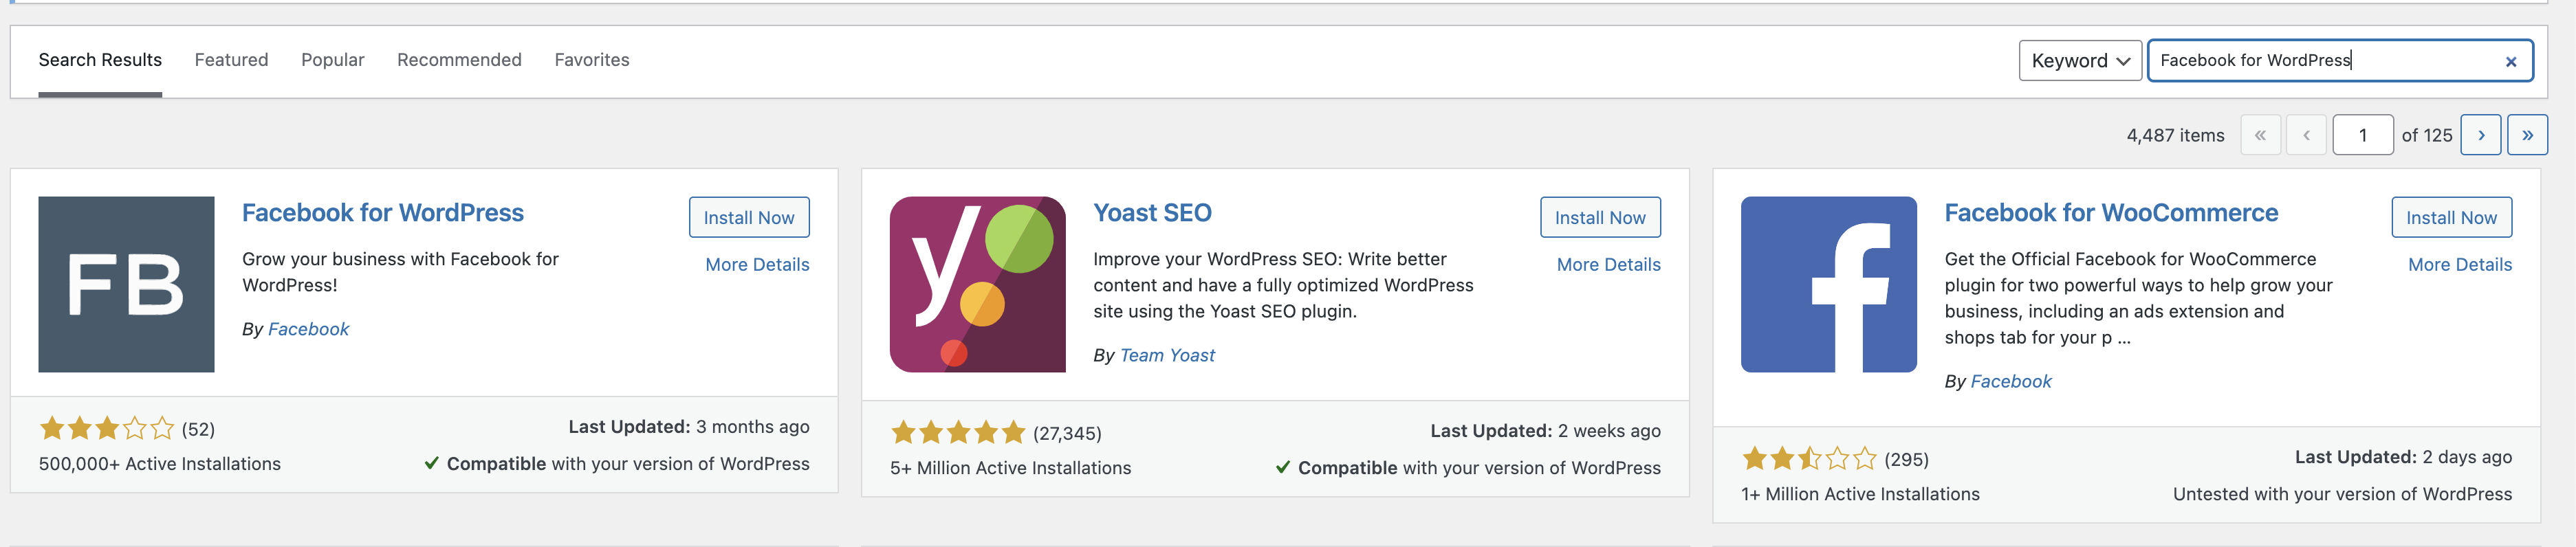
One your wordpress wp-admin dashboard and open the “Add New Plugin” page. Search for Facebook for WordPress and install the plugin:
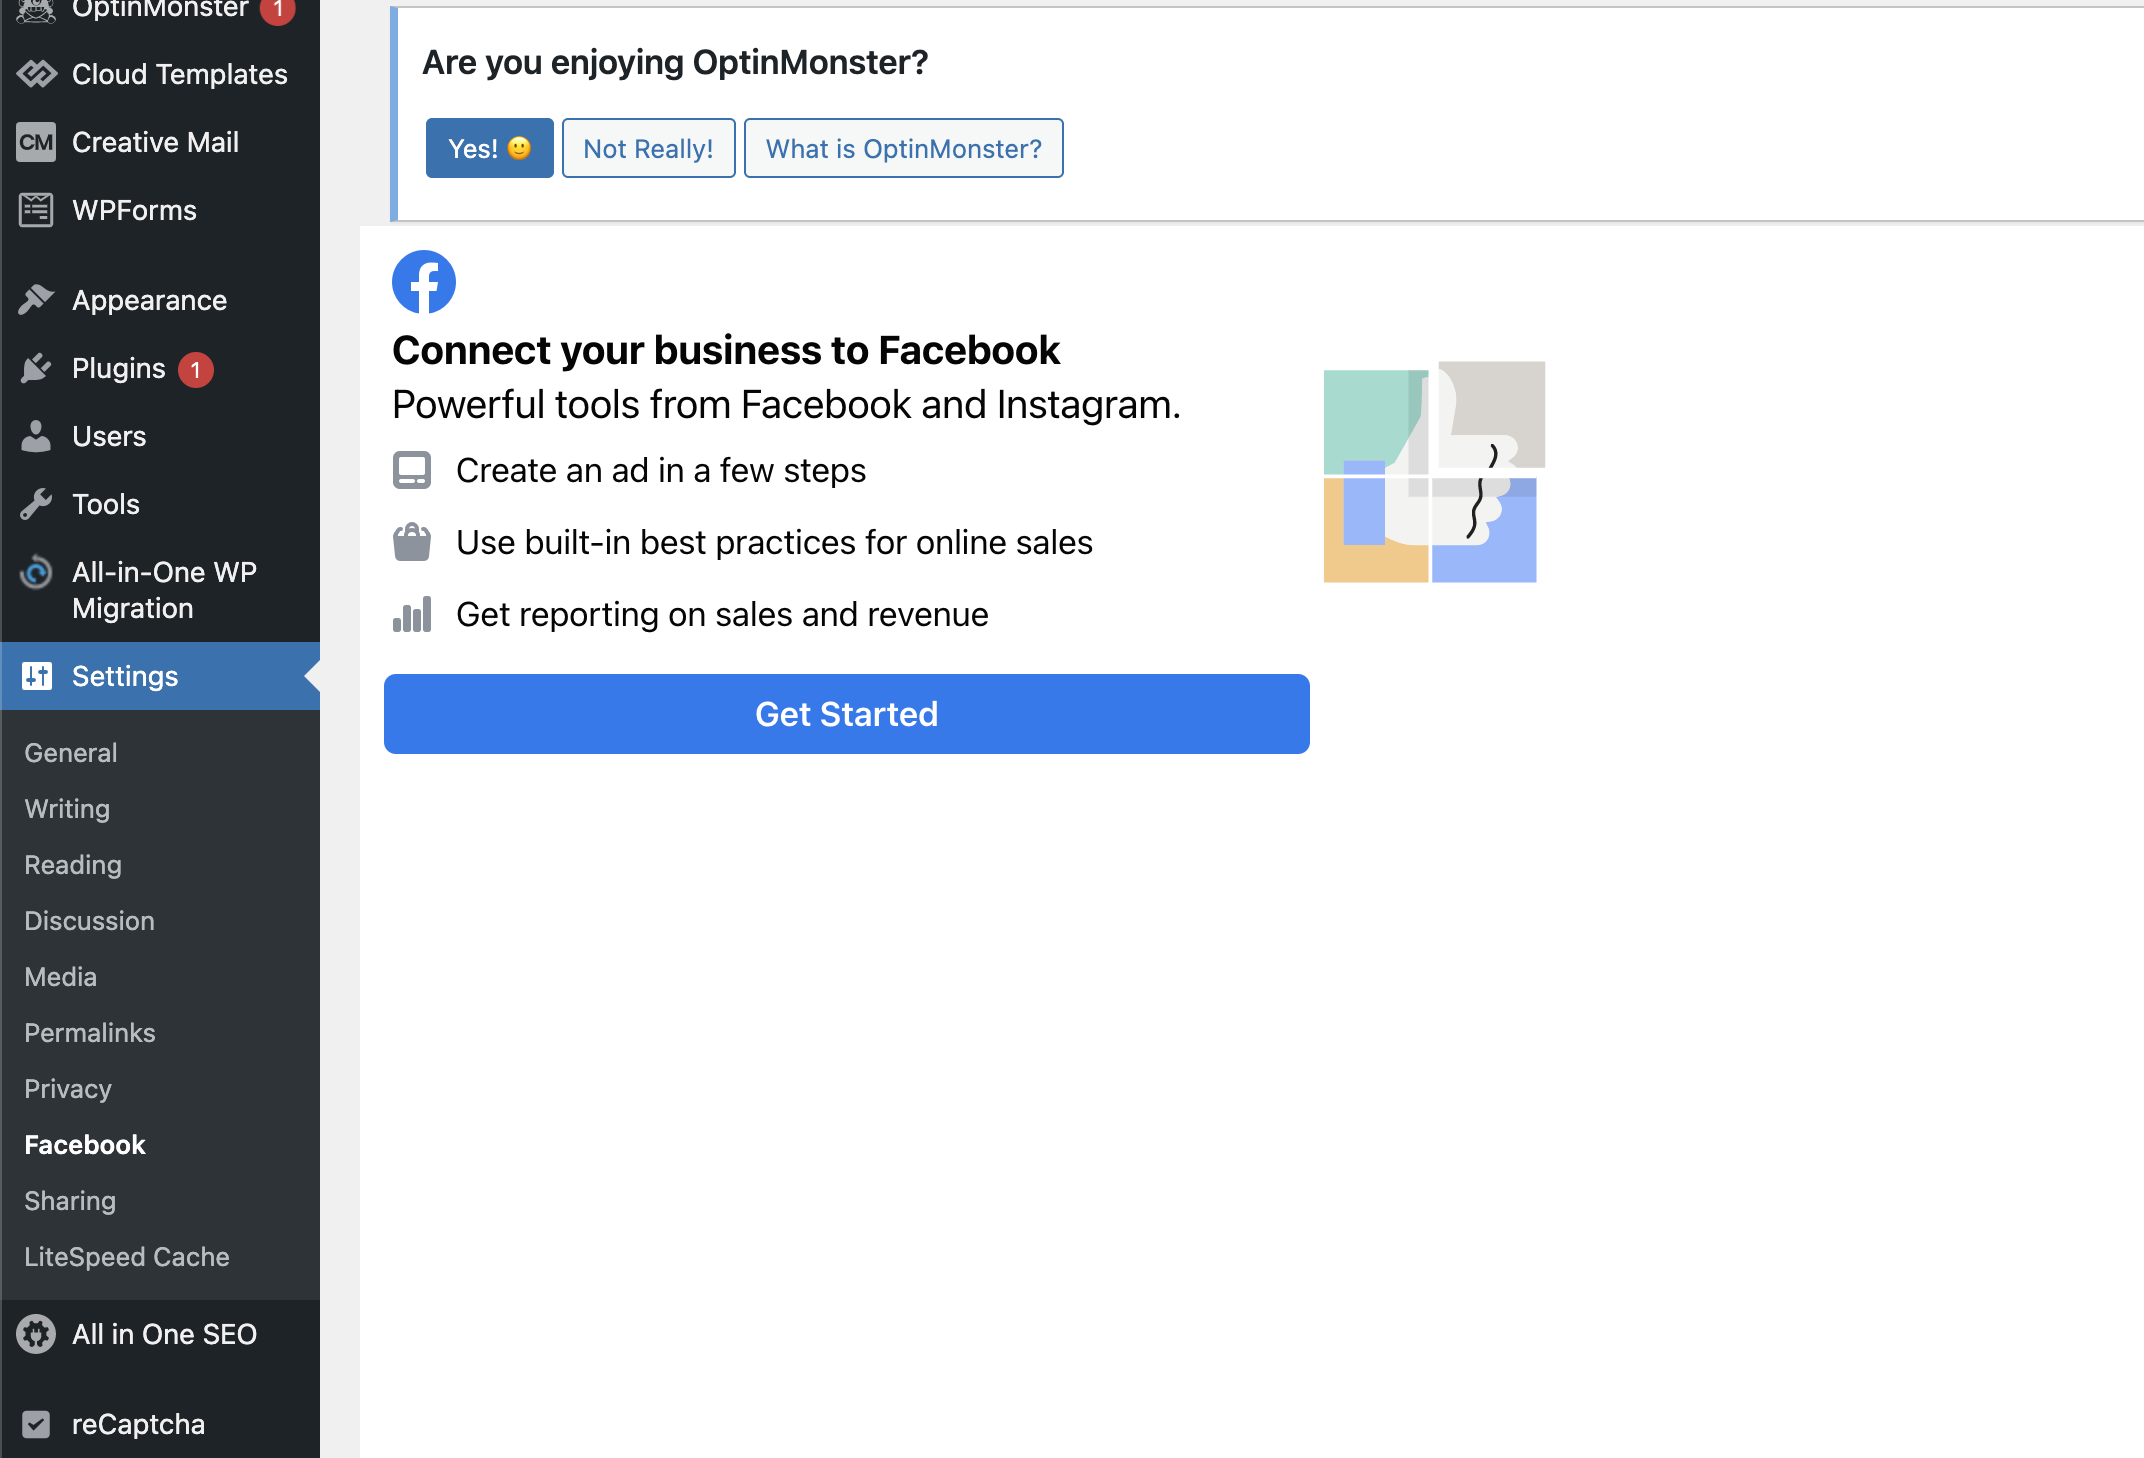
After installation and activation of plugin, open the plugin’s settings page from the Settings > Facebook:
Now go back to the Facebook page where you were completing the steps for the Facebook pixel and click next:
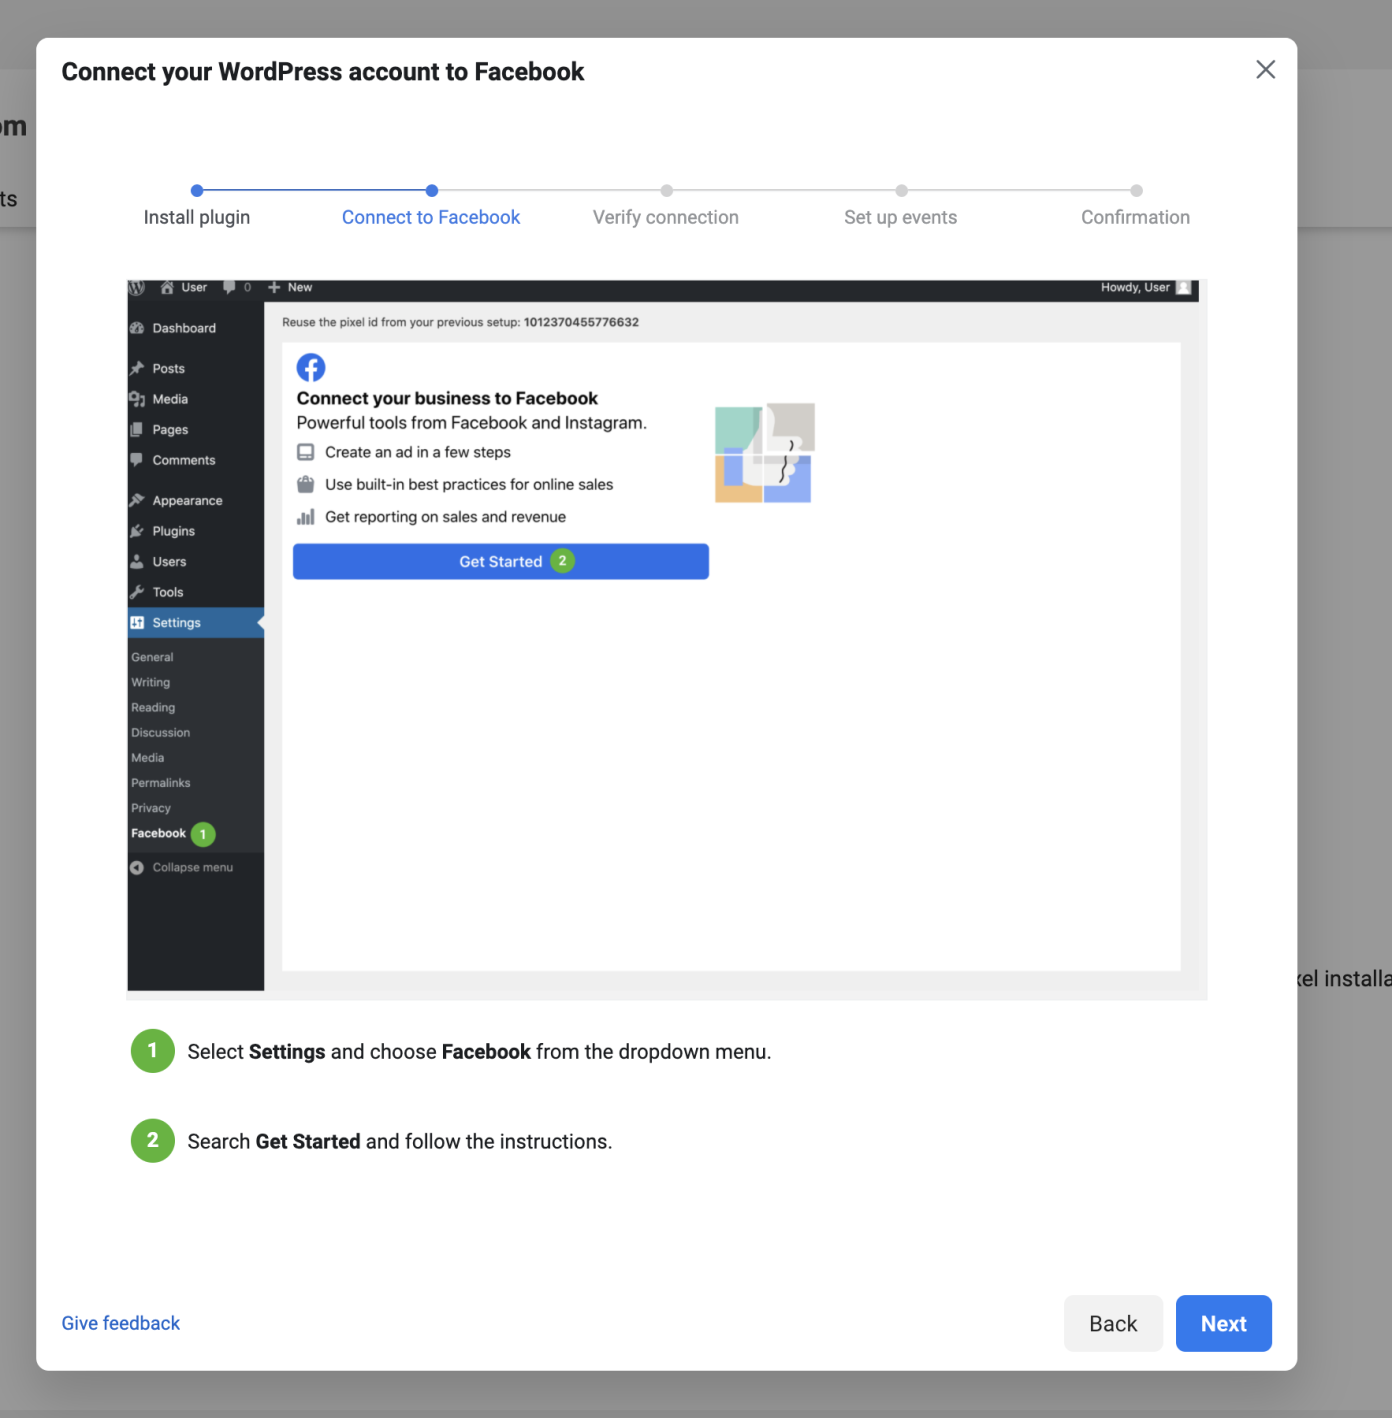
Follow its instruction and go back to wordpress tab and click on “Get Started” button of facebook settings plugin that will then show a consent screen to get your authorisation.
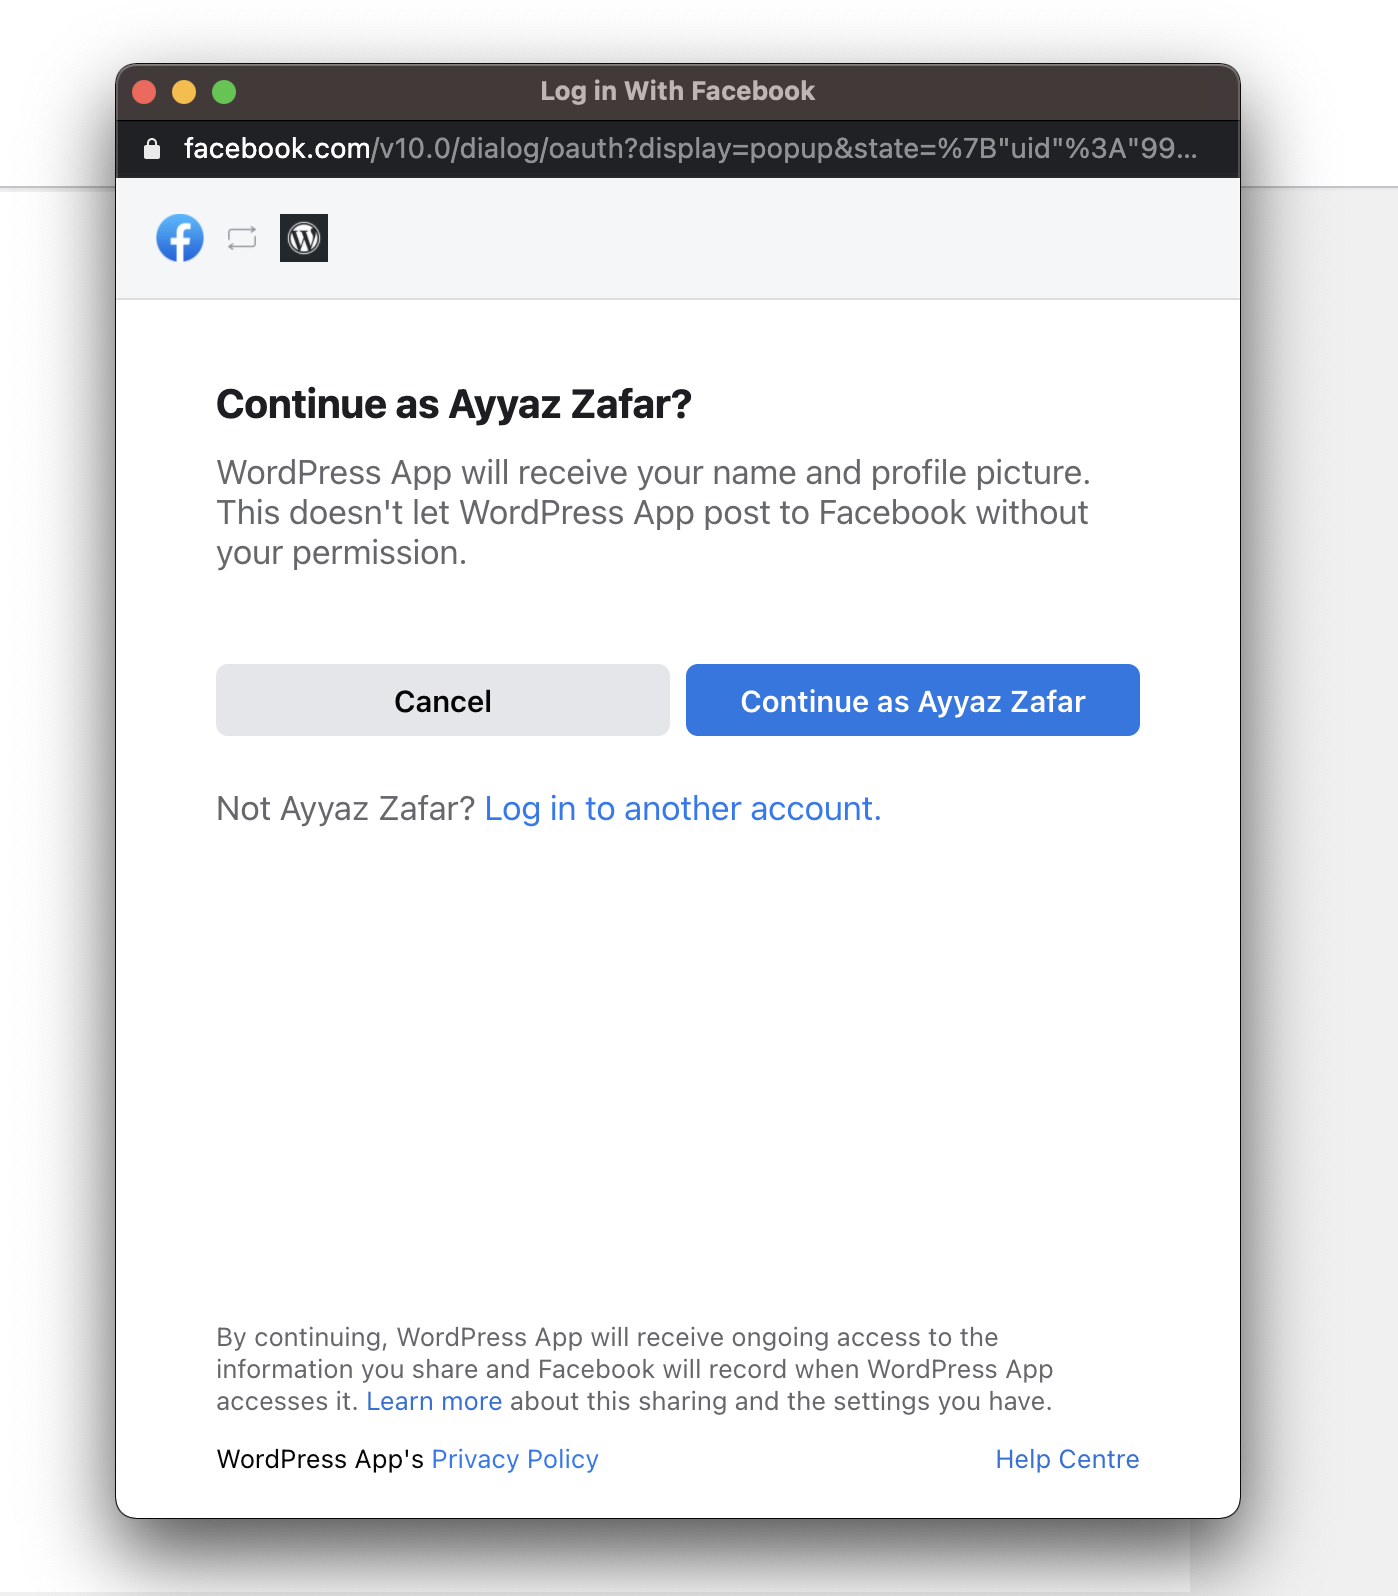
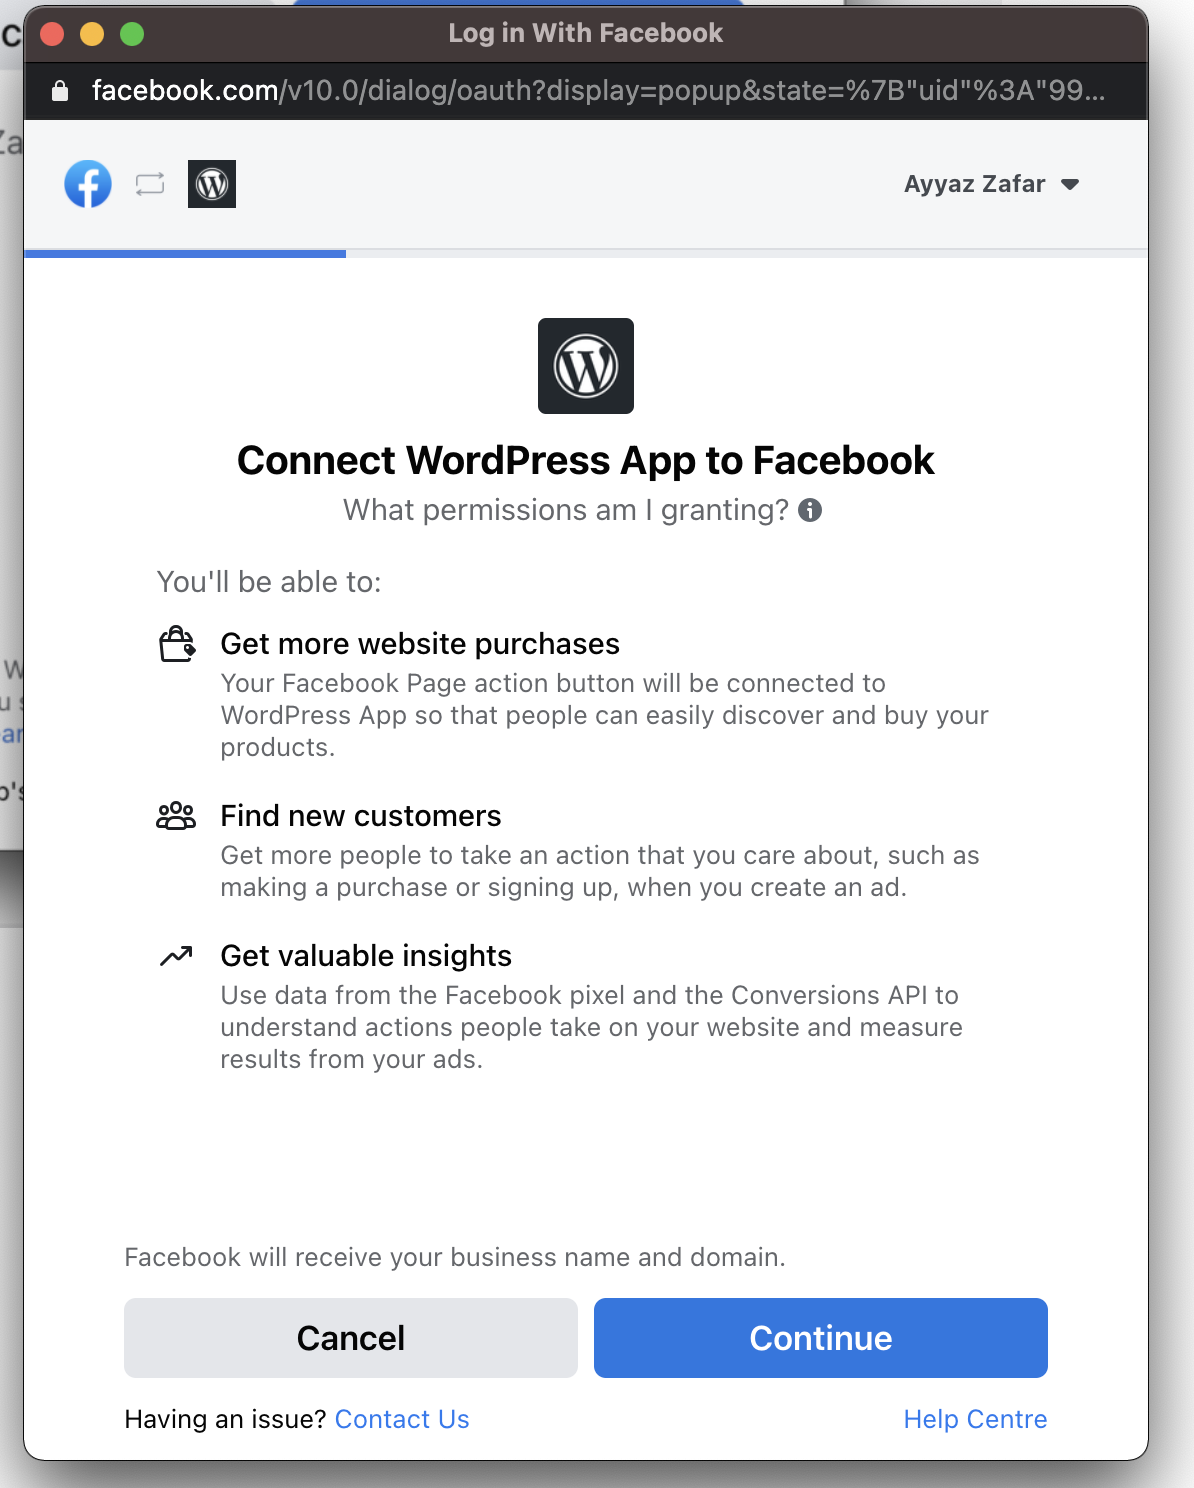
Click on “Continue as …” button and then again click on “Continue” button:
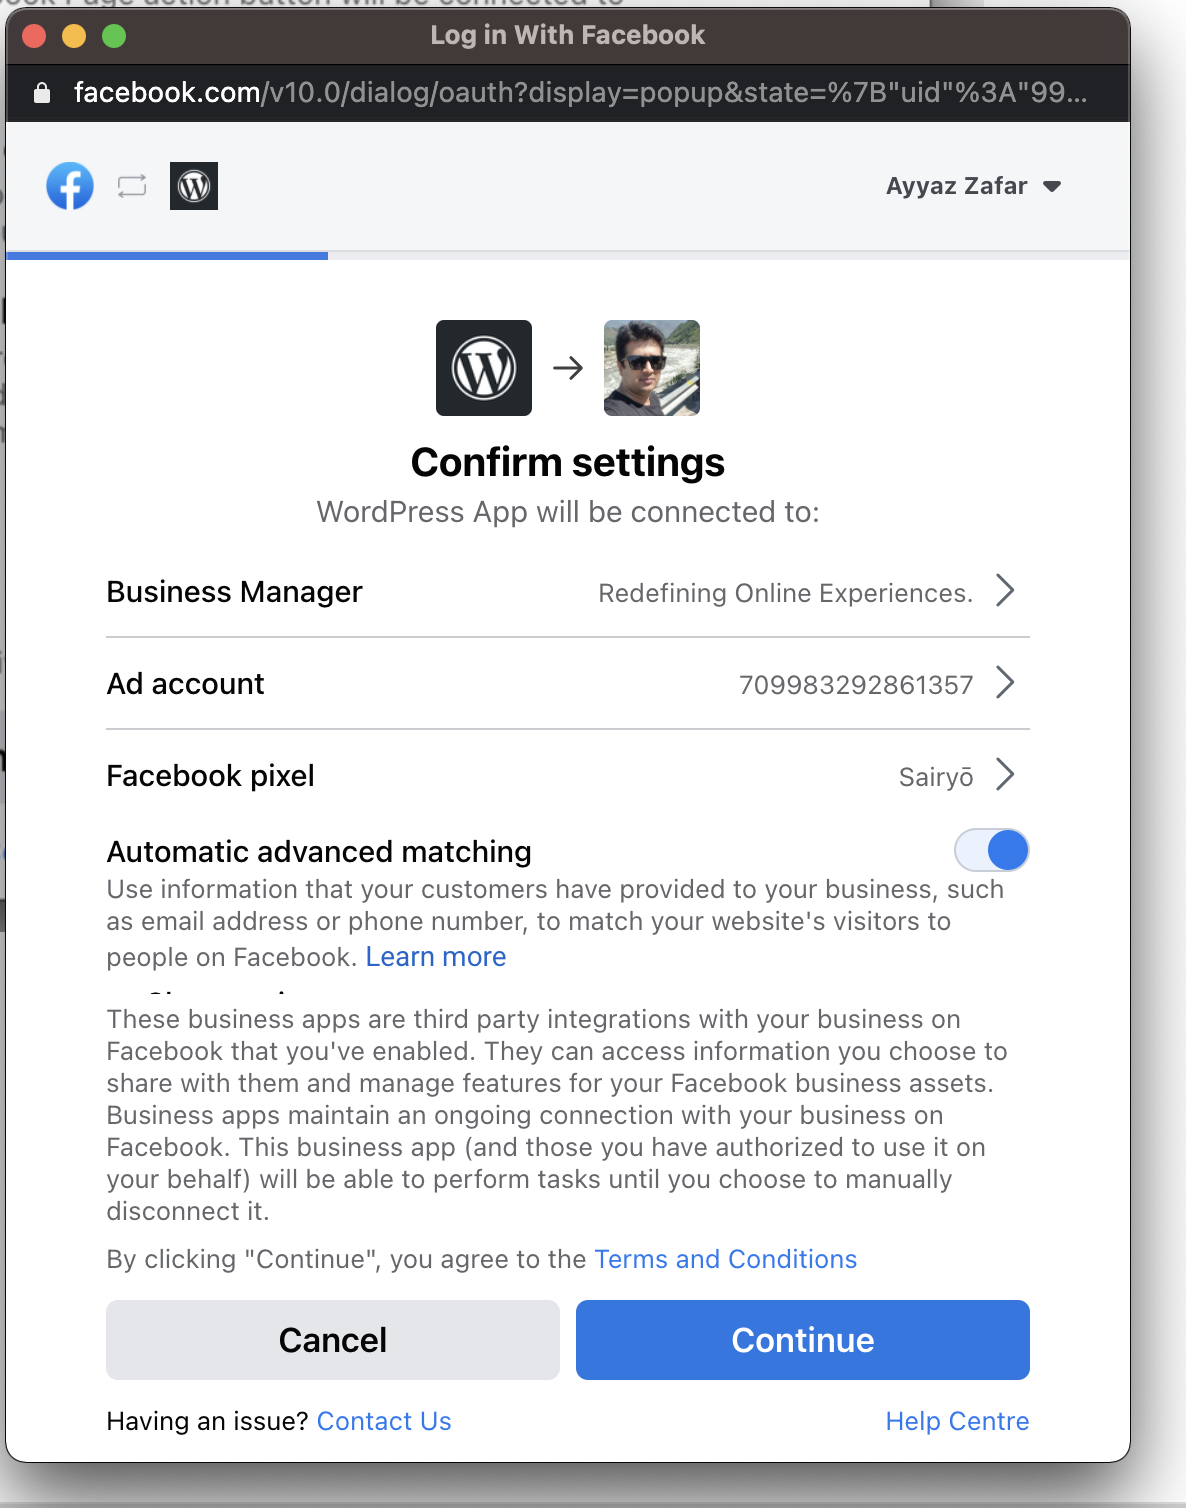
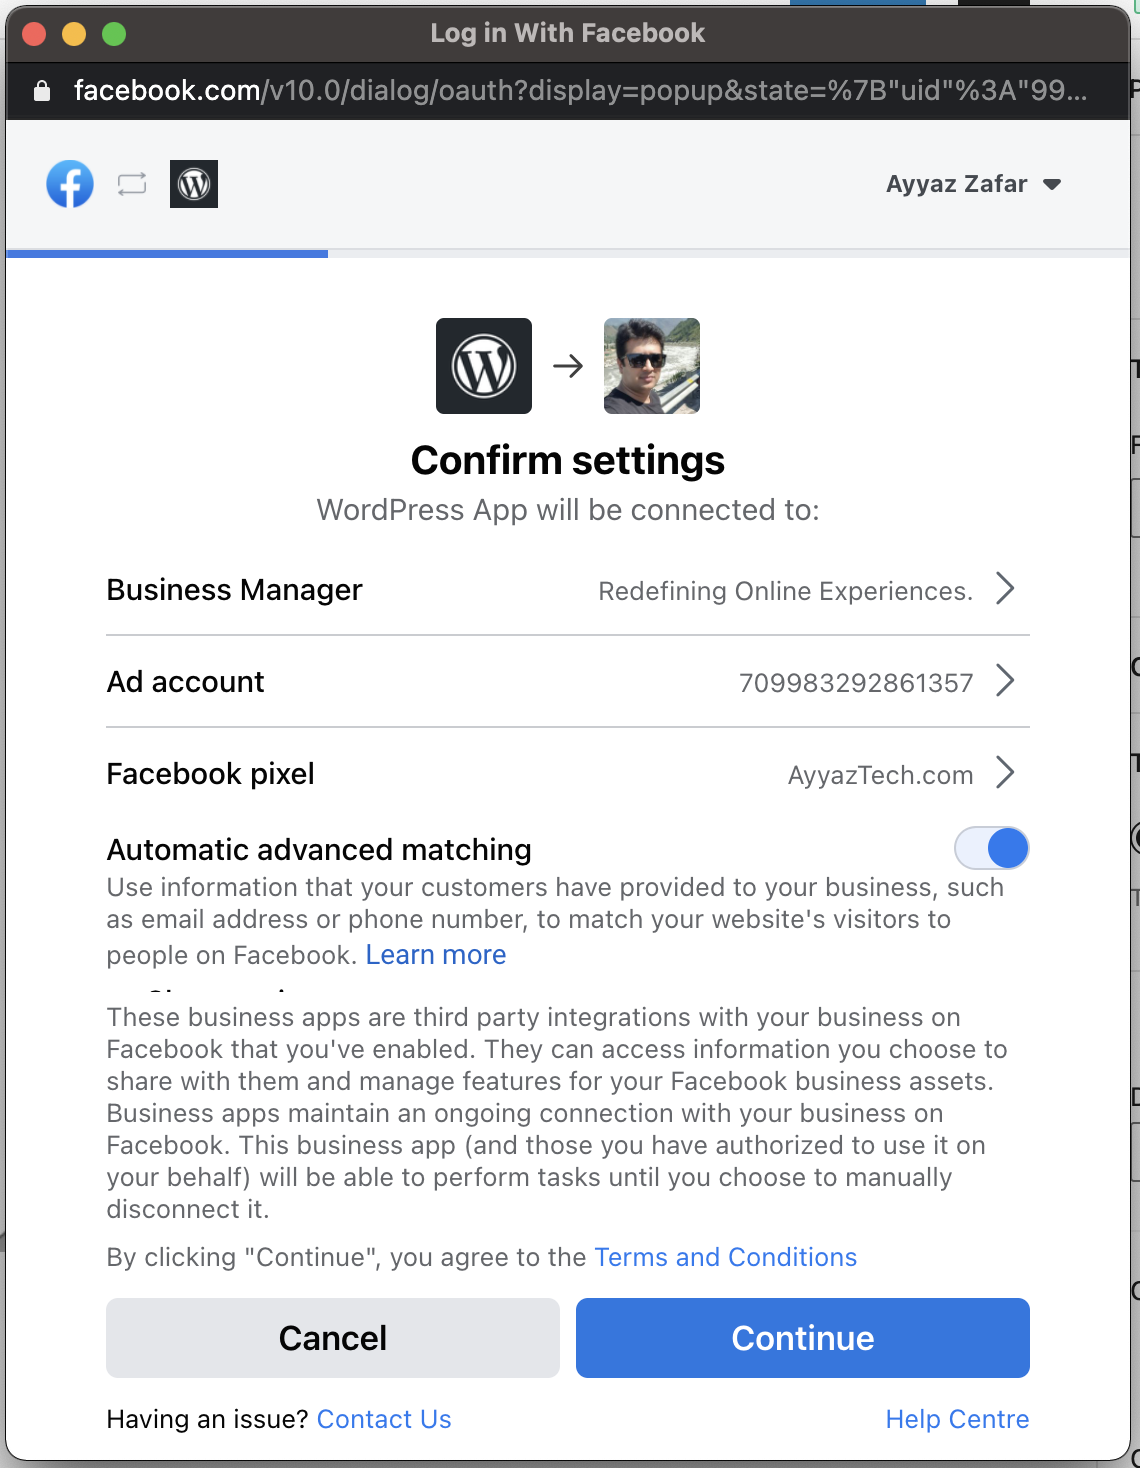
Then in next screen make sure that you select your correct facebook pixel name:
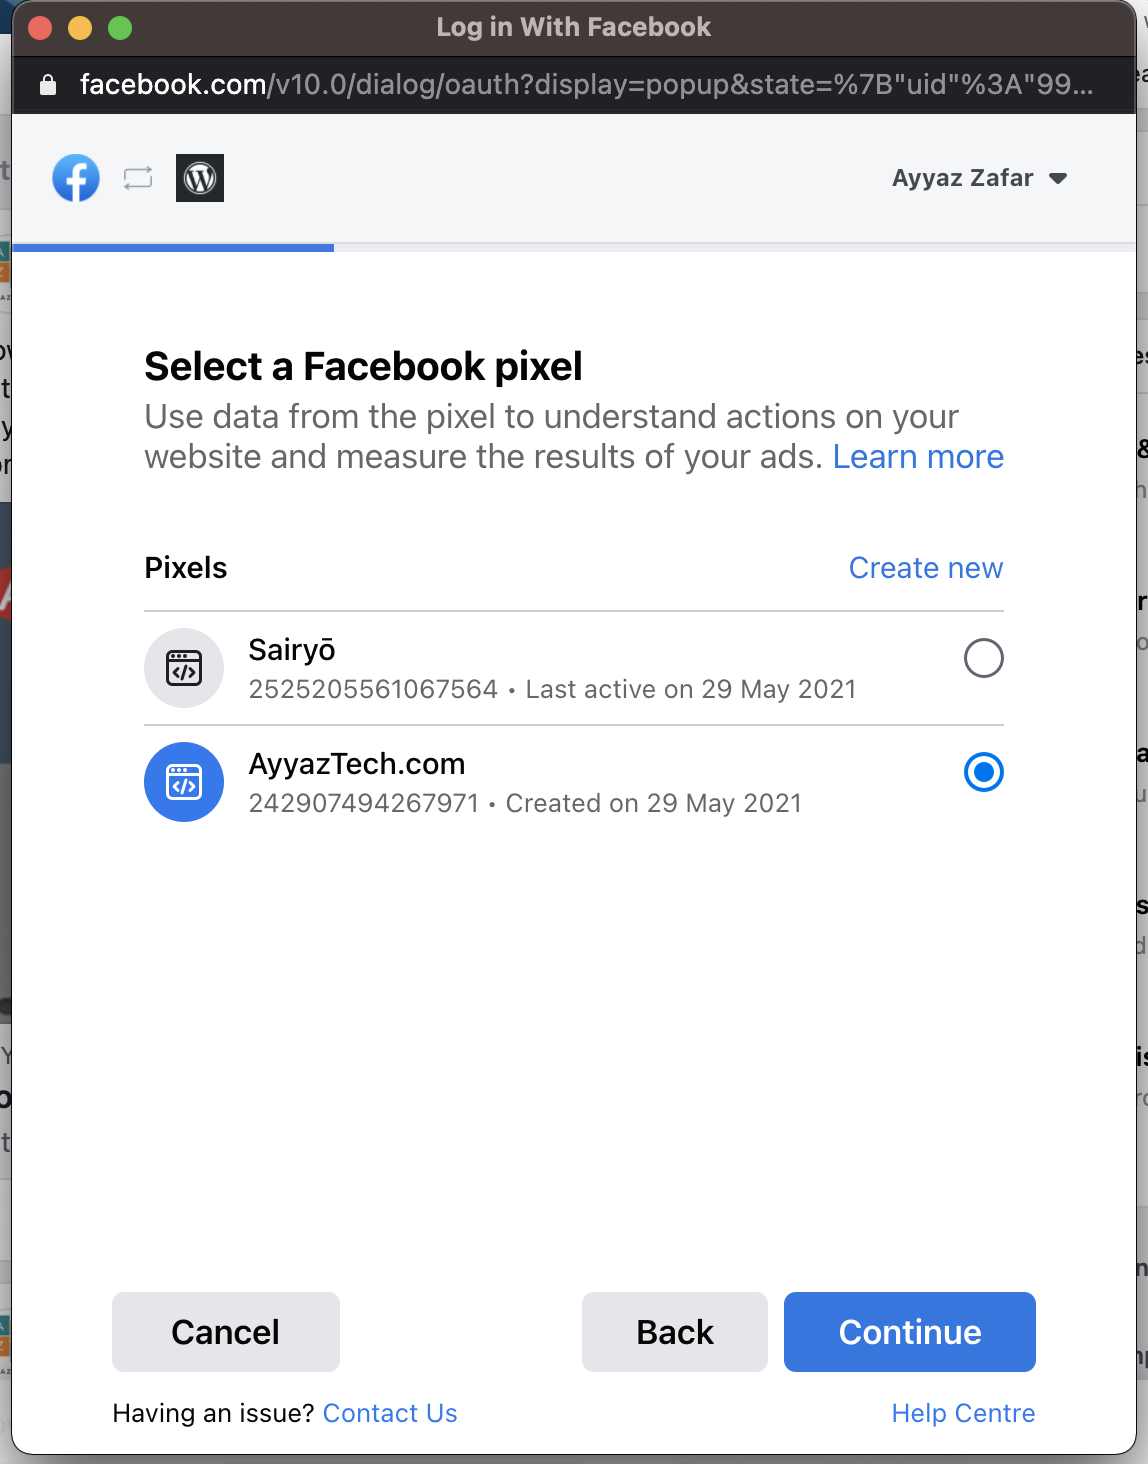
If it is not showing the correct facebook pixel name click on the arrow icon on the “Facebook pixel” row that will then show a another section where you will be able to select the Pixel that you created earlier:
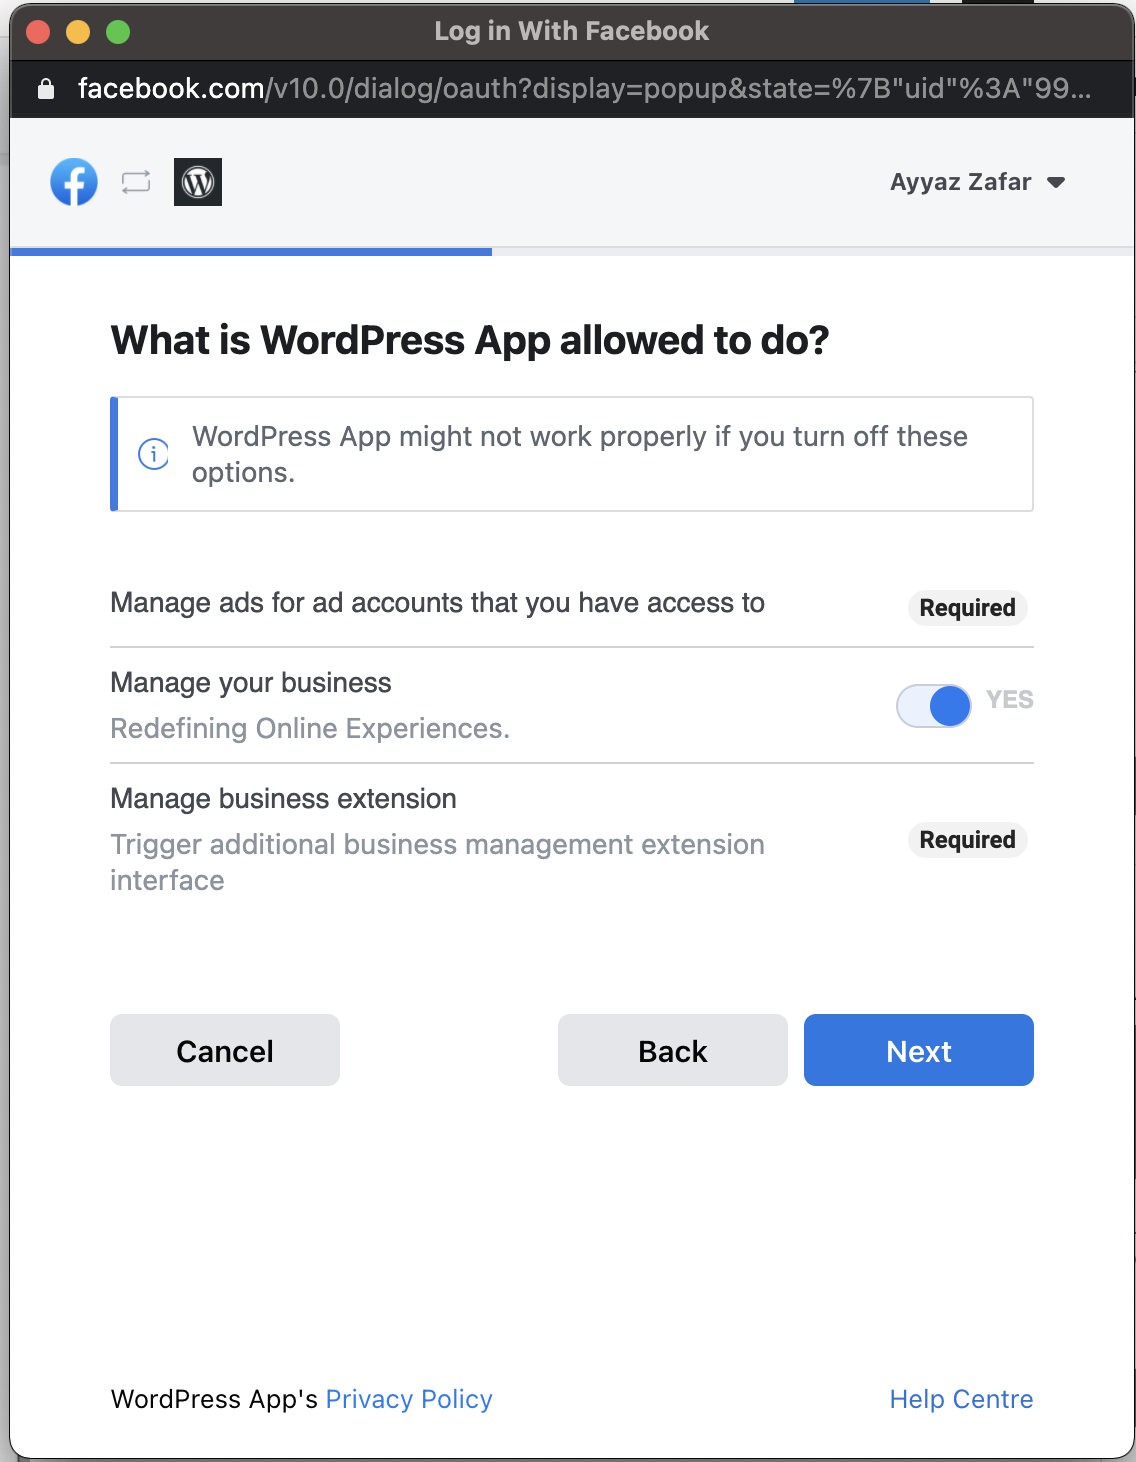
Click on continue button and again click on continue:
Now click on next button on next screen:
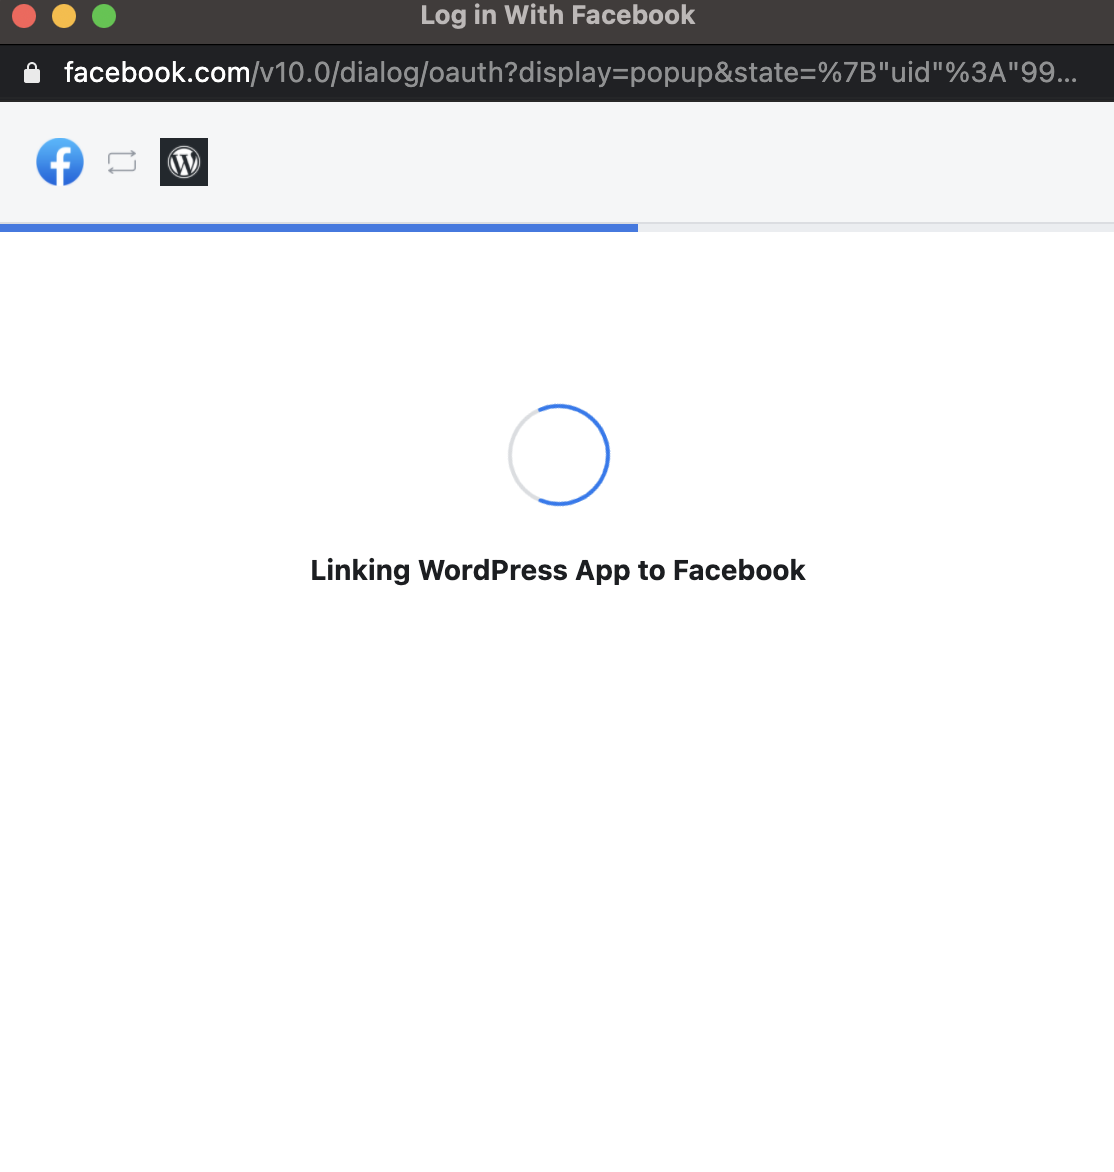
After then it will take a few seconds to link wordpress app with facebook:
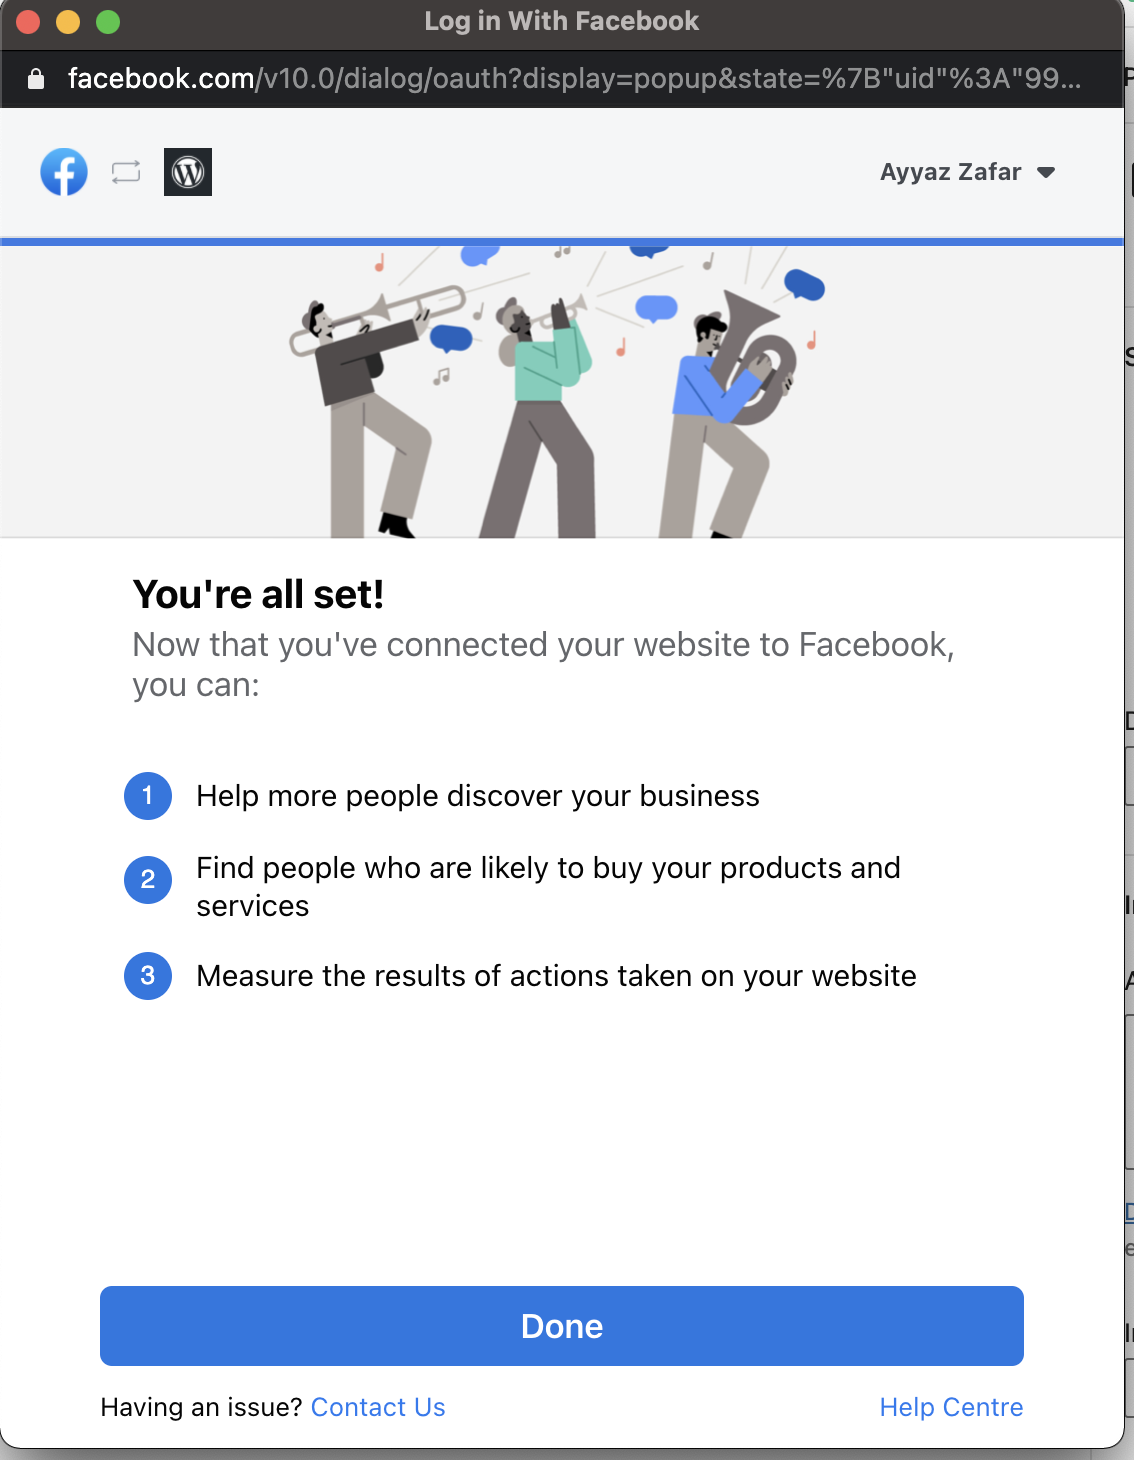
After linking is completed, you will see a success screen like in the screenshot below and just click on done button:
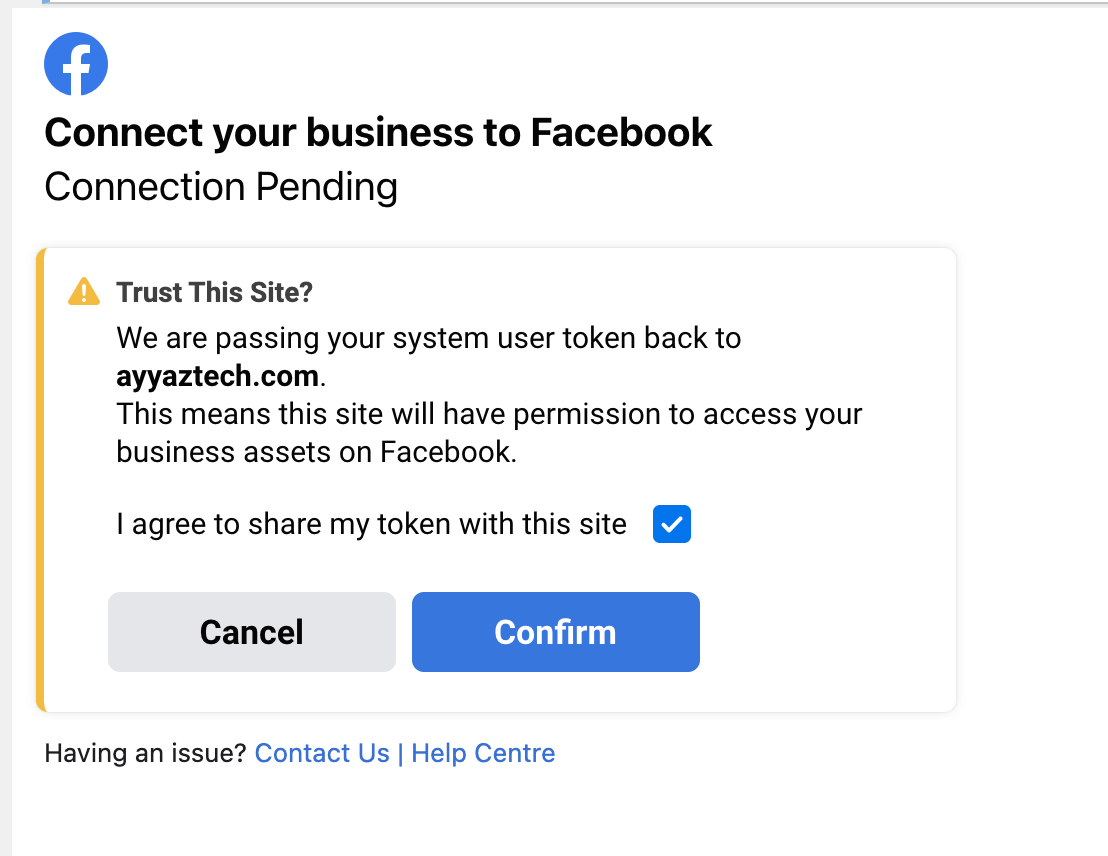
Now go back to your wordpress app tab, agree to their condition by clicking on checkbox and click on “Confirm” button:
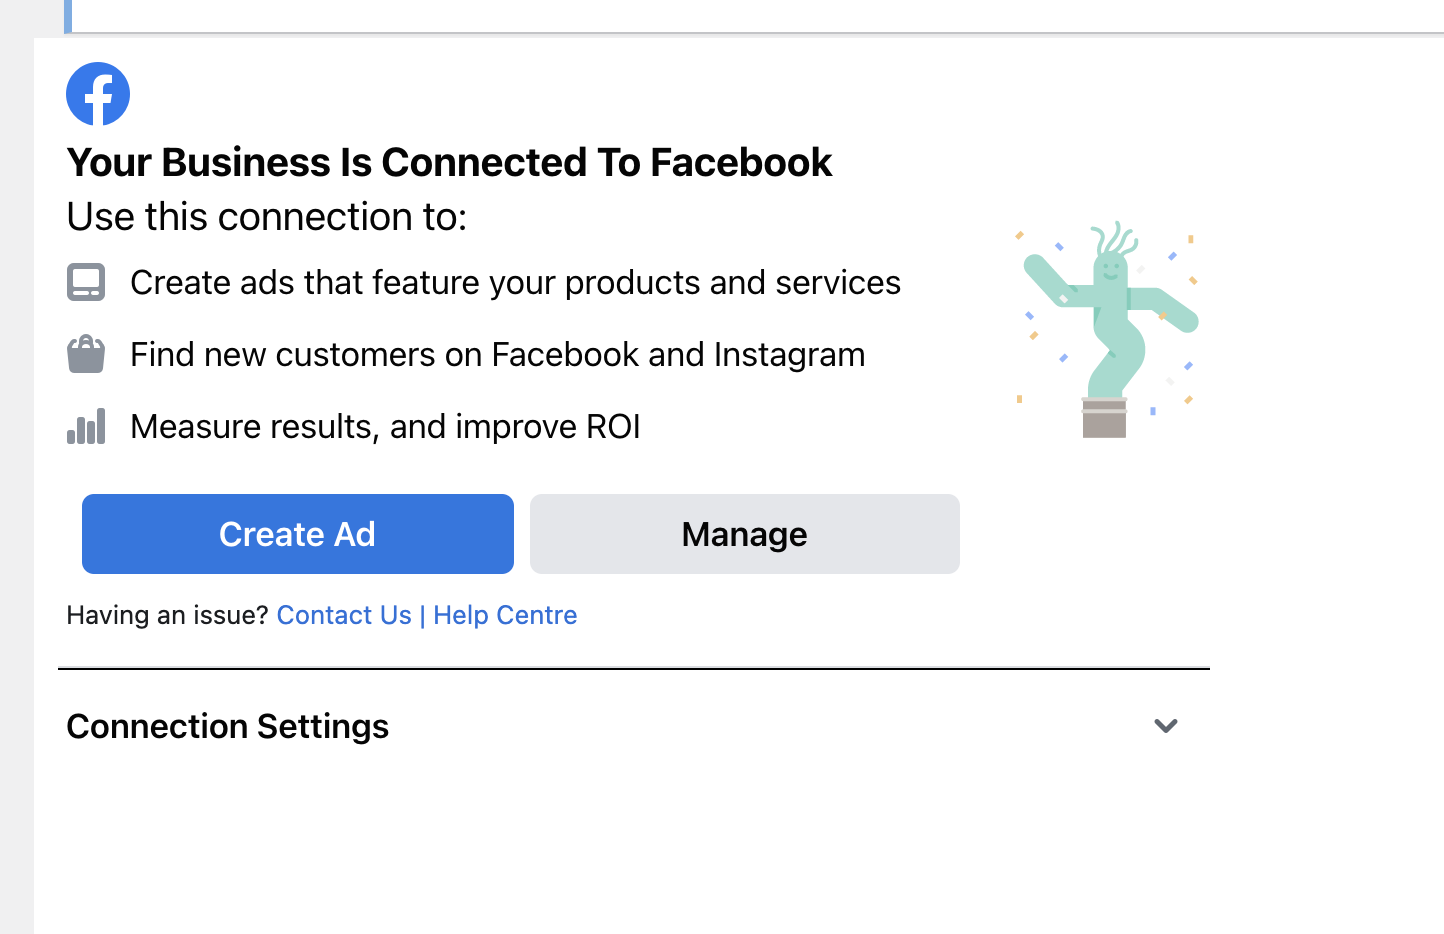
After that you will see success message that it is connected successfully:
Now go back to the facebook tab, click on next button and then click on “Send Test Traffic” button:
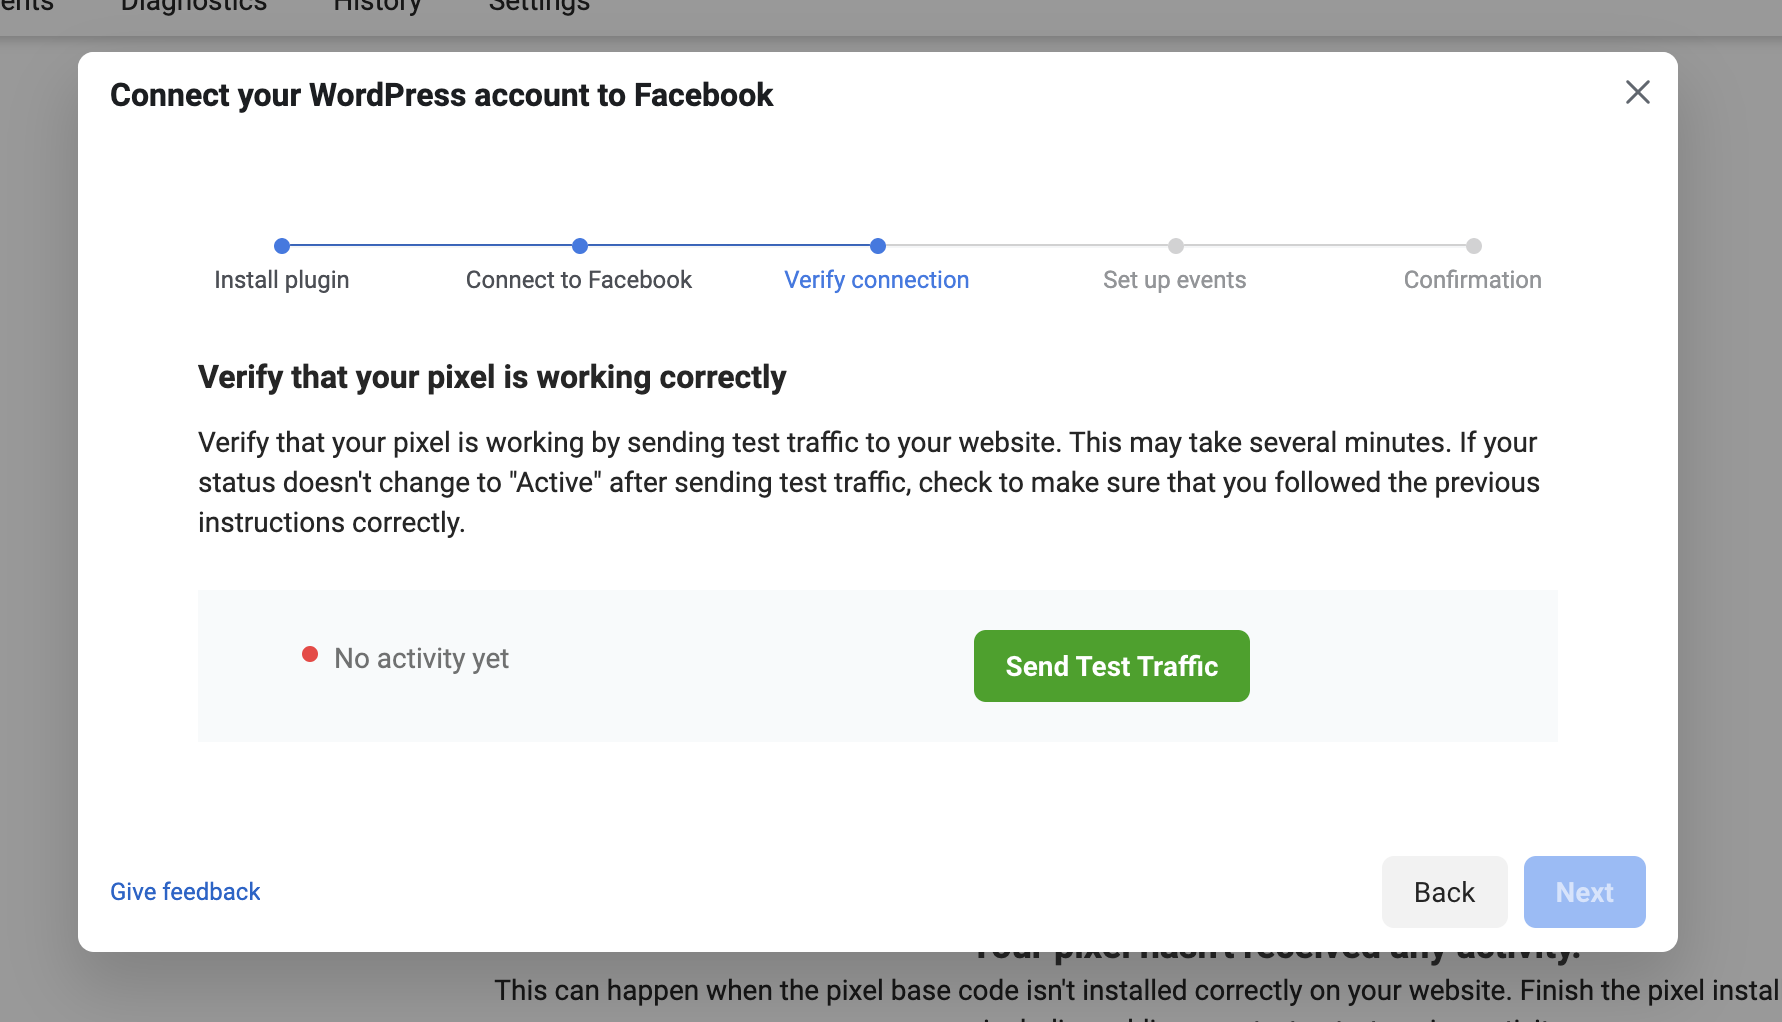
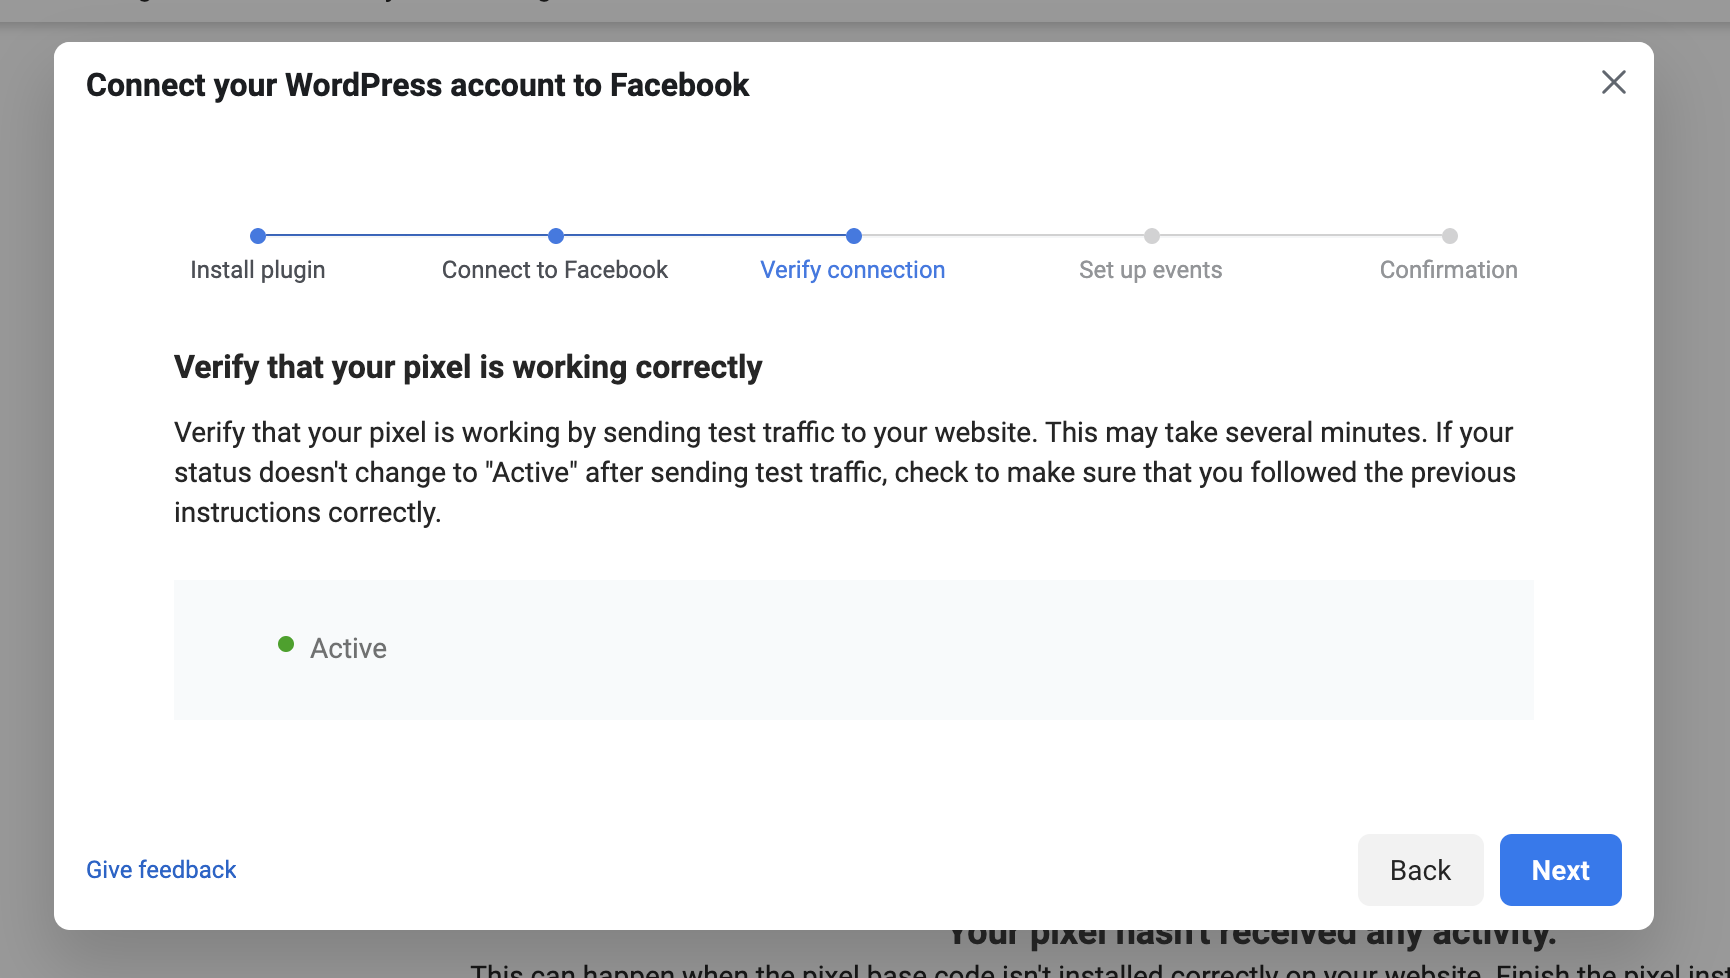
If all configuration was done successfully then you will see the green Indicator with the “Active” message in facebook:
Now click on Next button and then click on next again, that will then show you the “Setup complete!” step:
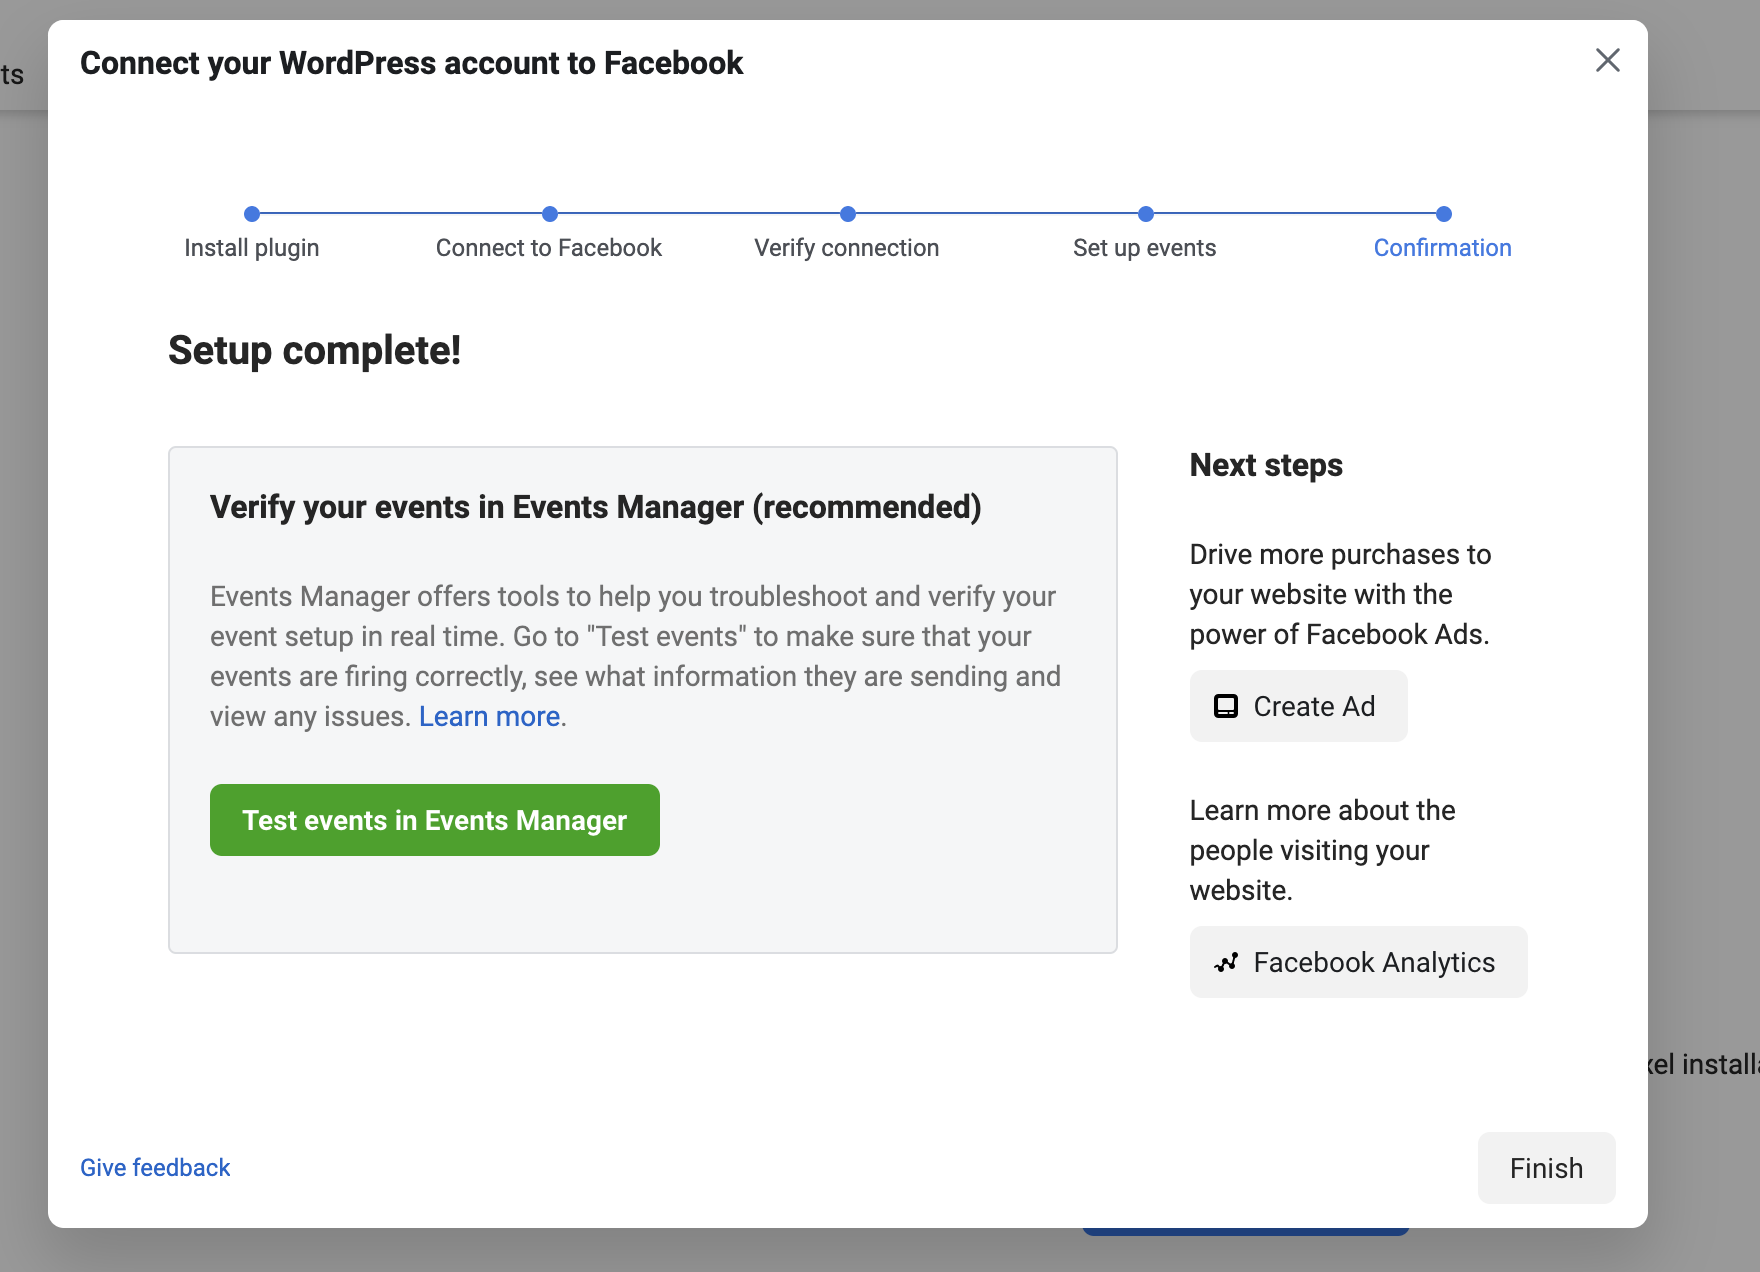
Click finish to close it.
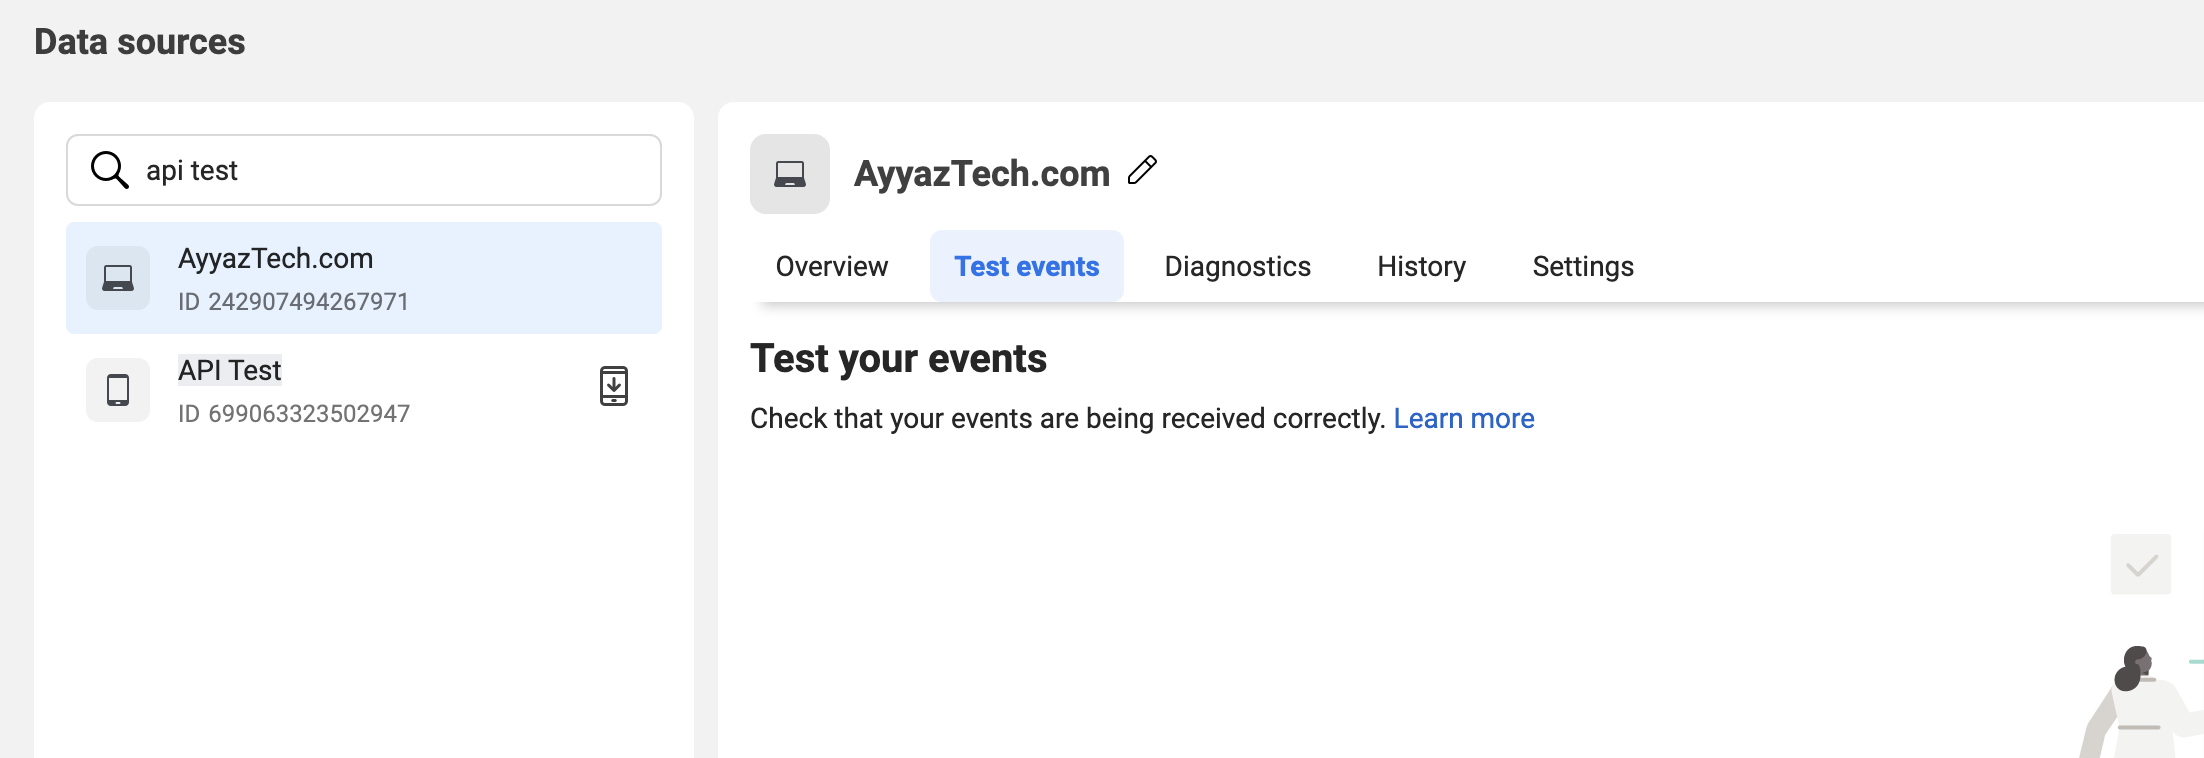
Now go to the “Test Events” tab:
Type your website url and click on “Open Website”:
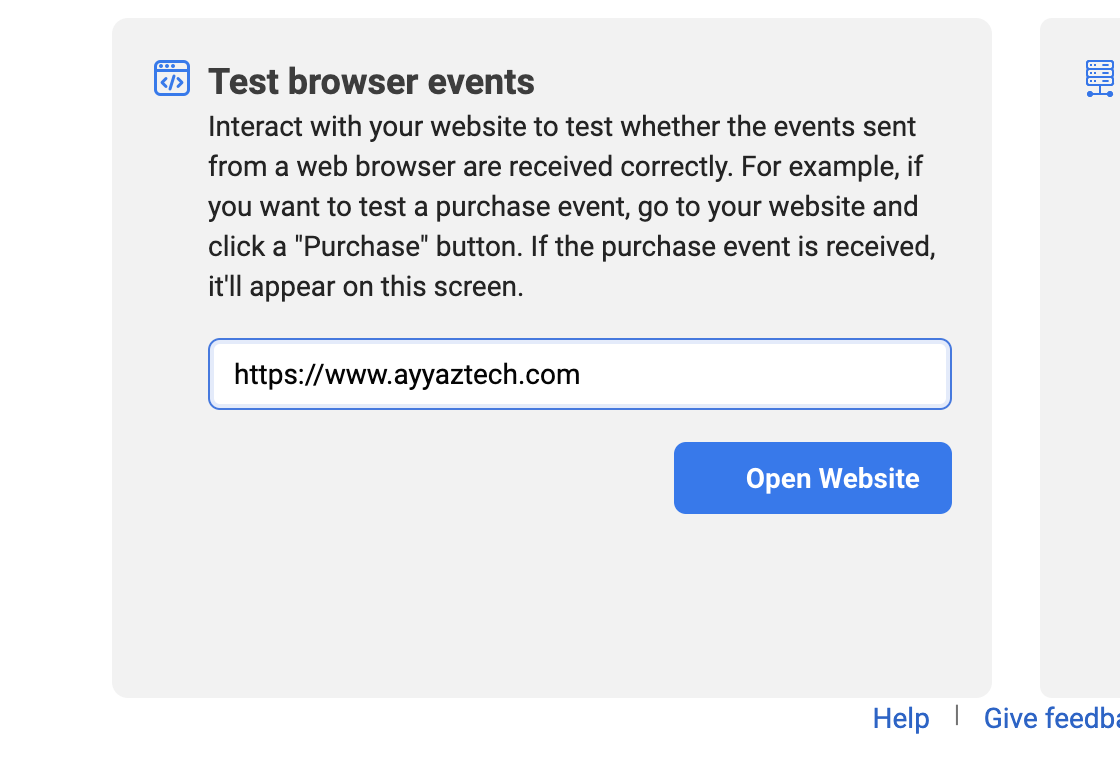
As soon as you visit the web page, you will notice an event “PageView” received in real-time. That means everything is set up and working correctly. Now Your Facebook pixel is properly integrated with your WordPress website and you can now use it.
I hope that this article was helpful for you. I also have a youtube channel where I upload many tutorials that can be helpful for you. So please don’t forget to click on the bell icon so that you don’t miss any notification.