How to Use OpenAI API with Python 3?
Introduction
Welcome to this tutorial on how to use the OpenAI API with Python 3. In this article, we will walk through the steps to set up a virtual environment, install the necessary dependencies, and write code to interact with the OpenAI API. By the end of this tutorial, you will have a basic understanding of how to harness the power of OpenAI in your Python projects.
Prerequisites
Before we begin, make sure you have the following:
- Python 3 installed on your computer
- A text editor or IDE (e.g., VS Code)
- An OpenAI API key
Setting Up the Environment
- Open your terminal and create a new folder for your project.
- Navigate to the project folder and open it in your preferred text editor.
- Start a virtual environment by running the following command:
python -m venv env4. Activate the virtual environment:
source env/bin/activate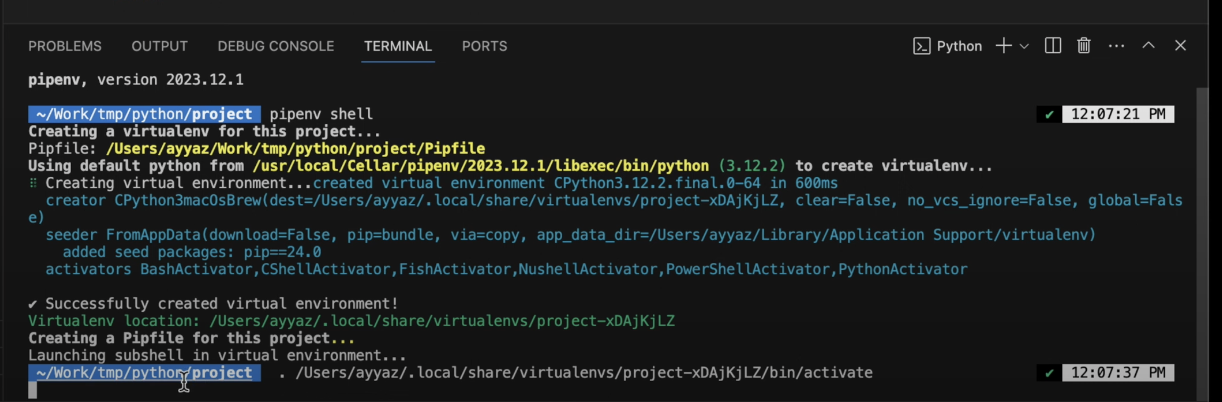
Installing Dependencies
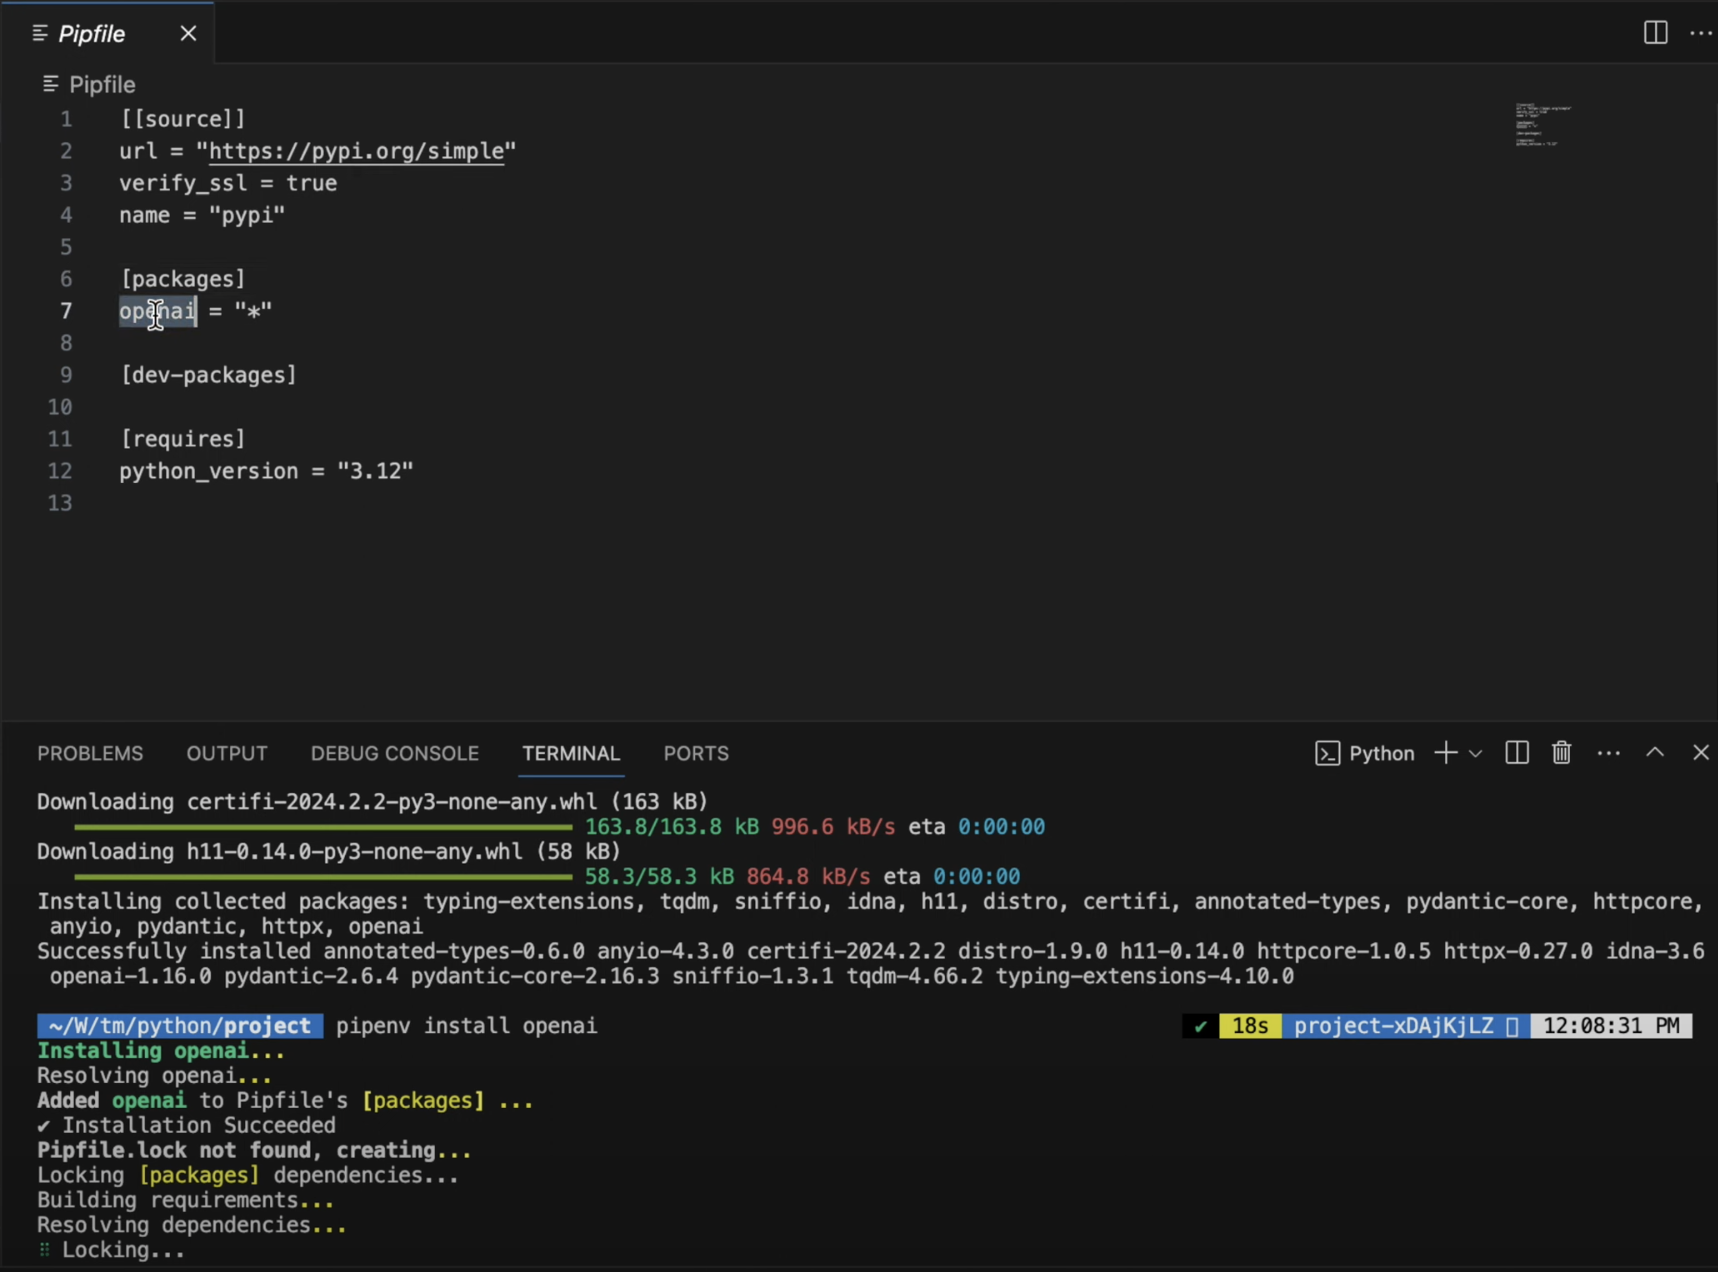
- Open the OpenAI documentation in your web browser.
- Copy the command to install the OpenAI package using pip:
pip install openai- Run the command in your terminal to install the OpenAI dependency within the virtual environment.
Writing the Code
- Create a new file named
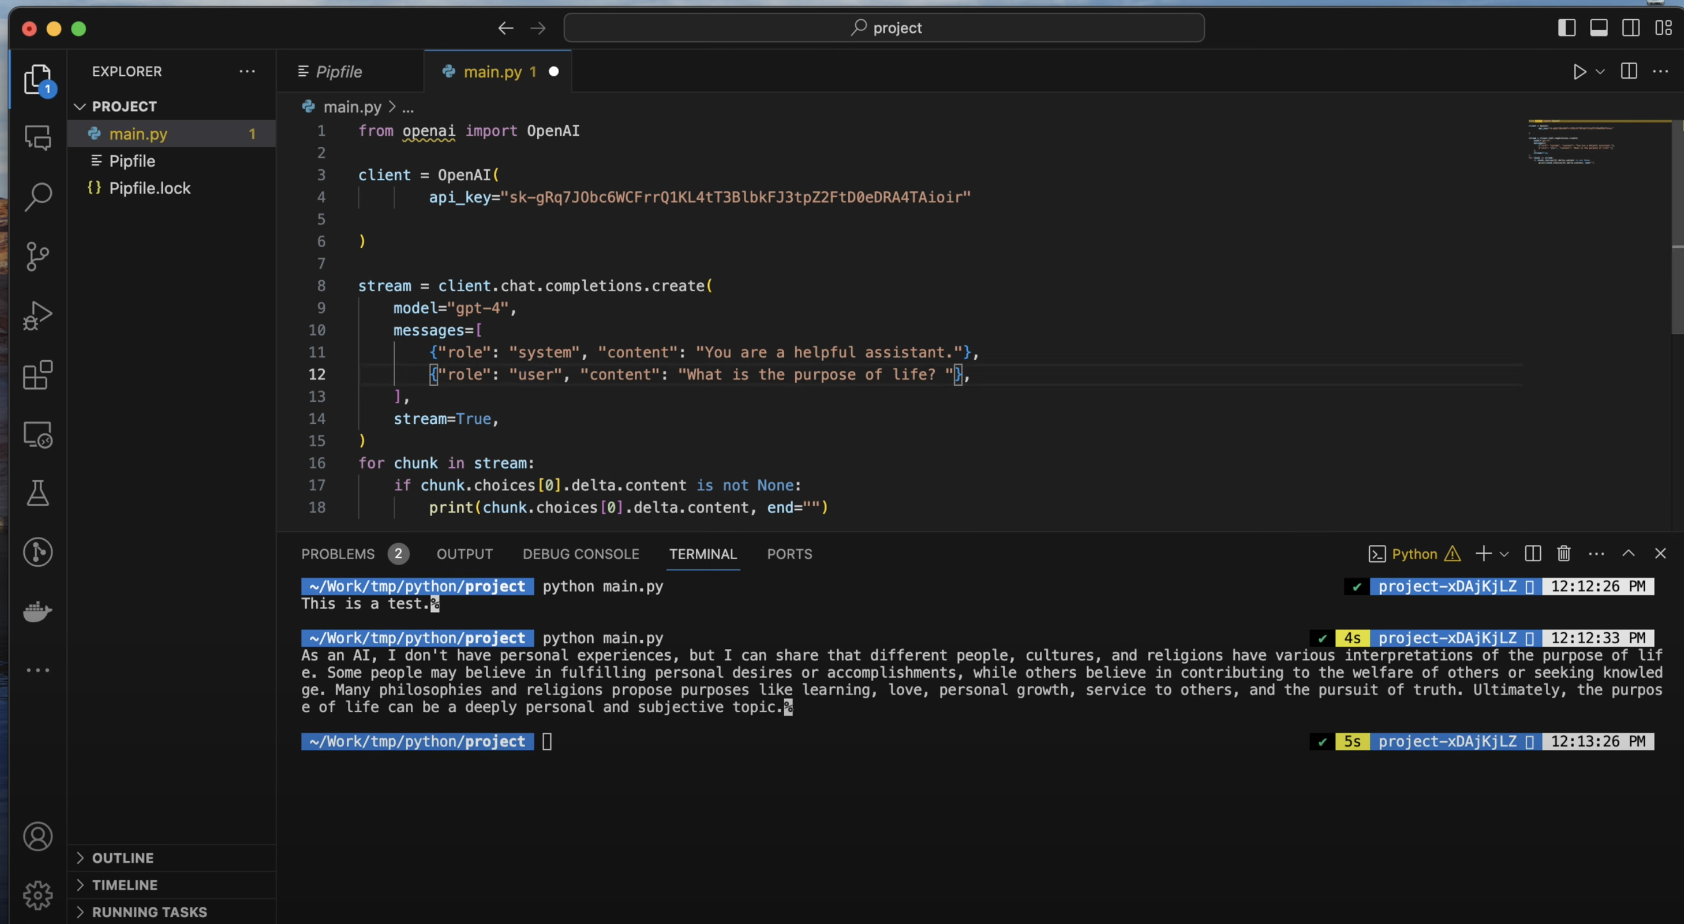
main.pyin your project folder. - Open
main.pyand paste the following code:
import openai

openai.api_key = "YOUR_API_KEY"

response = openai.ChatCompletion.create(
    model="gpt-3.5-turbo",
    messages=[
        {"role": "system", "content": "You are a helpful assistant."},
        {"role": "user", "content": "What is the purpose of life?"}
    ],
    stream=True
)

for chunk in response:
    content = chunk["choices"][0].get("delta", {}).get("content")
    if content is not None:
        print(content, end='', flush=True)
3. Replace "YOUR_API_KEY" with your actual OpenAI API key.
Running the Code
- Save the
main.pyfile. - In your terminal, run the following command:
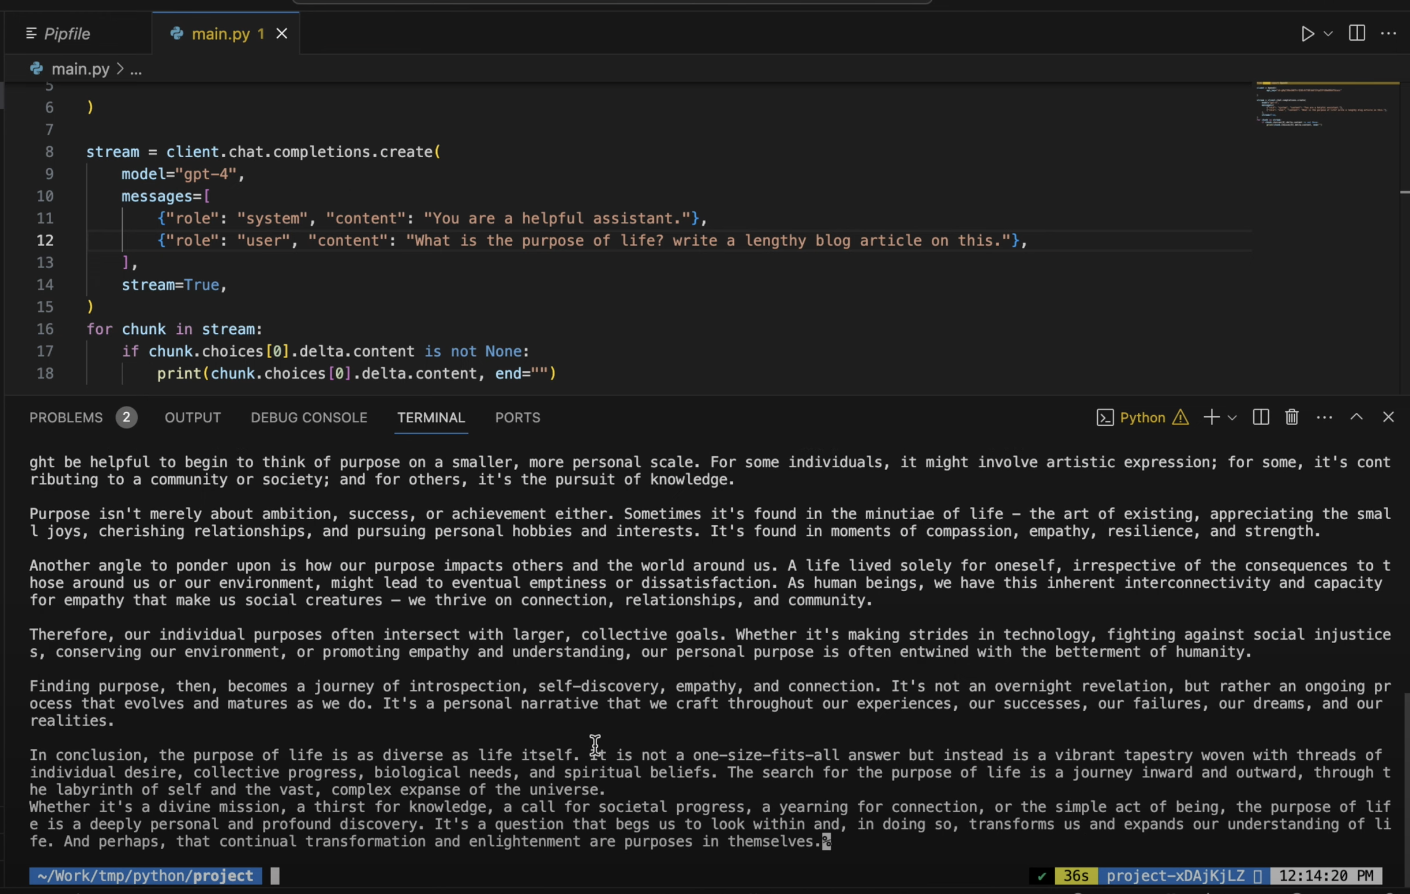
python main.py3. Observe the output as the OpenAI API generates a response to the question "What is the purpose of life?"
Enhancing the Conversation
To create a more engaging conversation with the OpenAI API, you can add multiple conversation objects to the messages array. For example:
messages=[
    {"role": "system", "content": "You are a helpful assistant."},
    {"role": "user", "content": "What is the purpose of life?"},
    {"role": "user", "content": "Write a lengthy blog article on this topic."}
]
Run the code again and observe how the API generates a more detailed response in the form of a blog article.
Conclusion
Congratulations! You have successfully learned how to use the OpenAI API with Python 3. By following the steps outlined in this tutorial, you can now incorporate the power of OpenAI into your own projects and build amazing applications.
If you found this tutorial helpful, please consider subscribing to my YouTube channel for more exciting content on OpenAI, Python, Node.js, JavaScript, Angular, React.js, and Next.js. Don't forget to like and share this video to support my work.
Thank you for joining me on this learning journey. If you have any questions, suggestions, or ideas for future tutorials, please leave them in the comments section below. Happy coding!